This tutorial will provide useful information about installing Atomic Matrix Kodi Build. The Build works on all operating systems like Windows, Mac, iOS, and, Android. Also, it works well for different devices, including Amazon Firestick TV 4K, Nvidia Shield, Android TV Box, Google Chromecast, and, Fire TV Cube.
Other popular Kodi Builds fetch premium links from Real-Debrid, All Debrid, and Premiumize services. Aspire Build, Grindhouse, Diggz Xenon, Luxray, Hardnox, Smokin, and Doomzday Builds are close competitors of Atomic Matrix Build and are being used as the best alternatives to Atomic Matrix Build.
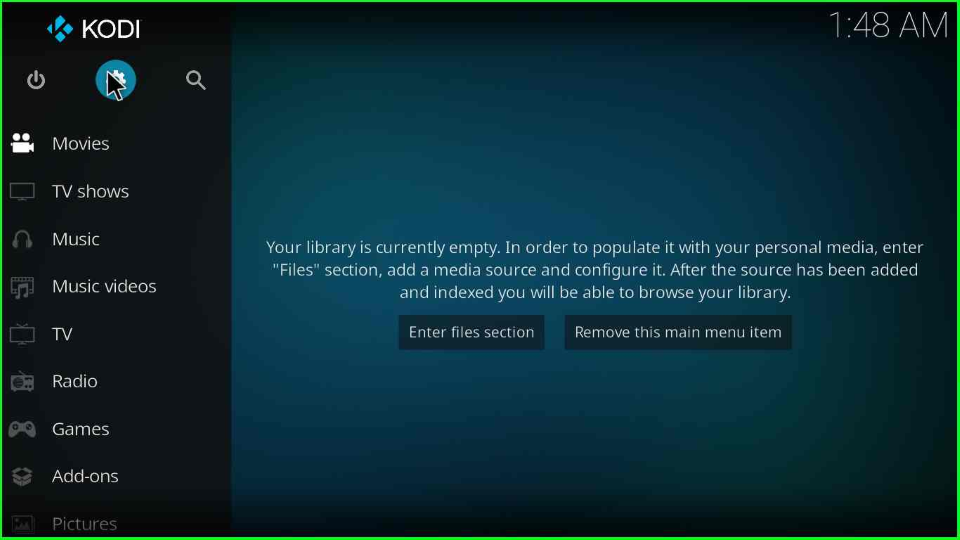
If you are a regular user of Kodi, then you know about the Build. They are just pre-packaged bundles with multiple Kodi add-ons and linked Kodi repositories. In addition, if you get tired of installing add-ons separately. Then, Build will be a better option for you.
When we talk about, the Atomic Matrix Kodi Build, it doesn’t belong to the official Kodi repository. To download it, you need to use the third-party repository, Misfit Mods Repository.
Moreover, it has an attractive green color layout with an optimized content theme to search the streaming quickly. The main sections for the Build are Sports, Series, Movies, Music, R-D (Real Debrid), Add-ons, Kids, Library, and System.
Attention! Before You Move Ahead.
I strongly advise protecting your privacy while streaming free movies/TV shows, and sports on Firestick/Kodi using Apps/Builds/Addons. Using a VPN while streaming on Firestick/Kodi is a good practice.
Currently, your IP address 3.144.10.140 is visible to everyone.I have been using the most secured #1 ExpressVPN for years because it has military-grade encryption, enables buffering-free streaming, hides your IP address and location, and bypasses geo-restrictions and bandwidth throttling.
Click here to get 4 Months Free
Note:- Streaming copyrighted content without a license is illegal and may land you in legal trouble. VPNHacks.com does not encourage piracy in any way.
Installation Steps
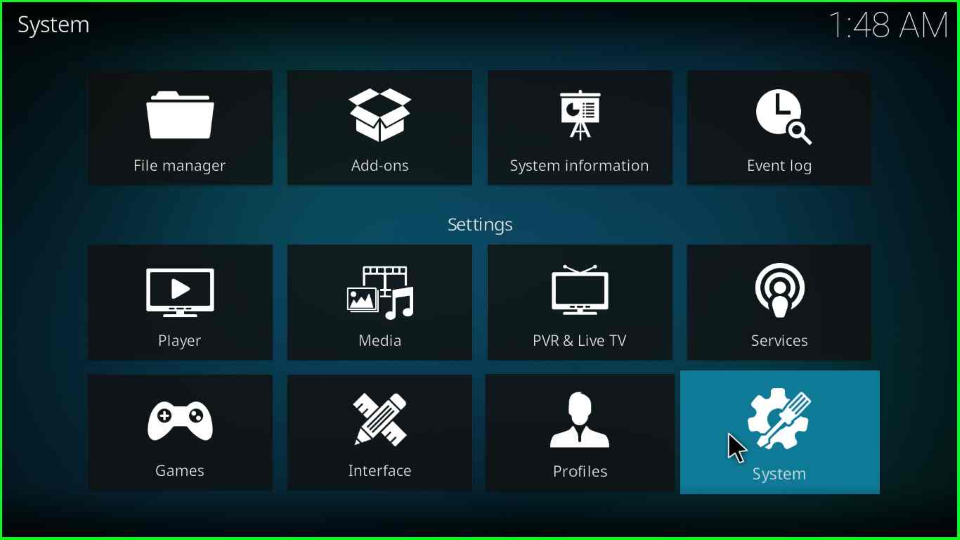
Go to the Kodi app and Navigate to the Kodi Settings.
A single click on the System tab.
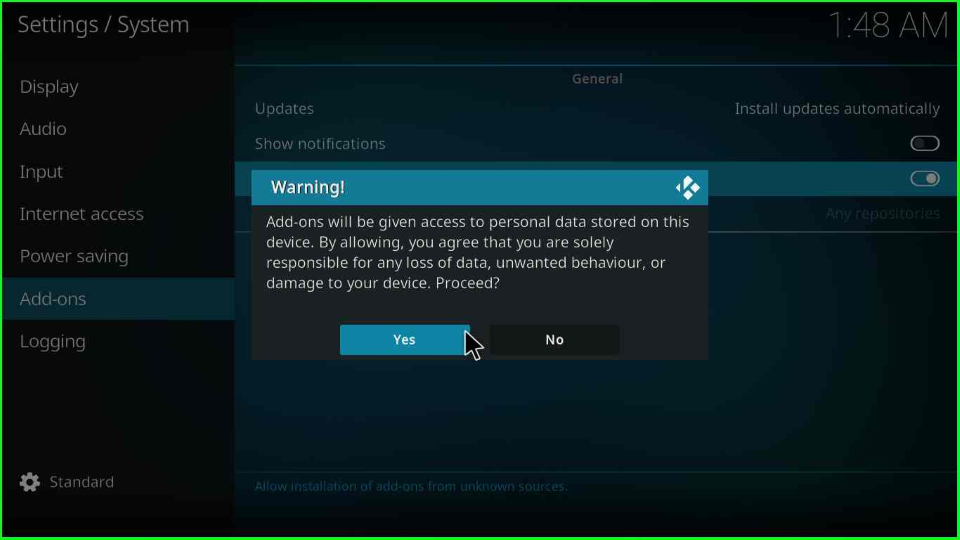
Look for the Add-ons option and on the off toggle button of Unknown sources.

After performing the above step, a warning window displays over the screen; tap Yes to remove it.
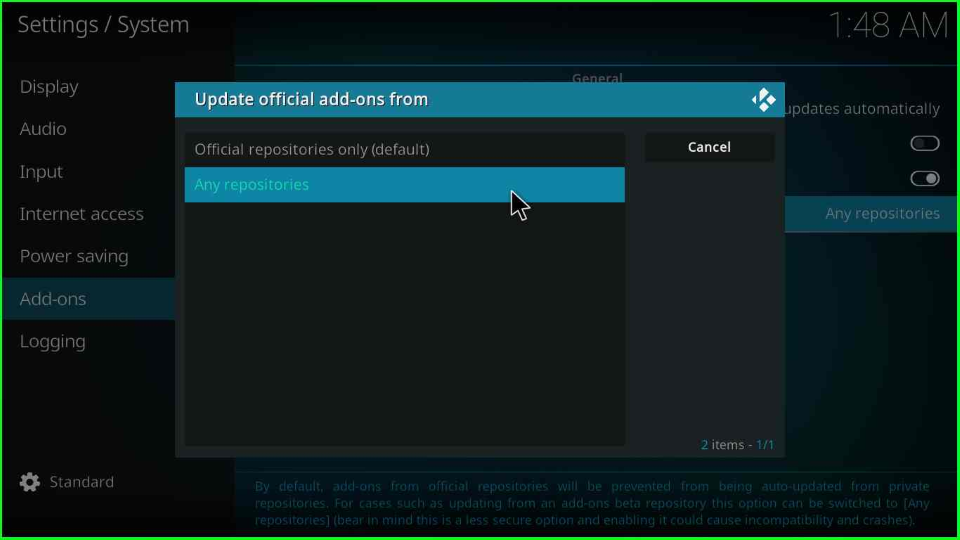
Now, select the -Update official add-ons from, option.
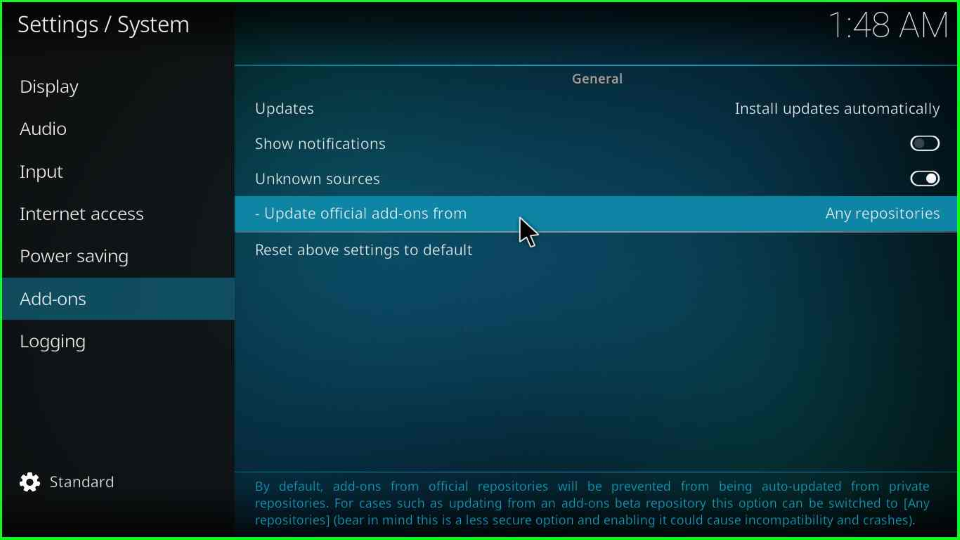
Choose Any repositories and press enter.
Add Media Source and Repository
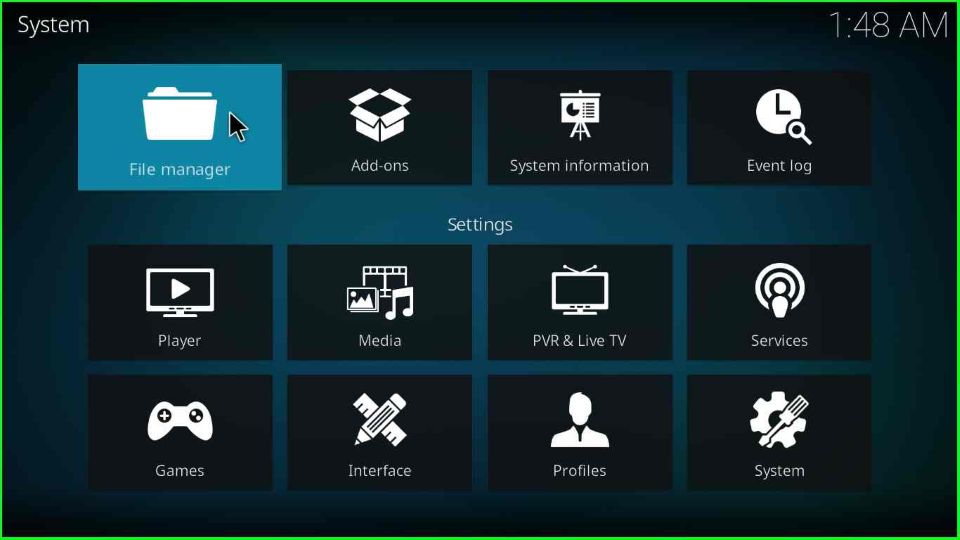
Revert to the Settings window; select the File manager item from the list of icons.
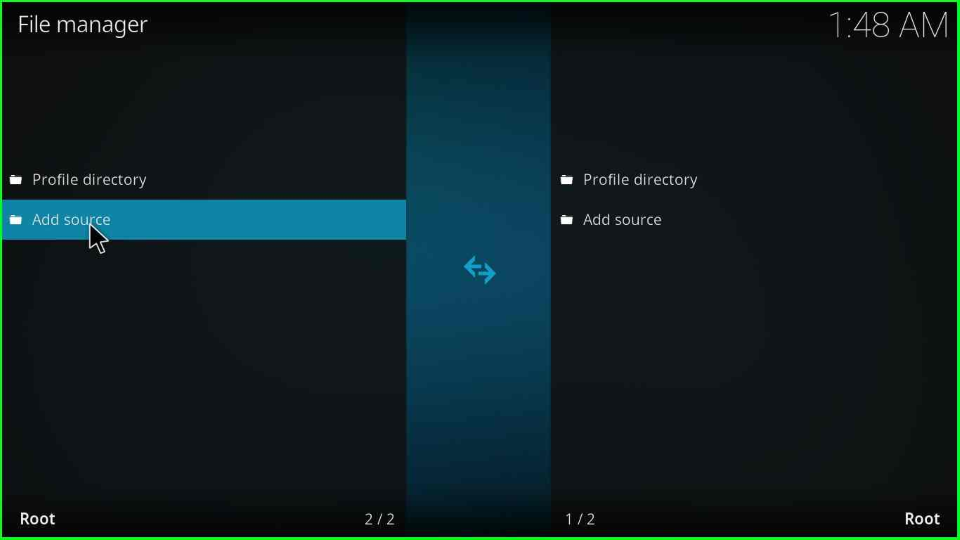
The File manager shows an Add source option. Double-click to open it.
Choose the None option inside the Add source window.
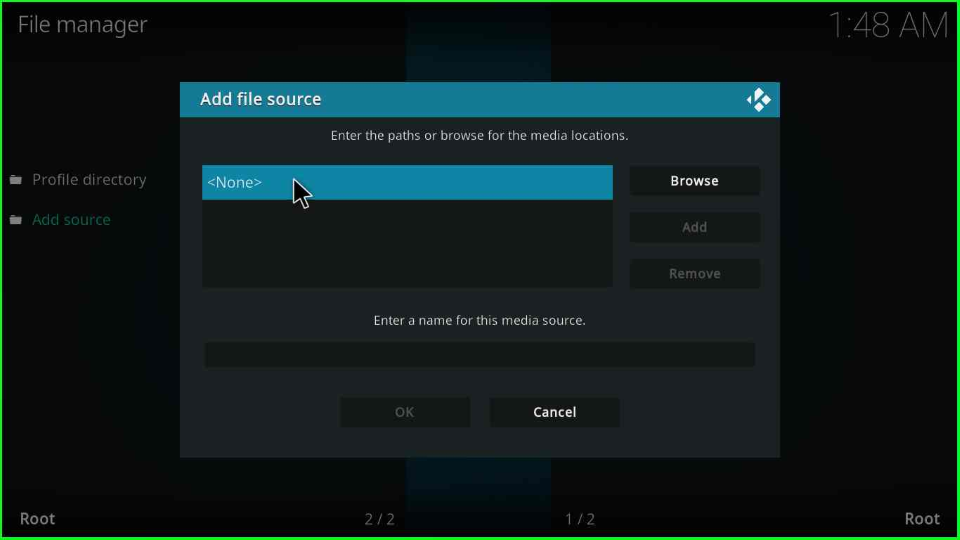
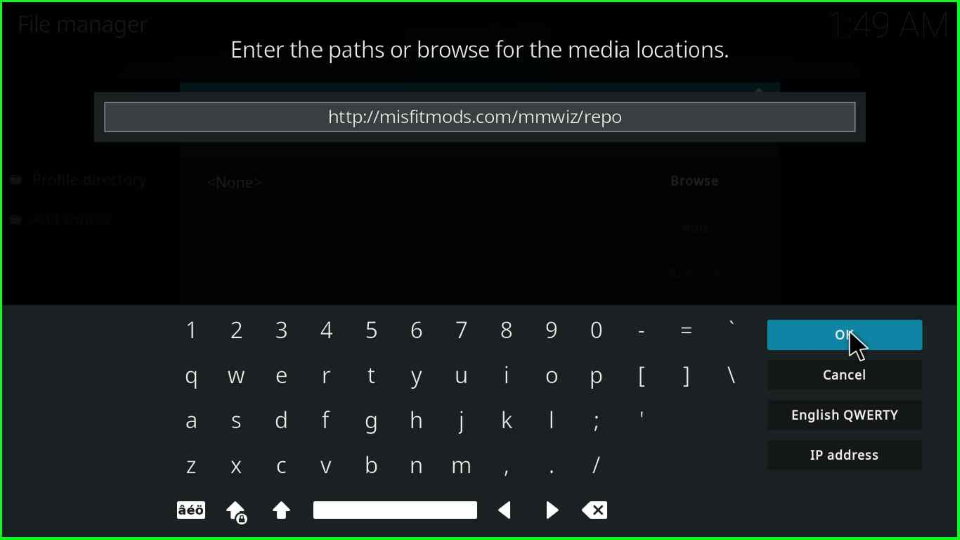
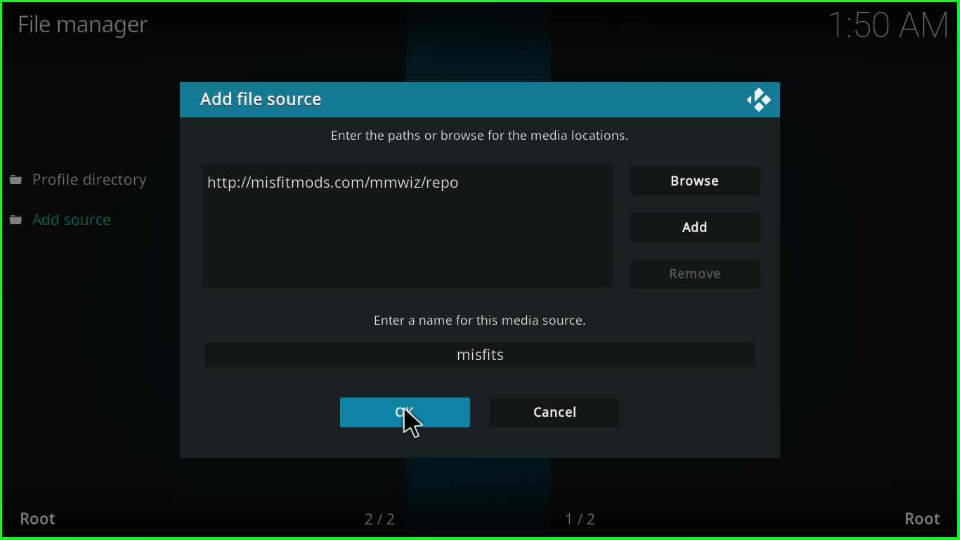
As you click on it, a blank window will appear where you must add the media path.

Enter the URL http://misfitmods.com/mmwiz/repo. Click OK.
The screen redirects you to the Add source tab. Now, tap on the below section.
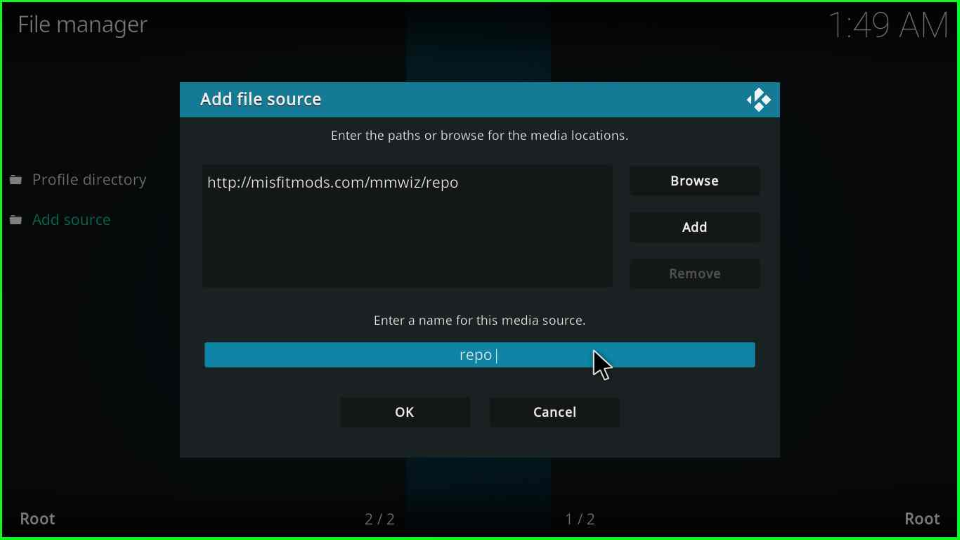
It displays a default name repo.
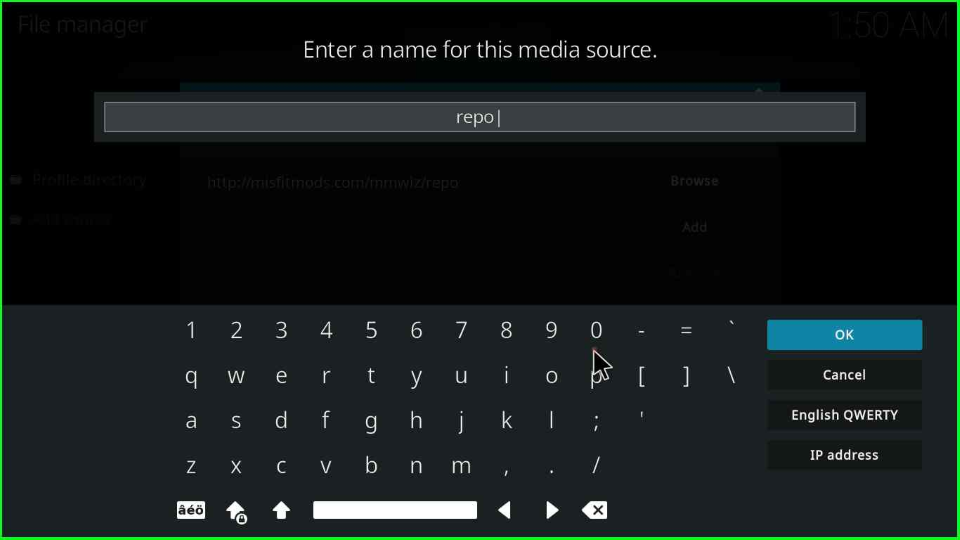
Change it to misfits and press OK (you can enter a name as per your choice.)
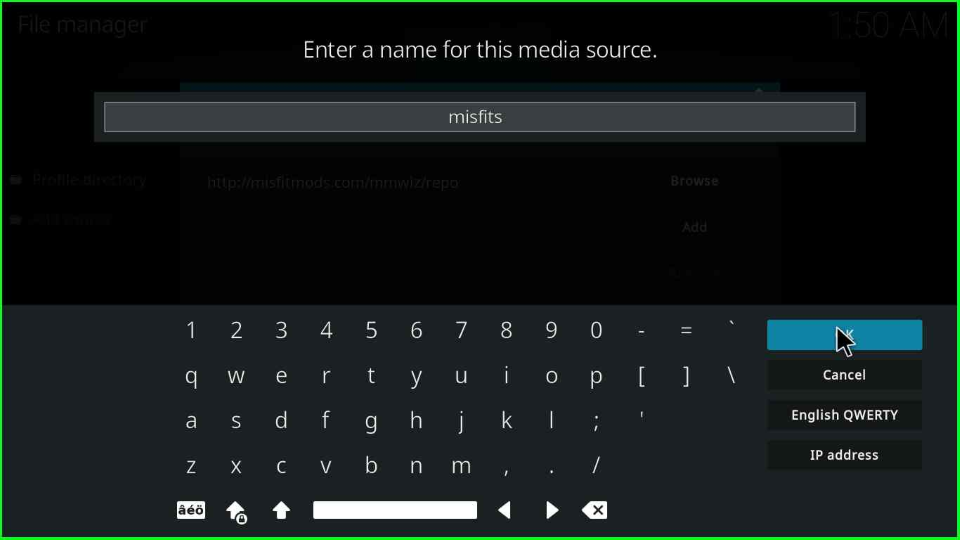
After adding the name and URL, click over the left side button OK.
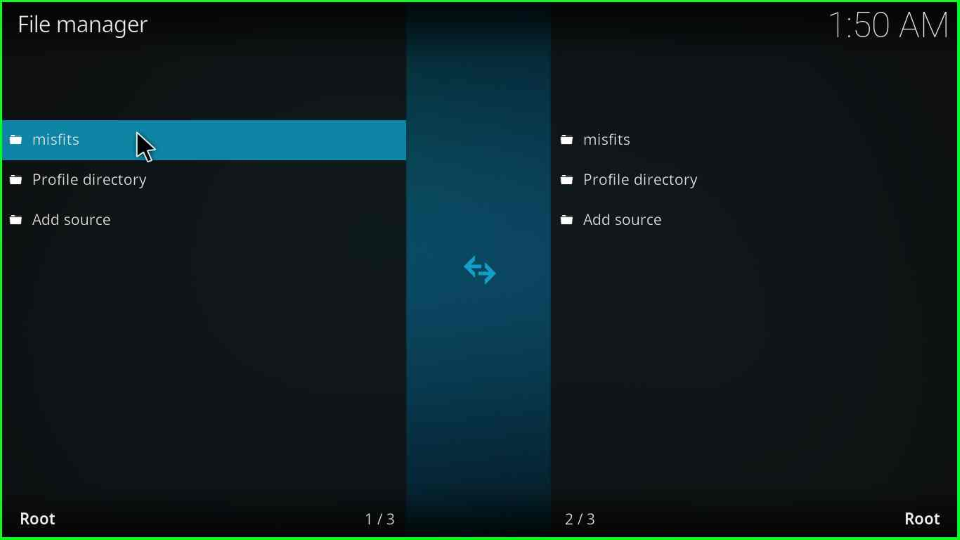
The misfits’ folder is successfully saved at the top of the page.
Install from Zip File
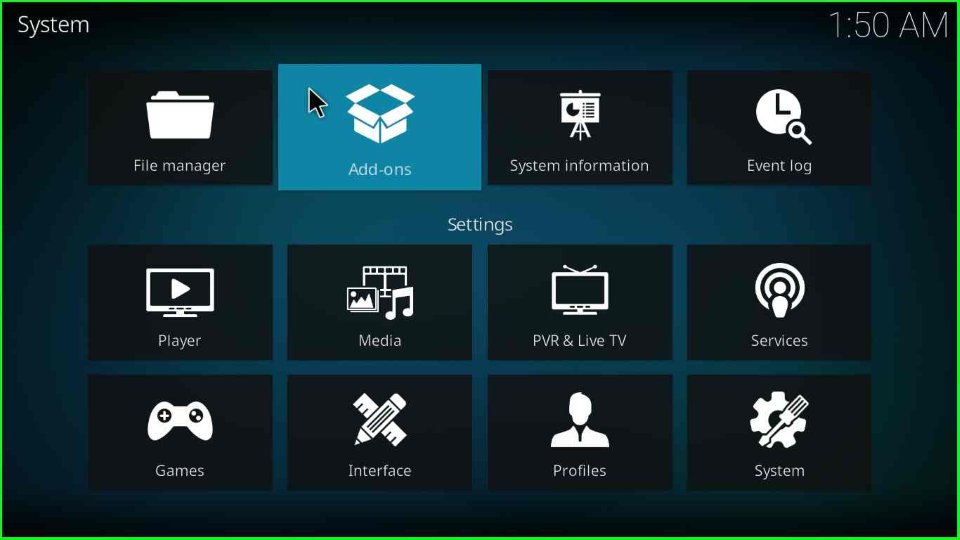
Again, go back to the Settings window and now open the Add-ons icon.
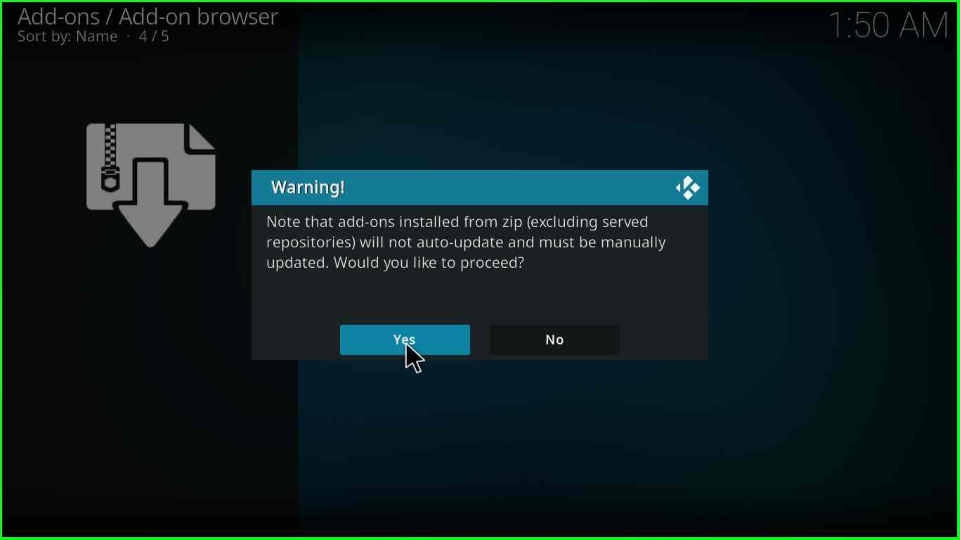
Click on the Install from zip file.
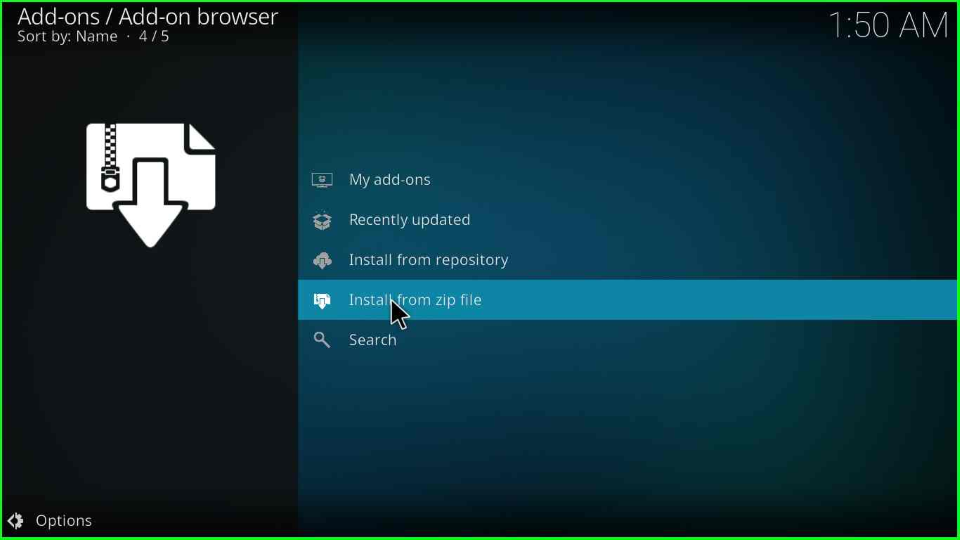
It will display a warning message; hit Yes to agree.
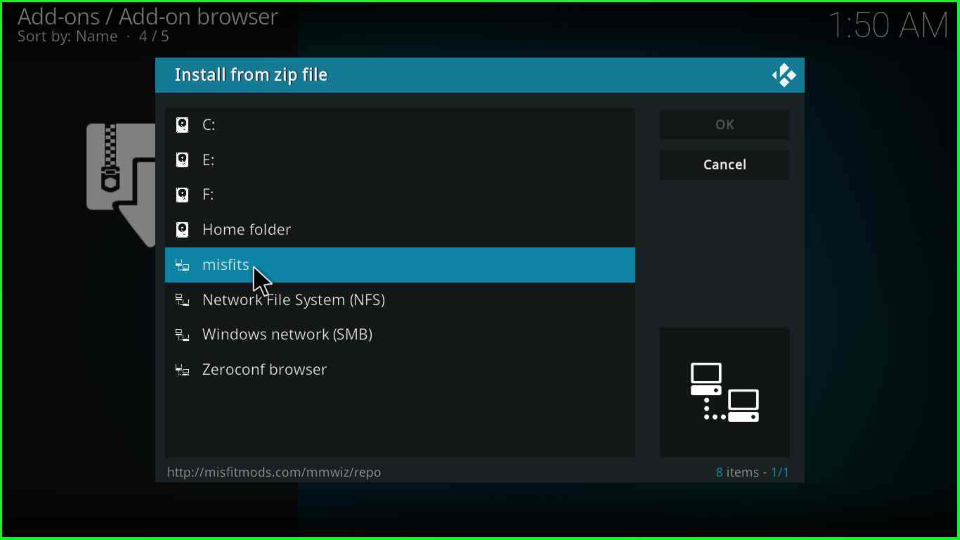
Go for the fifth option, misfits.
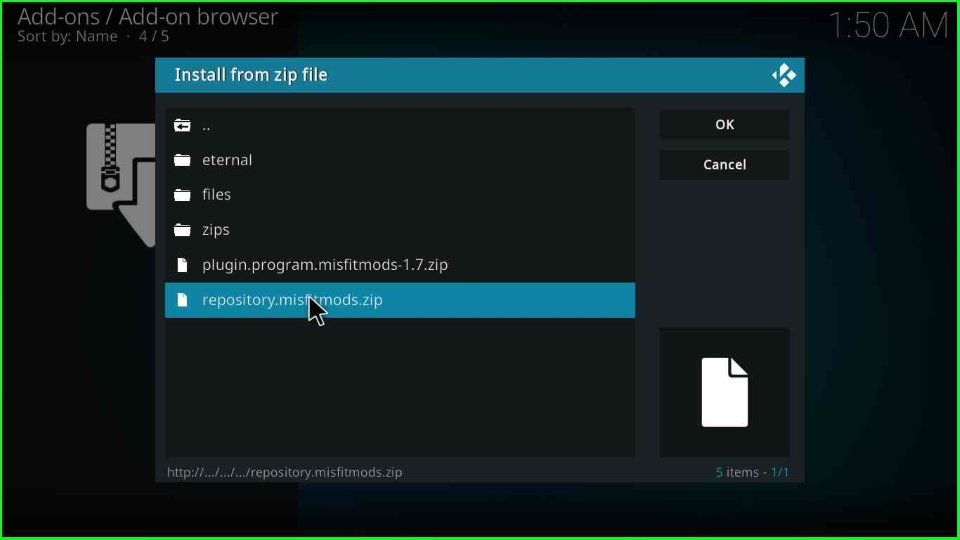
The misfit folder shows a zip file repository.misfitmods.zip; select it.
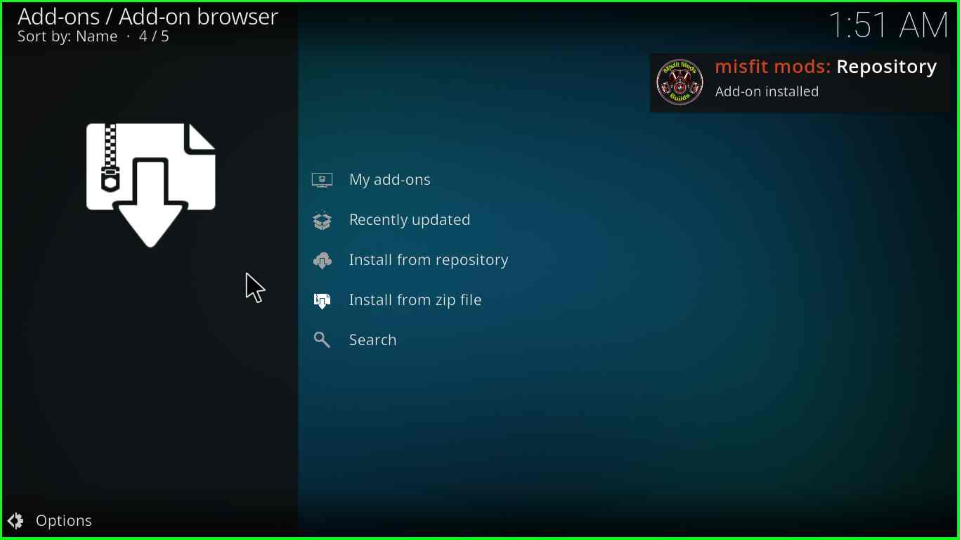
Soon, misfits mods: Repository Add-on installed notification pops over the screen.
Install from Repository
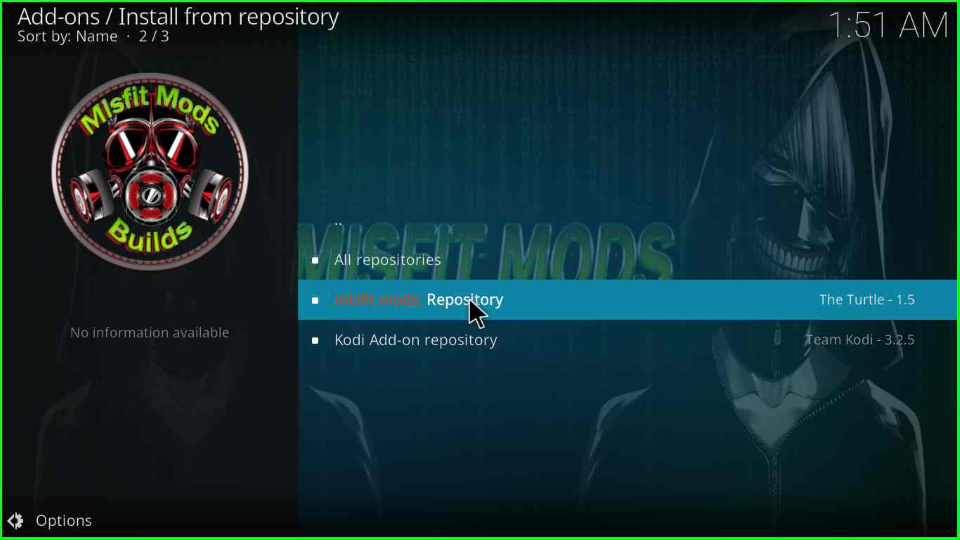
On the same page, pick the next option, Install from repository.
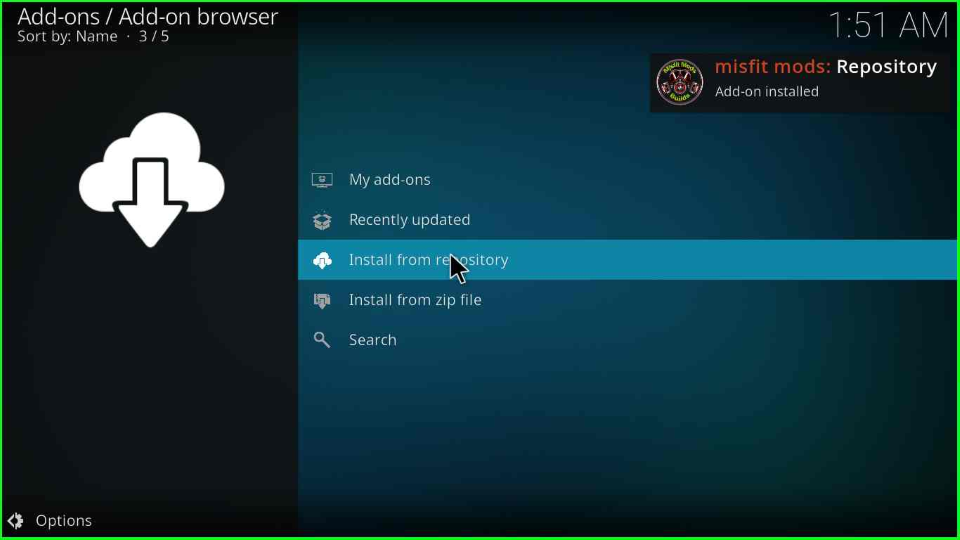
Choose the misfit mods: Repository.
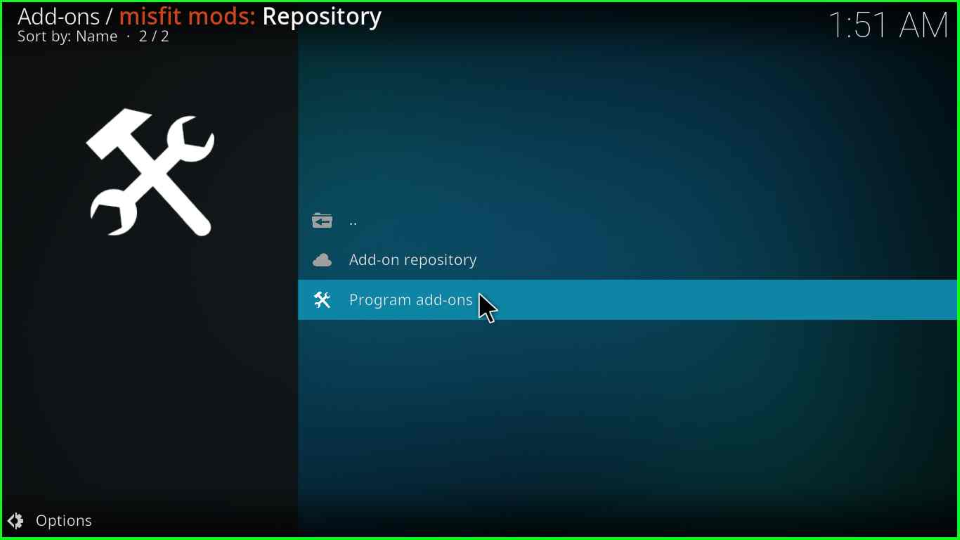
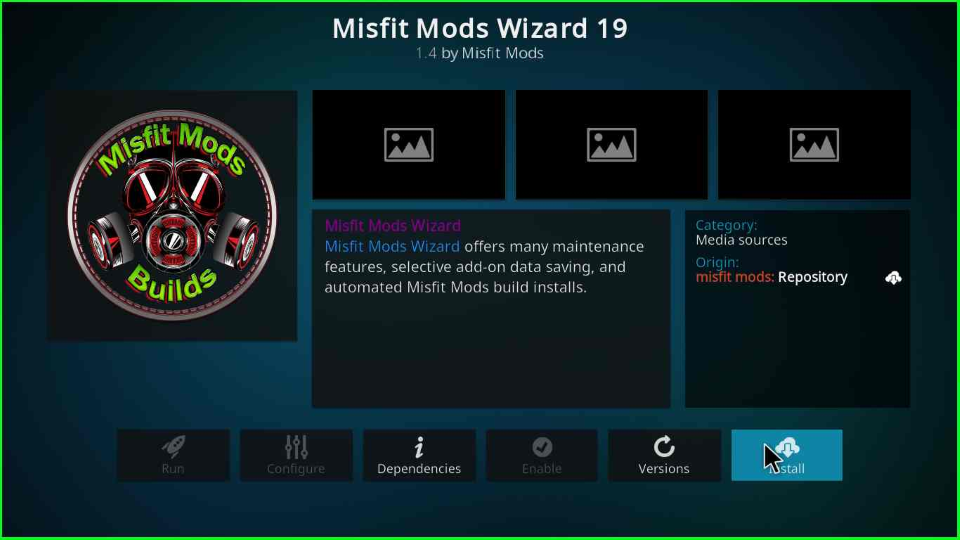
Install Misfit Mods Wizard
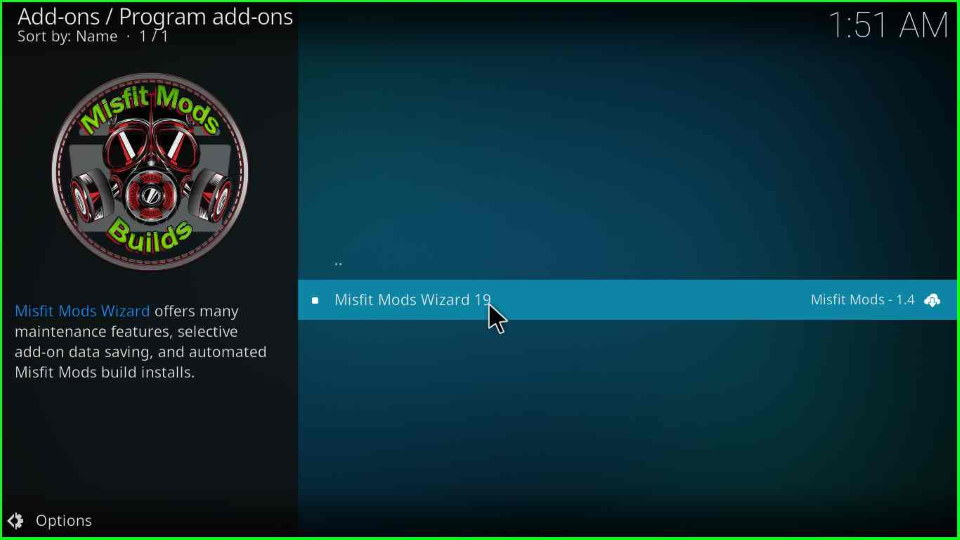
From the next page, select the Program add-ons tab.
The page displays a single option Misfit Mods Wizard 19; click to move ahead.
Misfit Mods Wizard 19 dashboard will appear where you have to choose the Install tab.
Now, you will be asked to install additional add-ons on the wizard. If you agree, then hit OK.
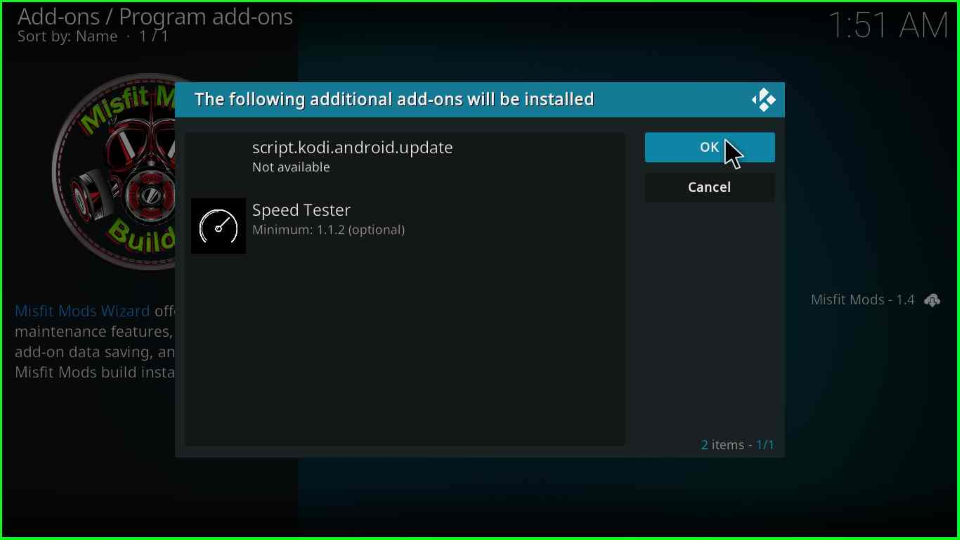
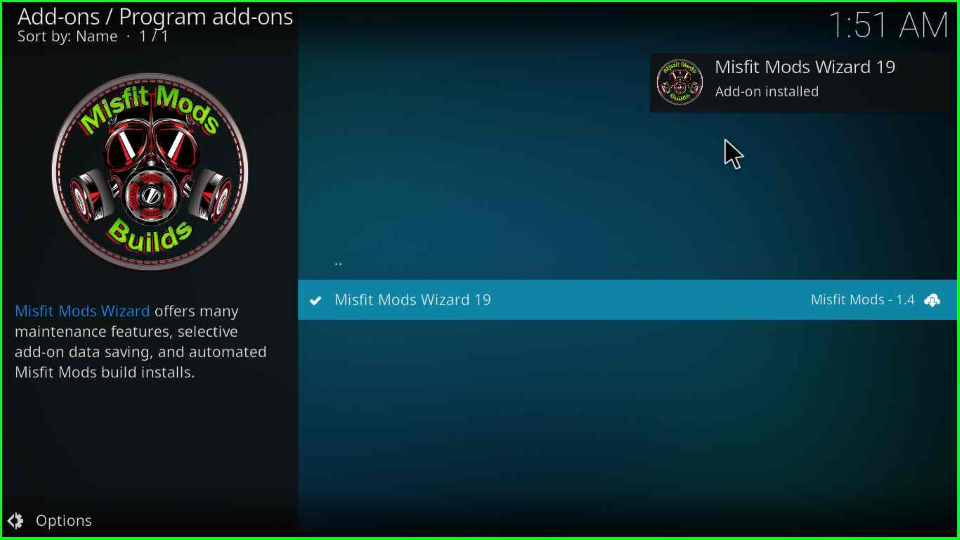
The installation process of Misfit Mods Wizard 19 will start and display the installation message in a few seconds.
Install Atomic Matrix Build
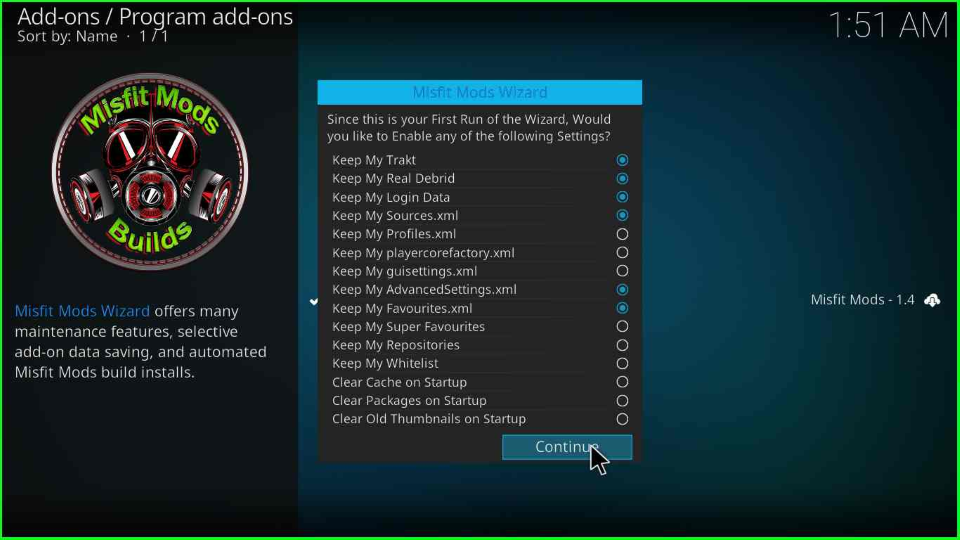
Tap on the Continue button to proceed further.
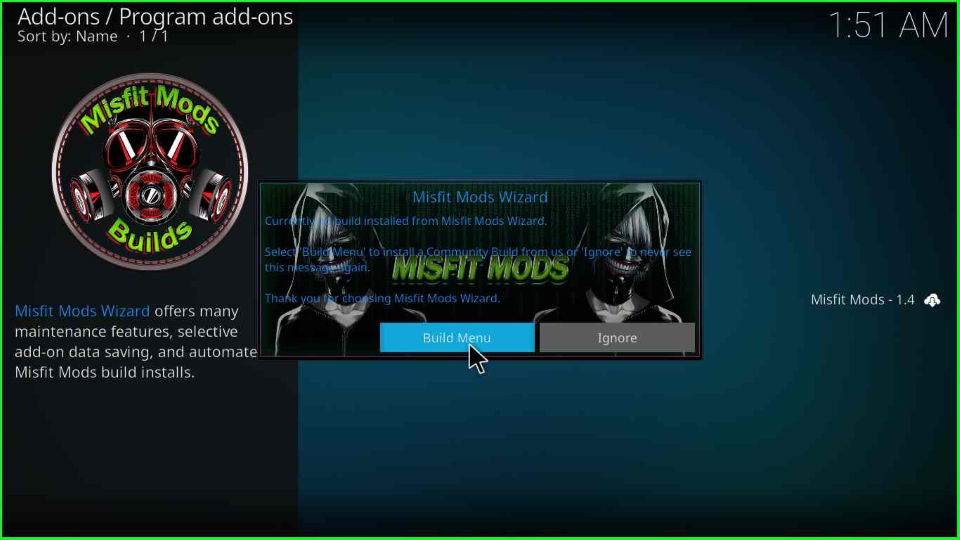
After that, another Misfit Mods Wizard window will pop up where you need to select Build Menu.
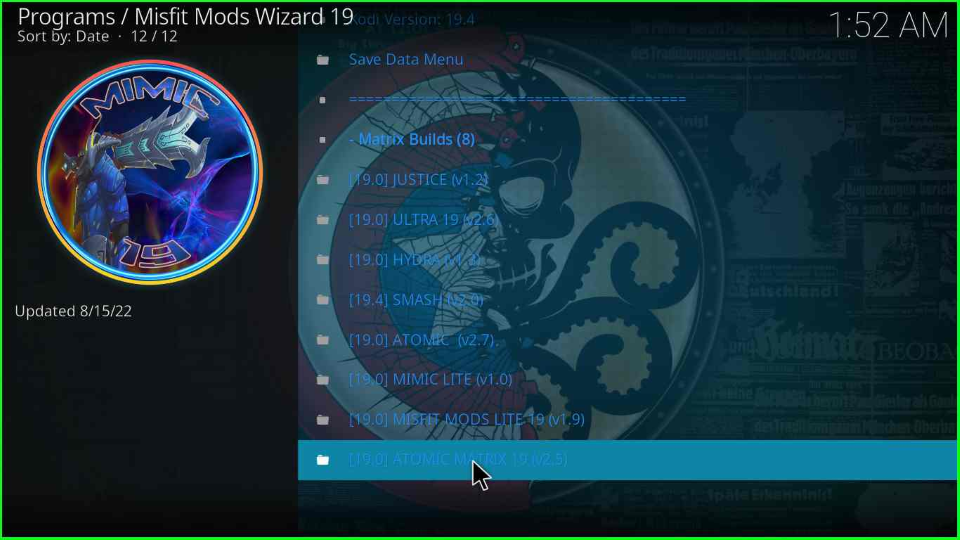
Scroll down the pointer and choose the ATOMIC MATRIX 19 (x.x) Build.
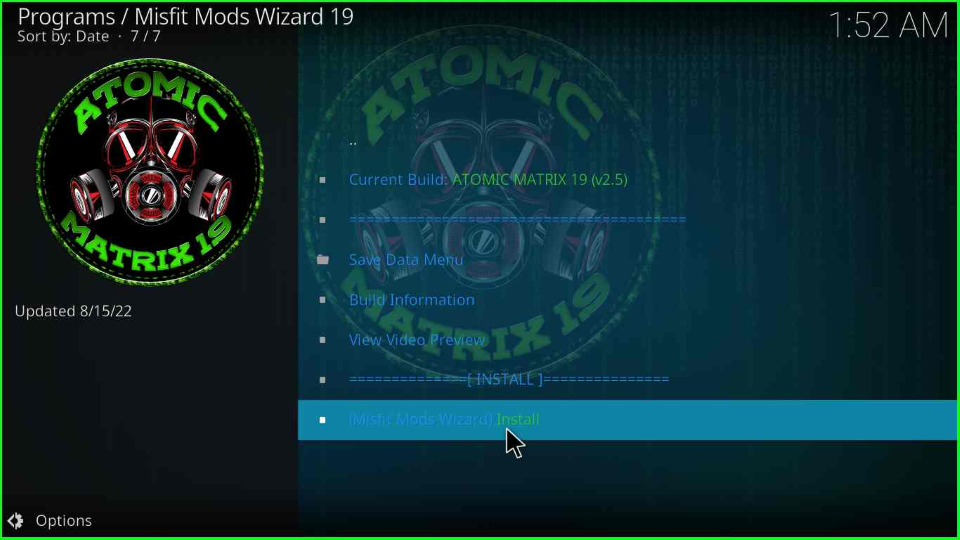
Choose the (Misfit Mods Wizard) Install label from the screen.
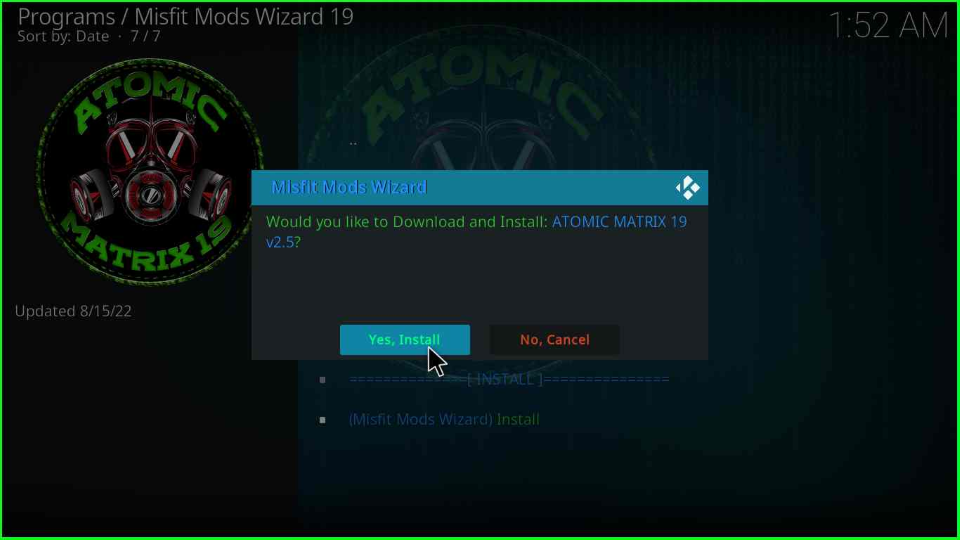
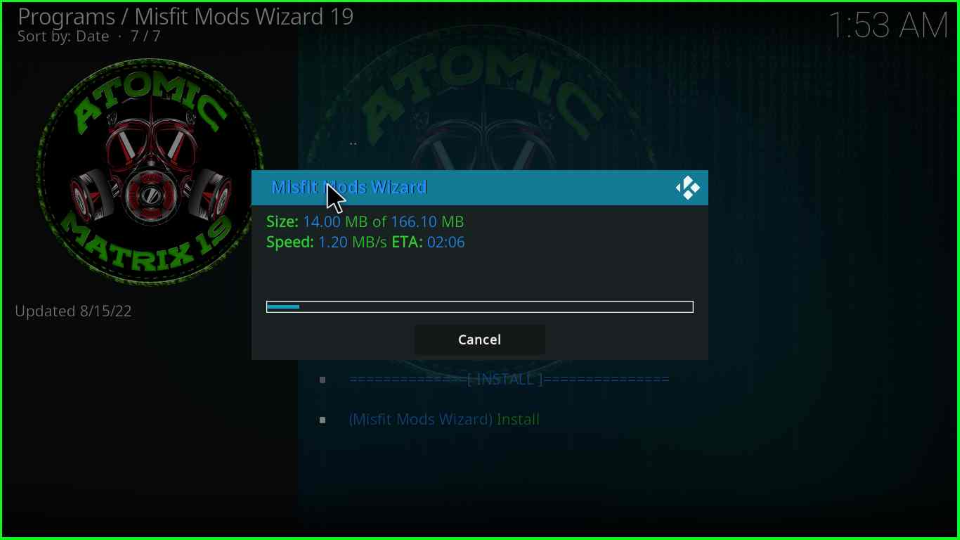
After selecting, it will show a message box; click on Yes, Install to agree with it.
A progress bar verifies the size of the Build. Wait for some time.
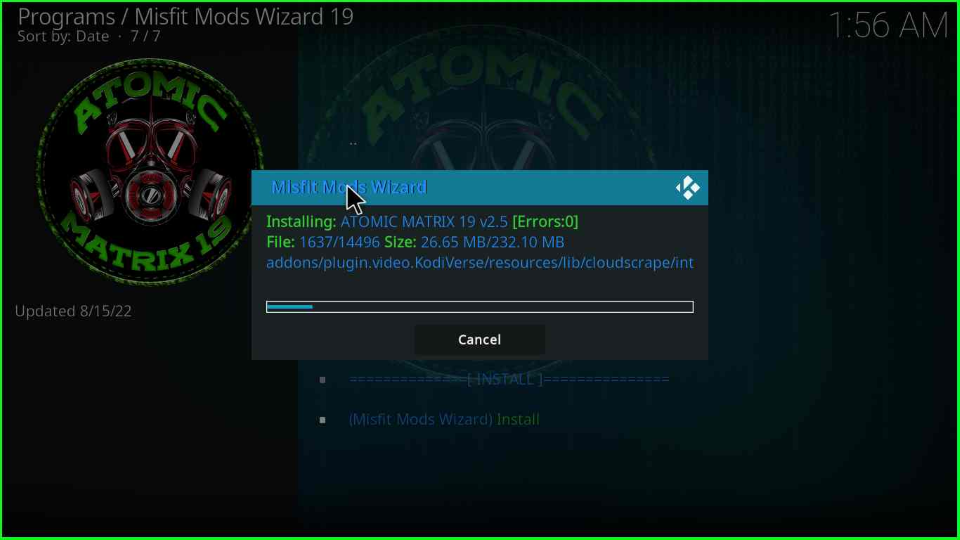
Again, a progress bar appears that installs all related files of the Build.
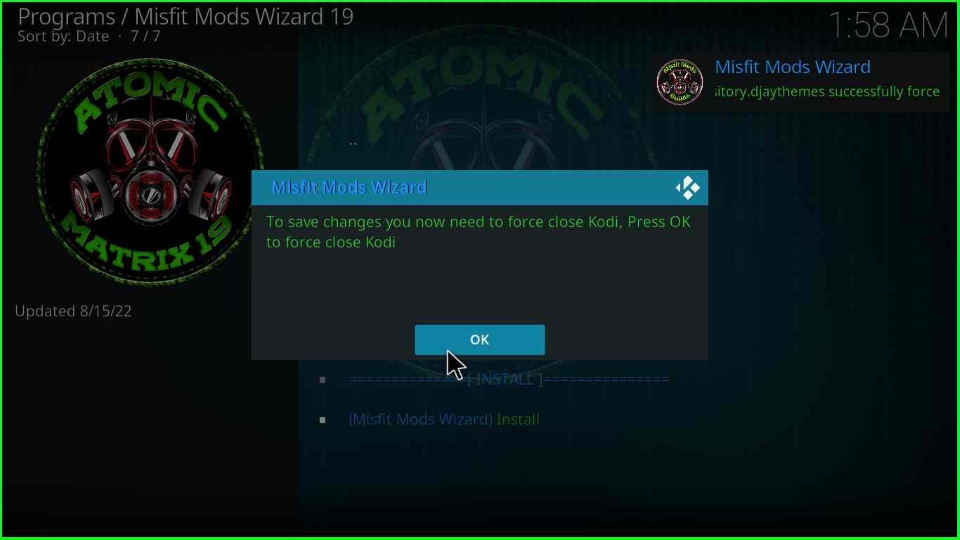
As the Build installation completes, you must click the OK button to save to force close the Kodi. After that, restart the Kodi and start streaming on Atomic Matrix Wizard.
FAQs
The supported add-ons of the Build are Alvin, The Oath, The Boys, and, Asgard.
Yes, Atomic Matrix Build leverages the capabilities of premium services like Real Debrid, Premiumize, and Trakt.
The Misfit Mods Wizard has many other alternatives, including Black Adam Matrix, Hydra, Hard Nox Ultra, Hard Nox Xtream, Misfit Mods Lite, and, Atomic Matrix.
Final Words
The article explained how to install the Atomic Matrix Build on your device. In addition, the repository is safe to install and use. But, remember that using a VPN, i.e., Express VPN, while installing increases the device’s security. Moreover, follow our site to learn about the installation process of other Builds.
Before you start streaming on Firestick Apps/Websites, I would like to warn you once again that we do not know from where these Apps, Websites, Kodi Repositories, Wizards, Builds, and Addons fetch the streams.
The content you stream on Firestick may be copyrighted and may land you in legal trouble even if you stream unintentionally. Most of all, ISPs, Government, and authorized companies may monitor your online activities like streaming copyrighted movies, videos, TV shows, live shows, animes, etc.
To stay protected, and to get an exceptional streaming experience, I suggest you use ExpressVPN which is the fastest, most secure, and military-grade encryption VPN for Firestick. In addition, ExpressVPN hides your original IP address, encrypts your internet connection, and bypasses bandwidth throttling and geo-restrictions.
I have been using ExpressVPN for a couple of years and I can say that ExpressVPN is the best VPN for Firestick Apps in all aspects for all devices because the VPN unlocks geo-restricted streams and enhances my streaming experience.
Disclaimer: VPNHacks.com does not support or encourage piracy and copyright infringements in any form. You should abide by the rules and regulations in your country. We just want to protect you because sometimes you may end up streaming copyrighted content unintentionally.
Limited Time Offer: Get 4 Months Free
Taking an ExpressVPN Subscription is simple.
- First, subscribe to ExpressVPN by clicking here.
ExpressVPN comes with a 30-day money-back guarantee. You can get a full refund if you are unsatisfied (I do not think you will be) with ExpressVPN, and they do not ask for any reason.
- Once you subscribe to ExpressVPN, download the ExpressVPN app and open it. Enter your e-mail and password and click the “Log In” button.
- Once you are signed in, select the VPN Server location that you want to connect to and click on the connect option.
- After that, you will see that your IP address has been changed. This way, you can protect your privacy and have an exceptional streaming experience.
