In this guide, we will learn how to install a Black and White Kodi addon on Android TV Box, Nvidia Shield, Fire TV Cube, Firestick, Linux, Roku, Mac, Chromecast, and, iOS devices.
According to its name, Black and White Movies is a collection of 1940s movies. These movies fall into different categories, i.e., Drama, Comedy, Mystery, Horror, Action, Thriller, Romance, Sci-Fi, War, Animation, Classic, etc.
One of the best things about the addon is that it doesn’t require debrid integration for high-quality links. That means you can access all content at no cost.
Installation Steps
Enable Unknown Sources
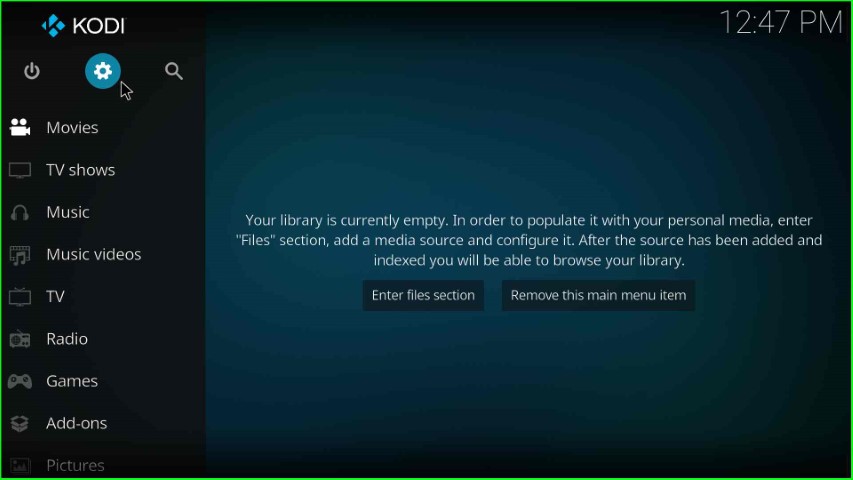
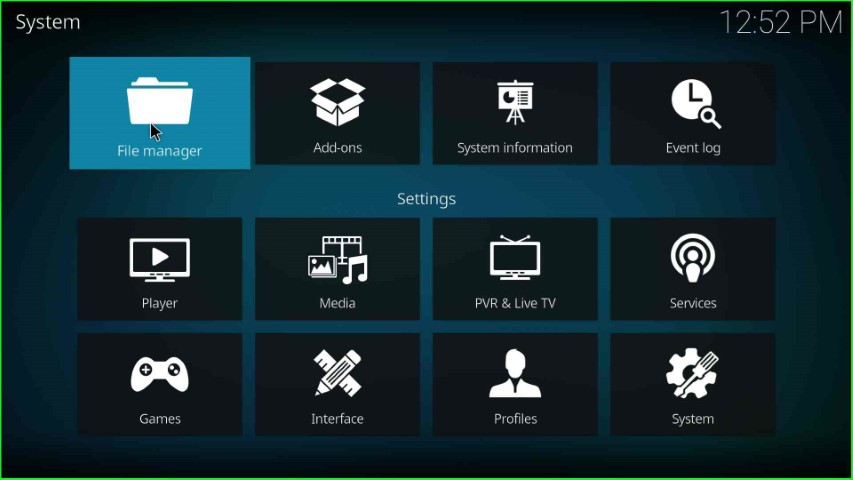
Open Kodi software and tap on the Settings sign.
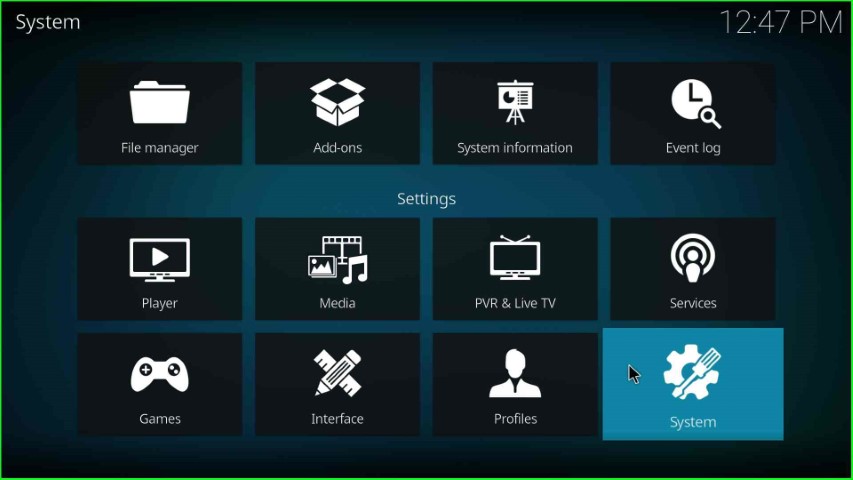
Select the System tab from the bottom right corner of the screen.
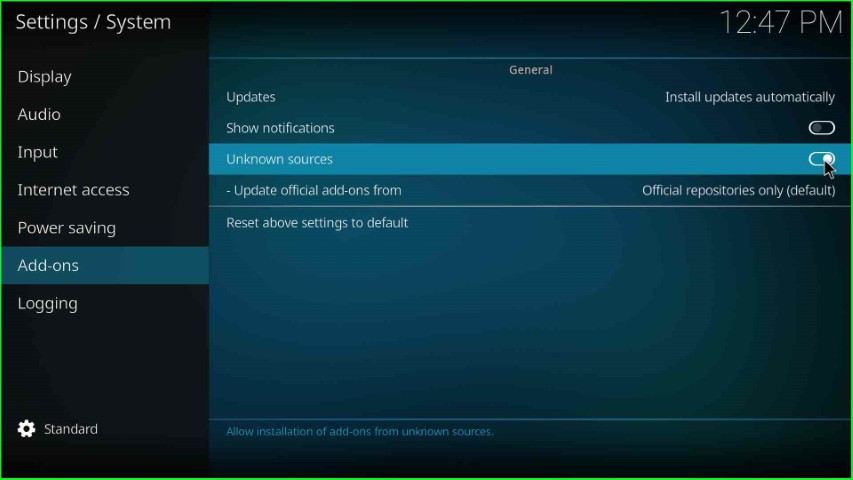
On the left side of the page, choose the Addons option and turn on the Unknown sources.
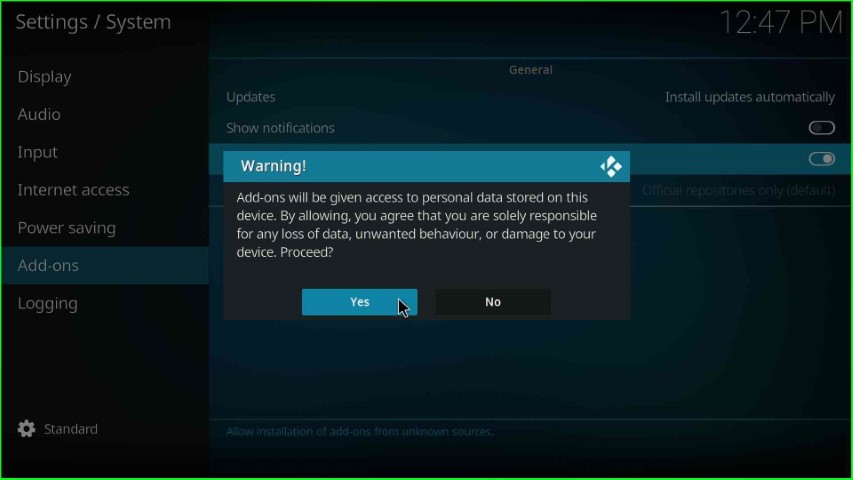
Hit the Yes button shown in the warning sign.
Add Media Source and Repository URL
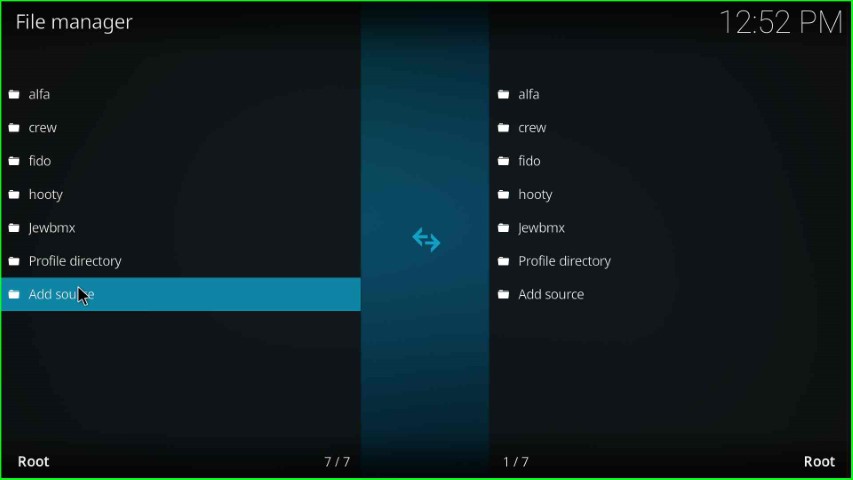
Hit the File manager tab from the top of the Settings page.
Click on the Add source option.
It redirects you to the Add file source window; click on the shown <None> tab.
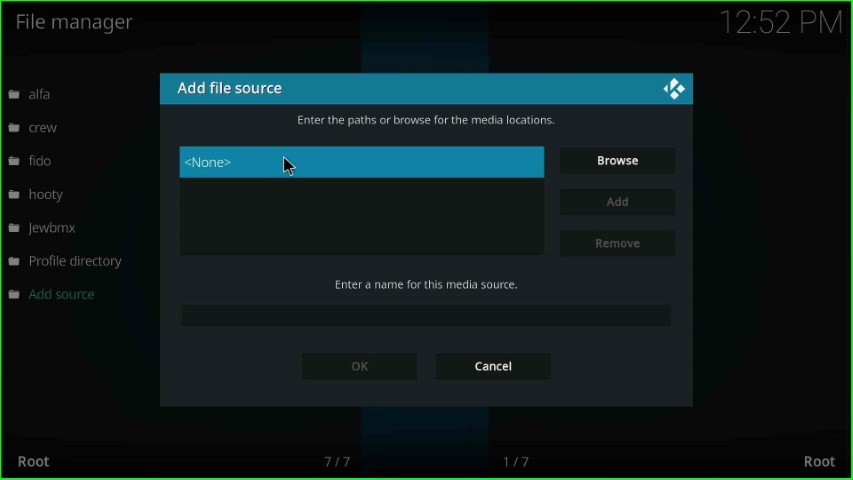
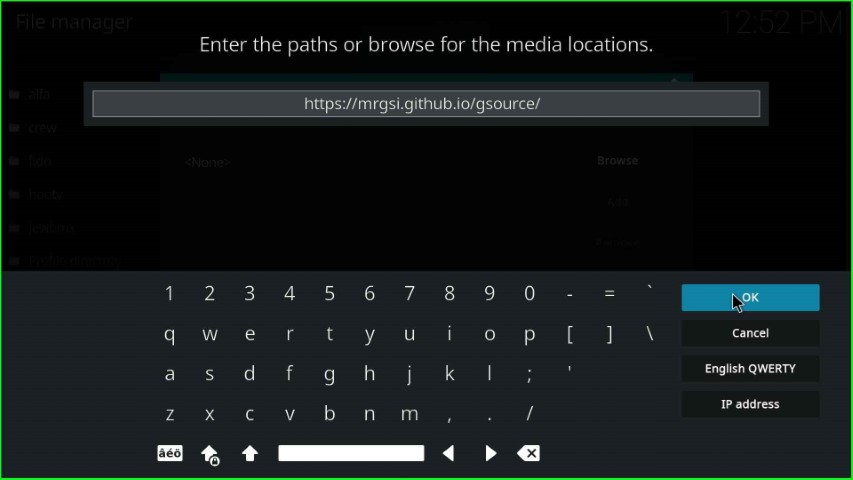
On this page, you have to enter the path for the media location.
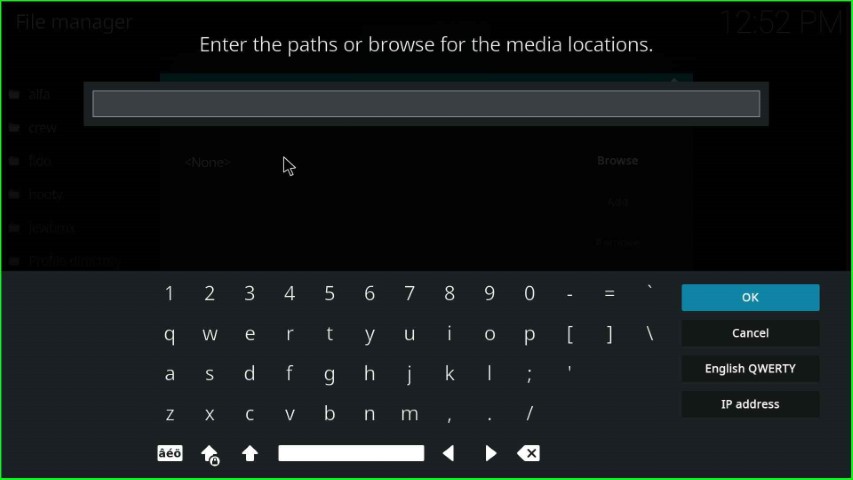
Enter the path for the media location: https://mrgsi.github.io/gsource/, and press the OK key.
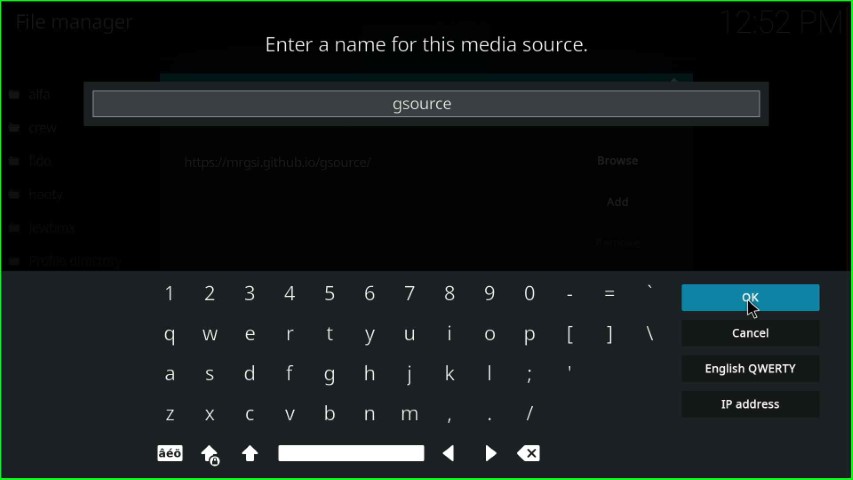
Click on enter a name for this media source label text.
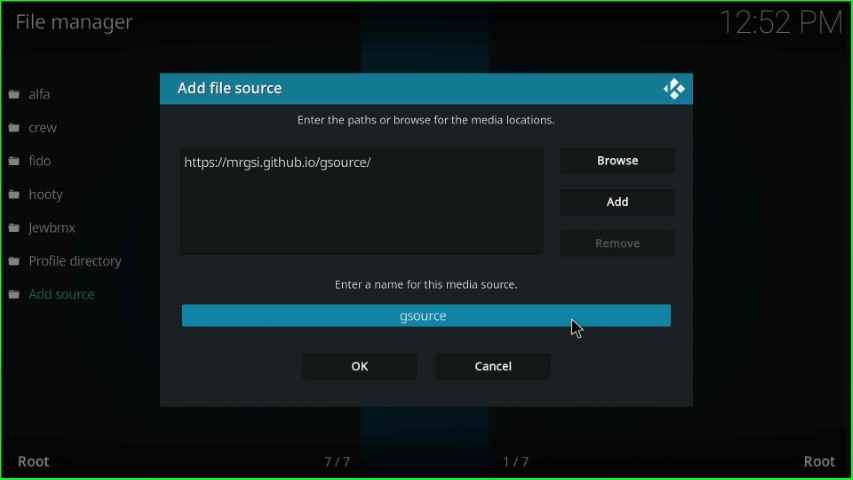
Remain with the media source name, gsource, and tap the OK button.
Check the media URL and source name carefully, and hit the OK button to save the details.

You can see the media folder gsource on the File manager screen.

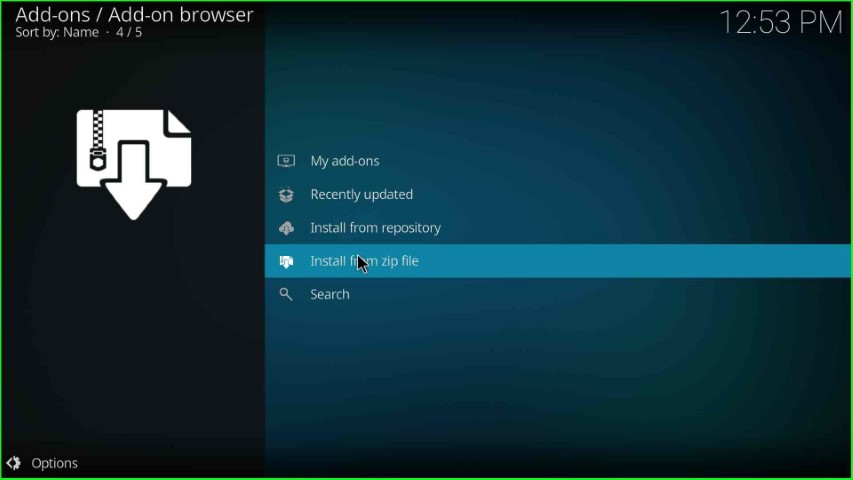
Install from Zip File
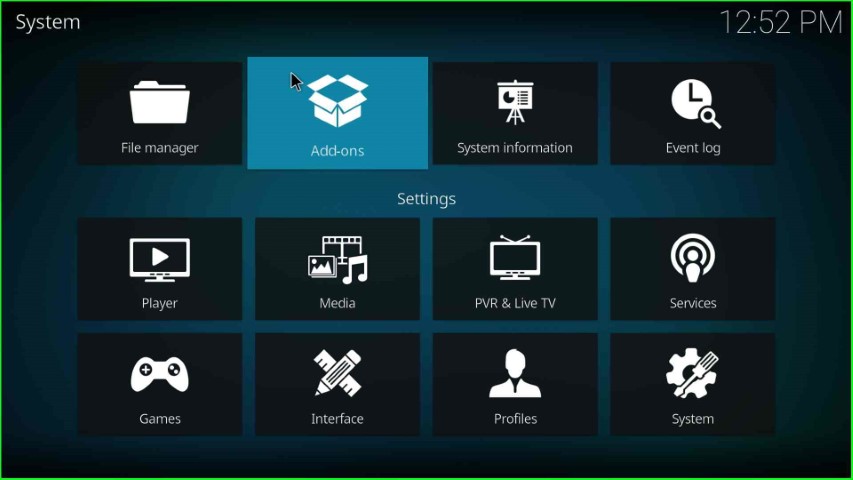
Return to the System Settings and tap on the Add-ons icon.
Select Install from zip file tab.
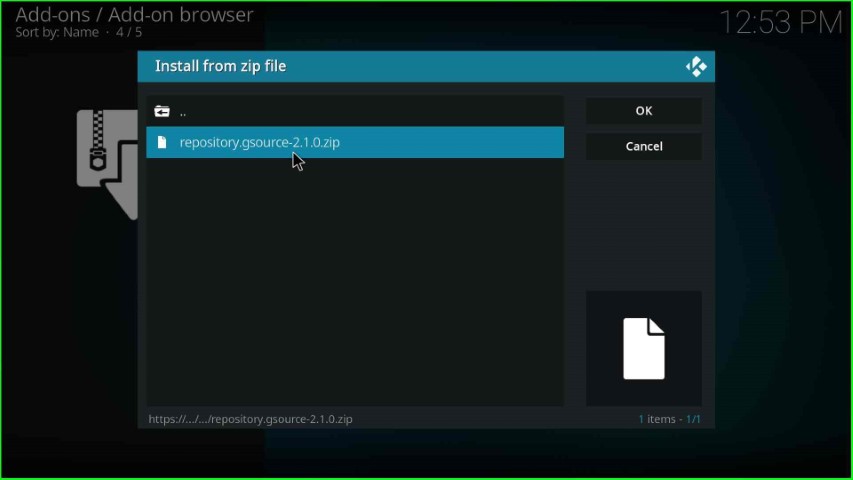
Tap on the gsource media folder.

Choose the repository.gsource-x.x.x.zip file.
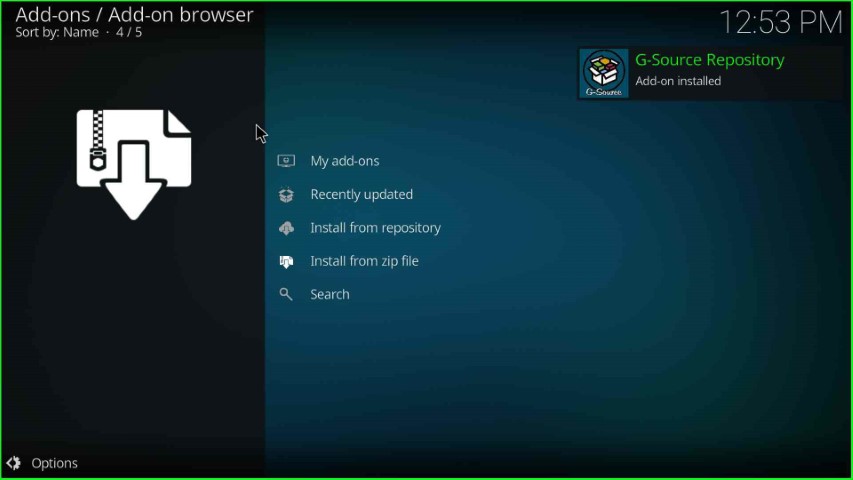
Wait for the notification, G-Source Repository Add-on installed on the page.
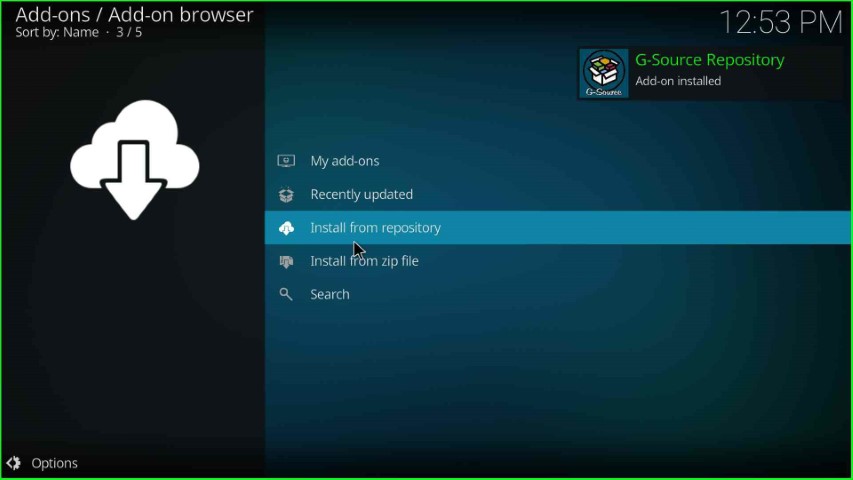
Install from Repository
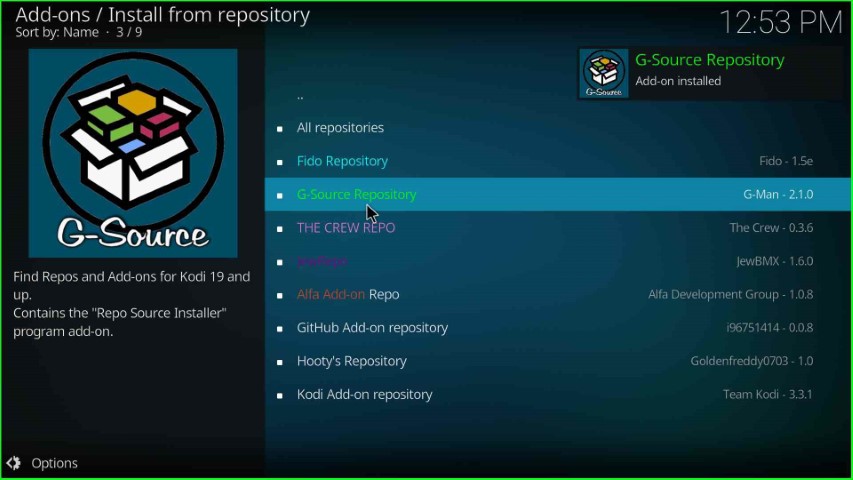
Click on the Install from repository option.
Select the G Source Repository from the list of available repositories.
Install Black and White Addon
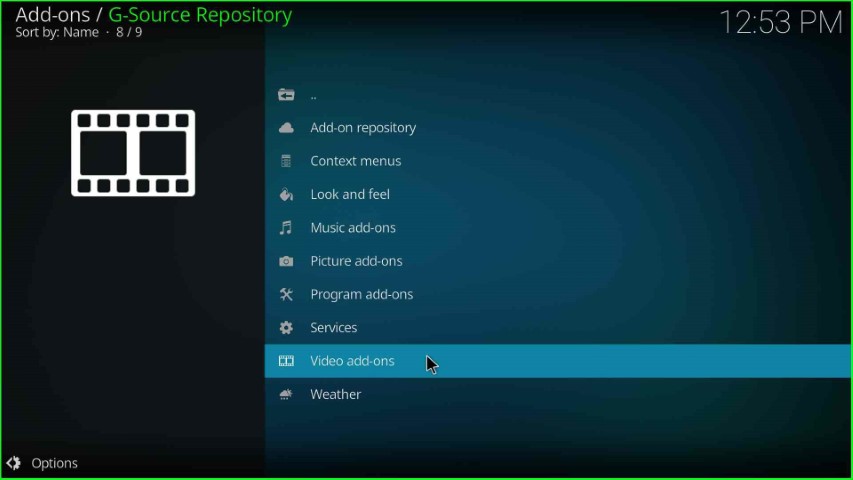
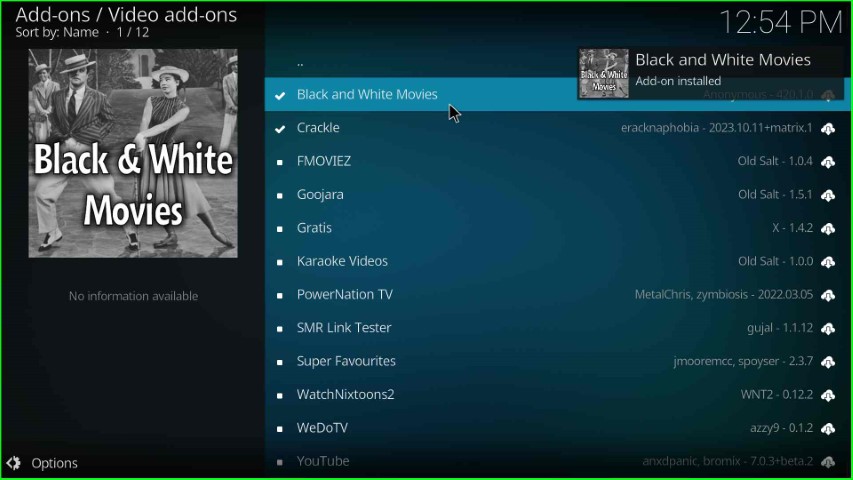
Hit the Video add-ons option.
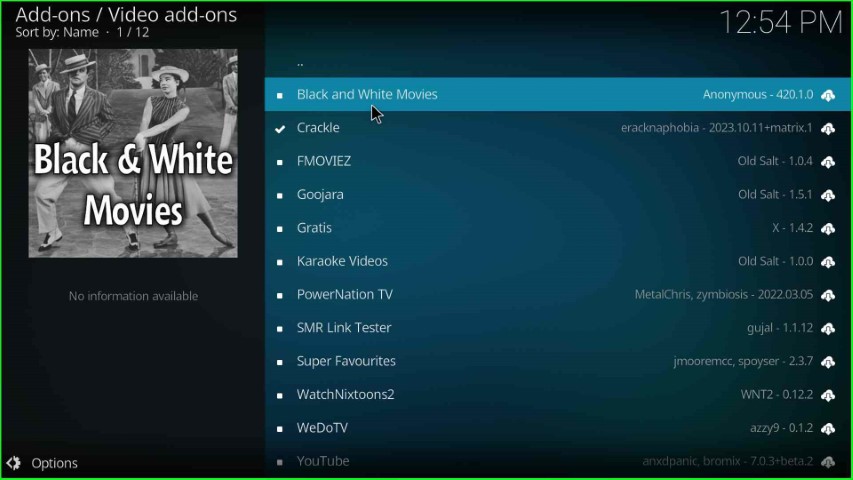
Click on Black and White Movies addon.
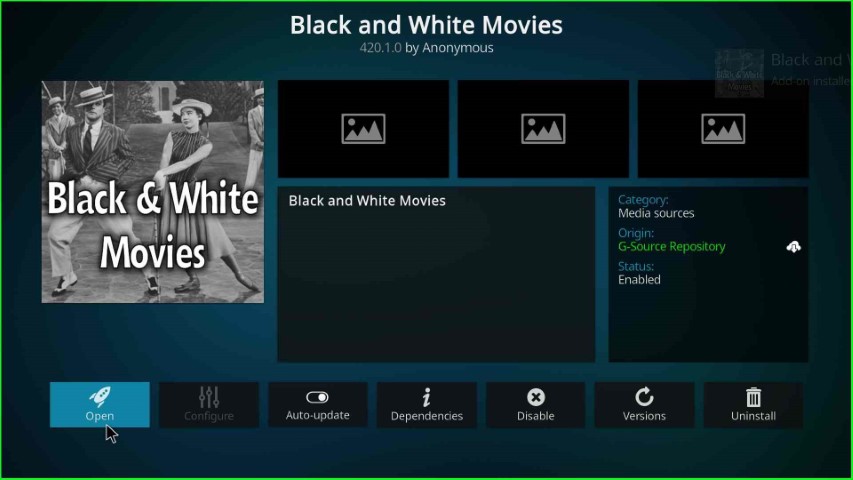
Press the Install key from the Black and White Movies dashboard.
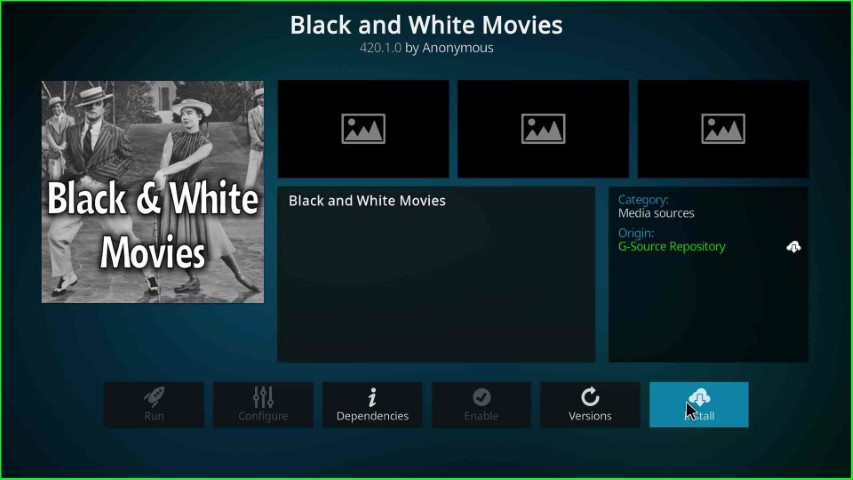
Wait for the installation of the Black and White Movies Add-on.
Launch Black and White Addon
Open the Black and White Movies addon.
Hit the Open key.
Now, you are on the Black and White Movies home page.

Here, click on the Black and White Movies folder.
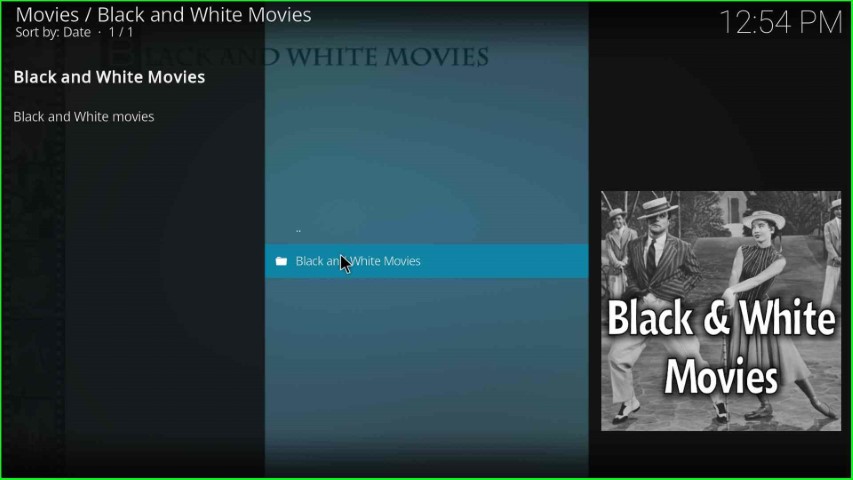
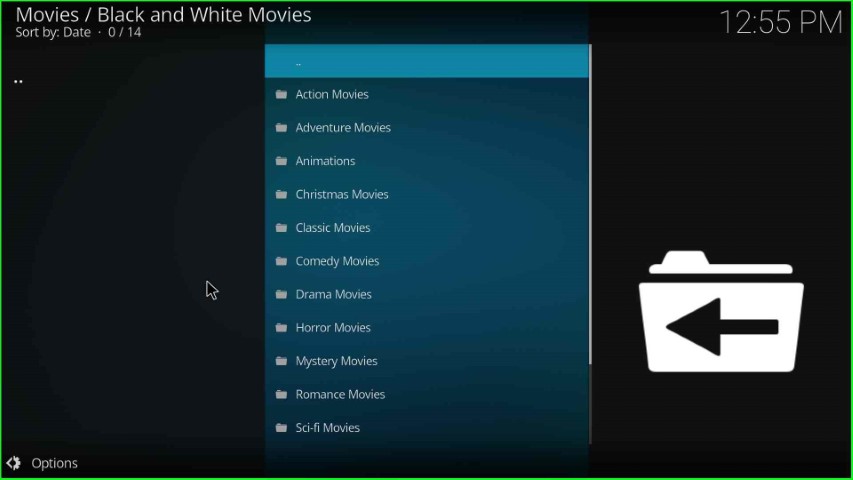
On this page, you can find different categories of movies.
Final Words
At last, we have included all related steps to install the Black and White addon on Kodi with proper screenshots. So, install the addon on your device after reading the above, and share your experience with us.
