In this article, you will learn the basic steps to install cMaN Wizard on Kodi Window. These steps are the same for Firestick Lite, Google Chromecast, Mecool Boxes, Android TV Box, Nvidia Shield, Apple TV, Fire TV Cube, Raspberry Pi, Samsung TV, Firestick 4K, etc.
cMan is the best Kodi Wizard, which allows you to access multiple Build and add-ons. You can find this addon on the cMan Repository. Some of its top builds are Eternals, Simplex, Rush, Edge, Kingdom, Mad Dragon, Fallout 19, and Nitro.
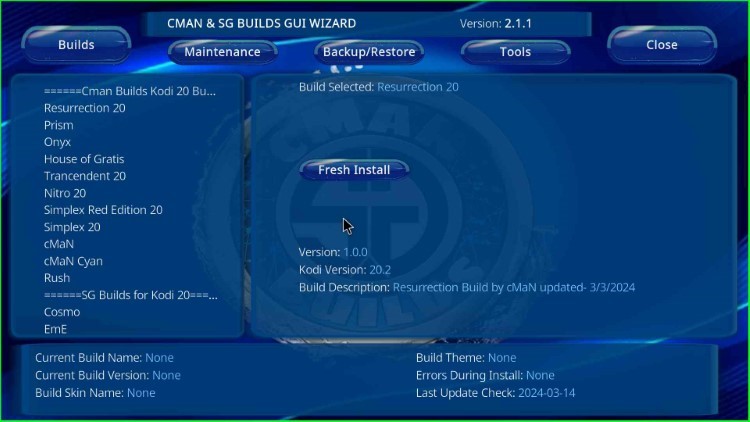
Also, all available builds of the Wizard are fast, feature-rich, have great categories, are easy to use, and have an awesome interface. Moreover, the wizard has a blue and black theme with well-arranged sections like Build, Maintenance, Backup/Restore, Tools, and Close.
Installation Steps
Let’s go ahead with the steps to install cMan Wizard on Kodi.
Enable Unknown Sources
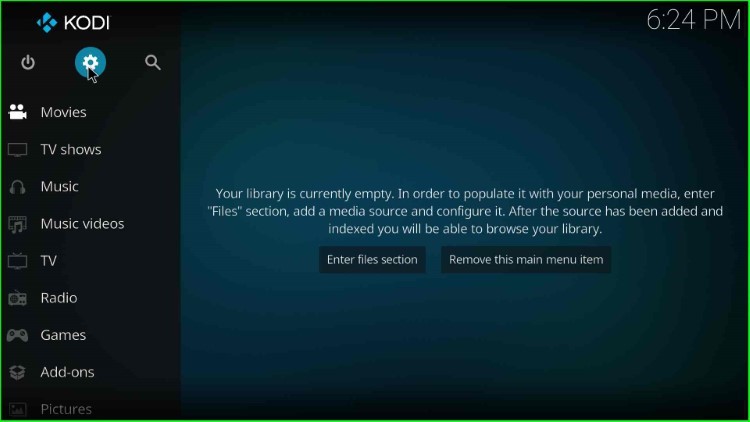
Start the Kodi app on your device and put the cursor on the Settings tab.
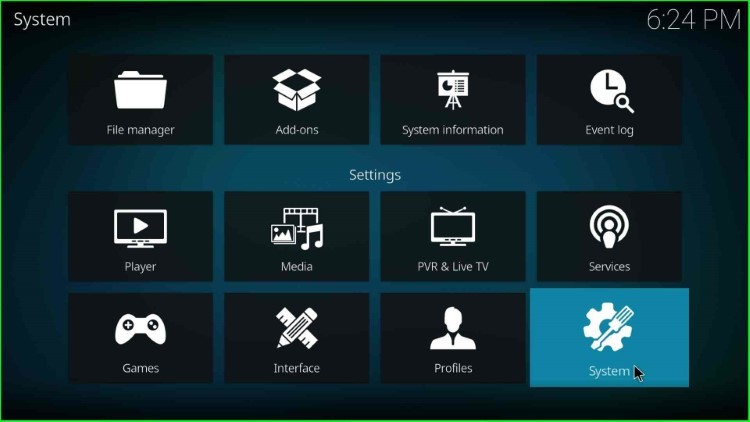
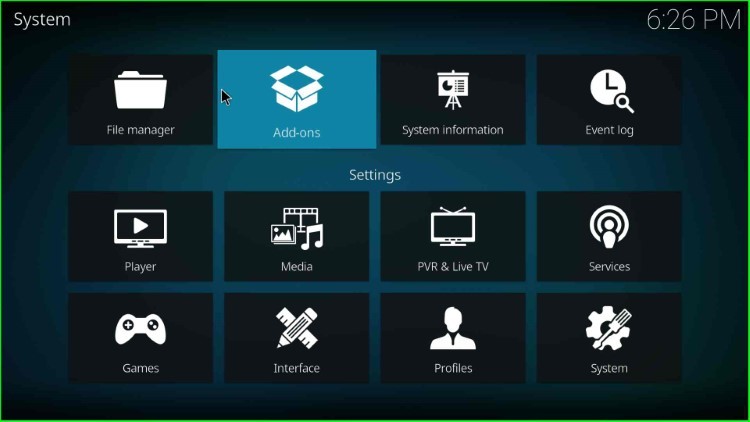
Settings tab opens on the screen with some icons like Add-ons, File Manager, Games, Interface, System, etc. Here, you need to click on the bottom left corner icon, System.
Now, single-click on the Add-ons tab.
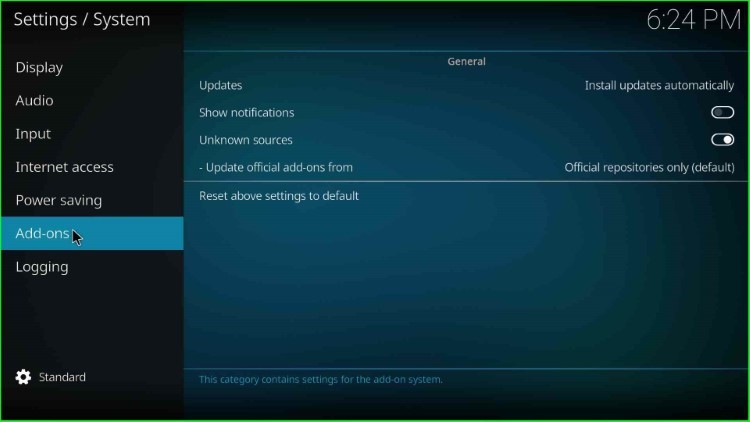
After clicking on it, you will see two buttons Shows Notifications and Unknown Sources.
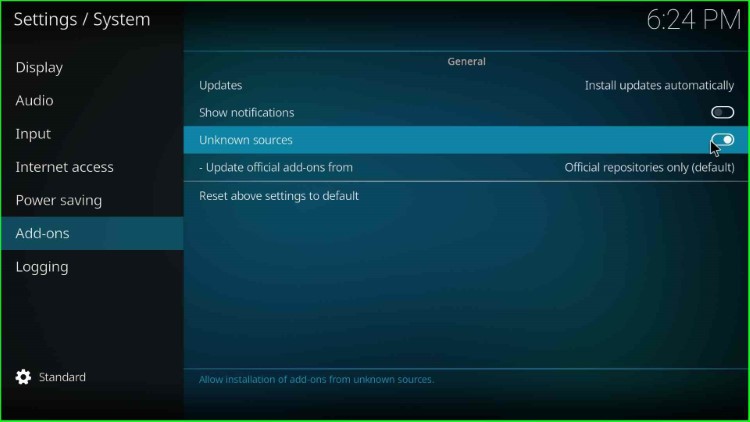
Here, enable the Unknown Sources button by sliding it to the right.

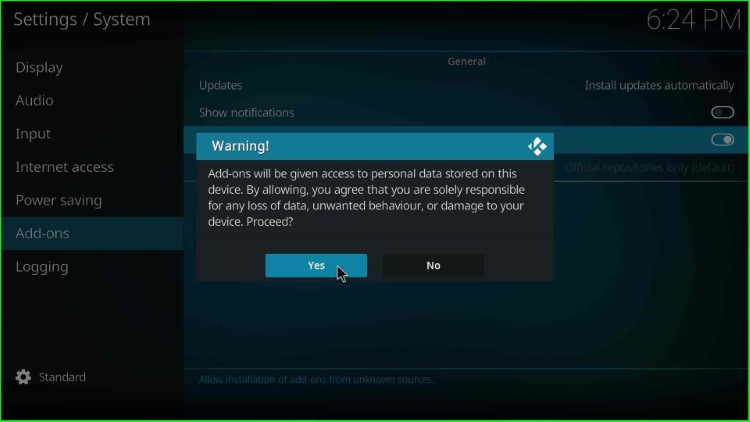
Tap Yes to proceed with the warning message.
Add Media Source and Repository URL
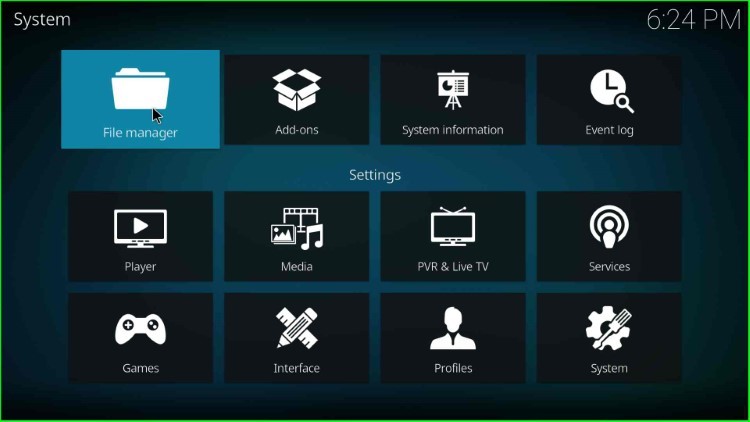
In this step, return to the System window and click on the File Manager icon.
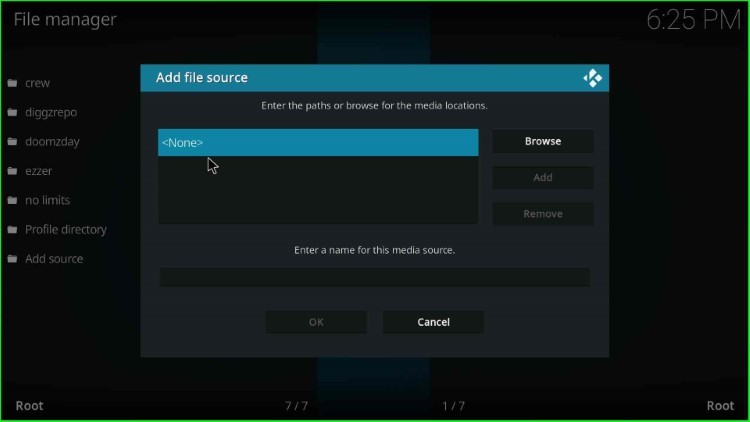
Now, hit the Add source option just after the Profile directory.
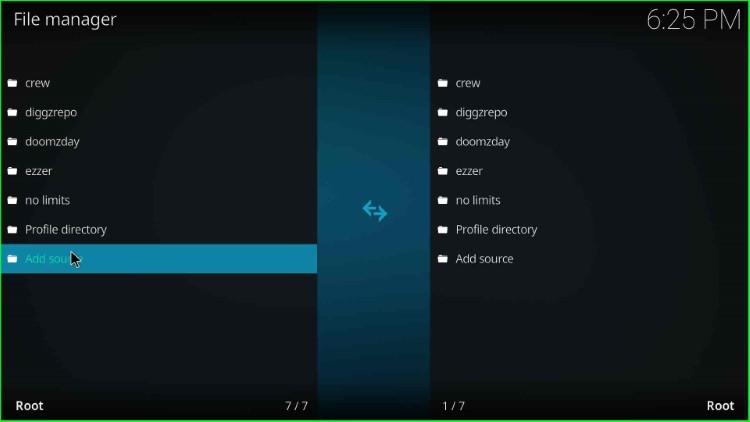
It shows an Add file source window with two label texts, i.e., enter a path for the media location and enter a media source name. Here, tap on the <None> option to enter a new media path.
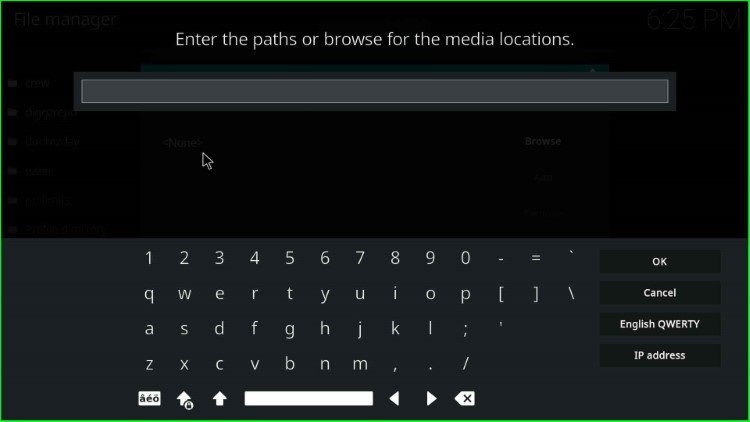
A black screen where you have to enter media location path.
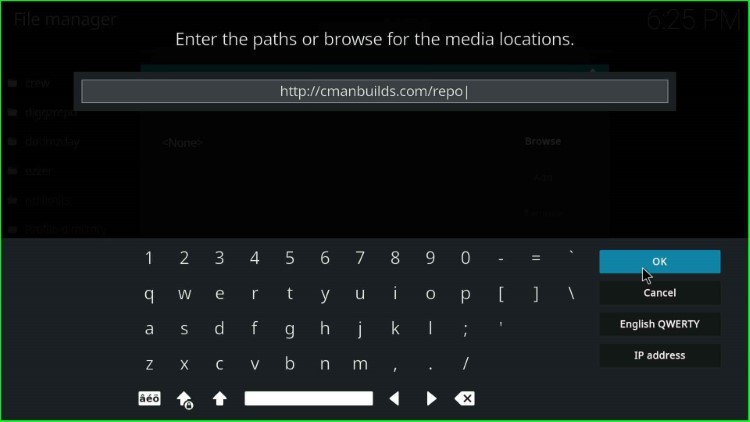
Type the URL path here for the cman wizard as http://cmanbuilds.com/repo and hit the OK sign.
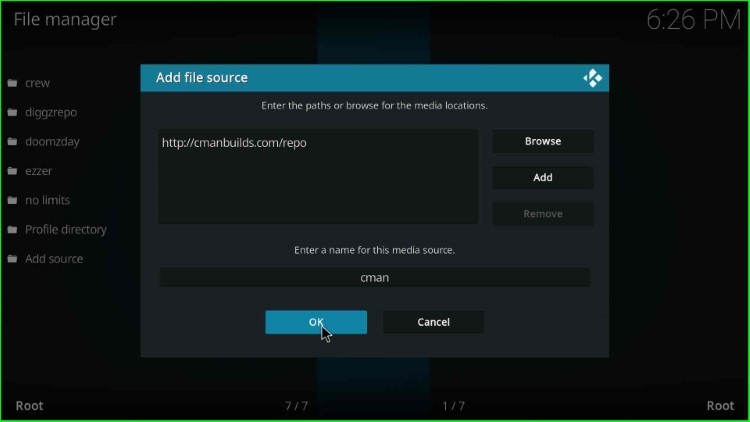
Now, scroll down and change the existing source name, i.e., repo.

Give the source name cman, and after that, check all the entries and hit the OK button.
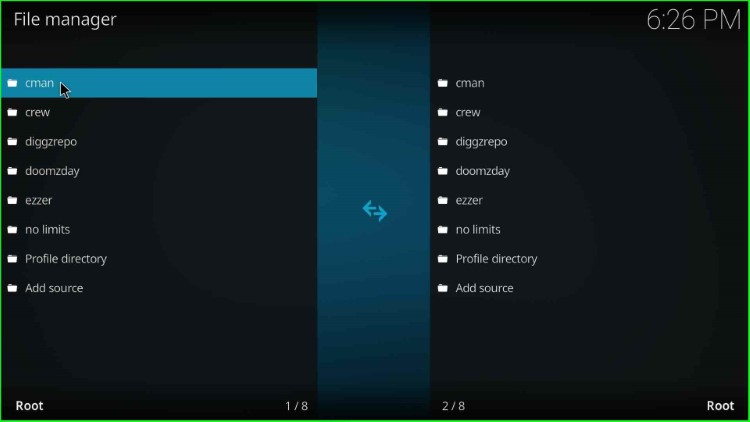
You can see cman source on the top of the File Manager screen.
Install from Zip File
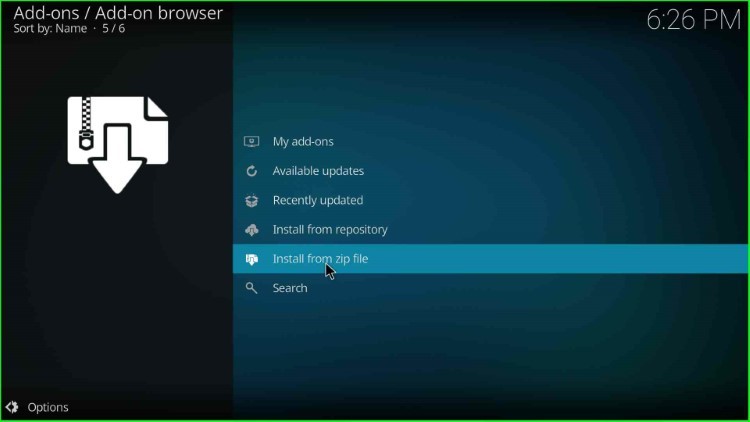
After adding the media source, the next step is to select the Add-ons tab available near the File Manager.
Now, click on the Install from zip file option.
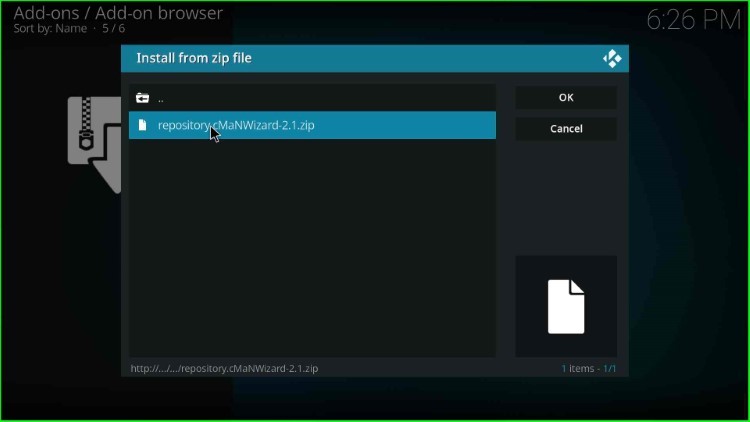
The Install from zip file window opens, which shows the cman media source; tap on it.

Click on the repository.cMaNWizard-x.x.zip file and press the enter key.
Wait for notification, cMaN’s Wizard Repository Add-on installed on the screen.
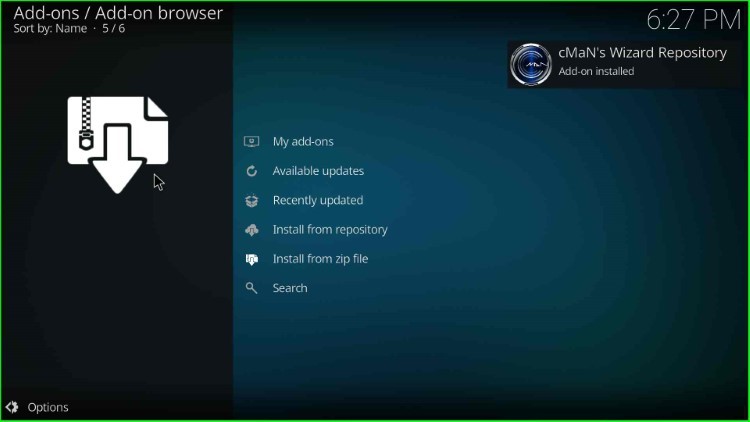
Install from Repository
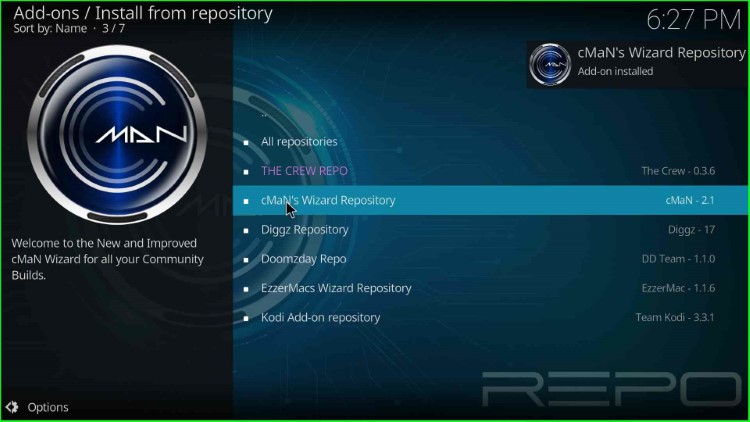
After a successful installation, go ahead with the Install from repository tab.
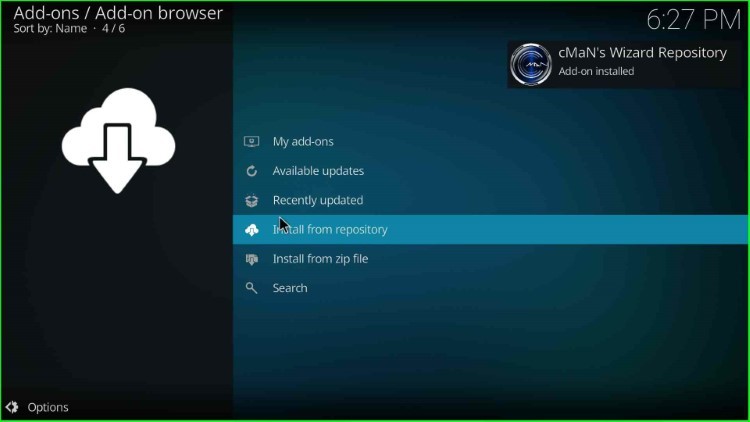
It shows the lists of installed repositories; choose cMaN’s Wizard Repository from here.
Install cMaN Wizard
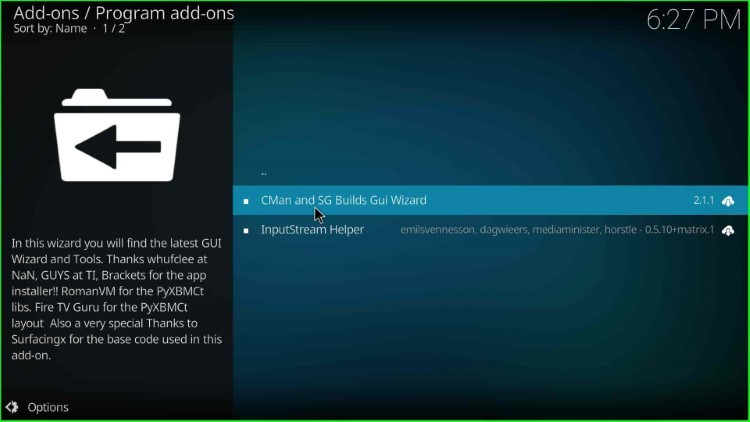
Inside it, you can see options like add-on repositories, music add-ons, program add-ons, and video add-ons. Here, just tap on the Program add-ons.
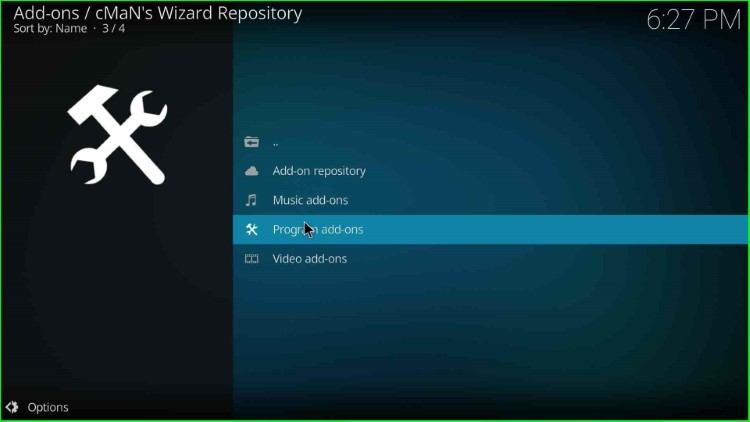
Select the CMan and SG Builds Gui Wizard from here.
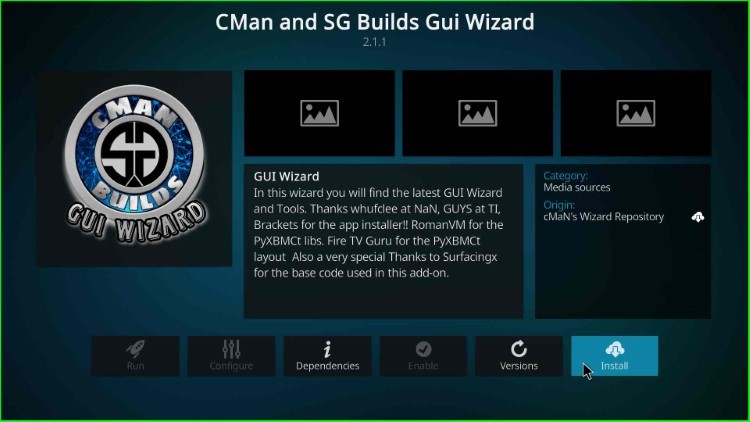
Here, just press the Install key.
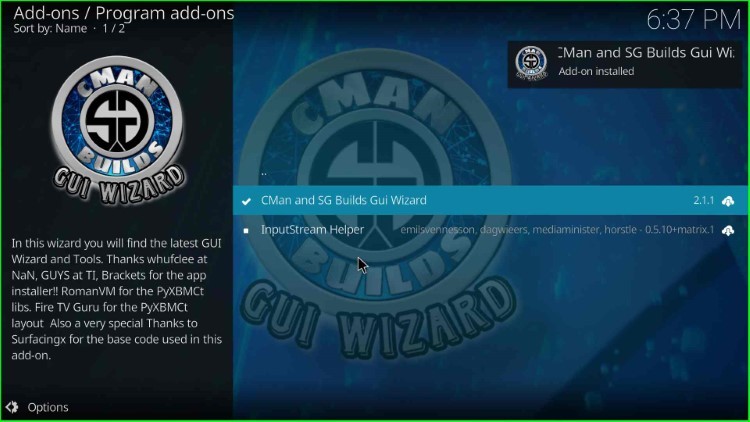
Wait for the cMan and SG Builds Gui Wizard Add-on installed message displayed on the page.
Launch cMan Wizard
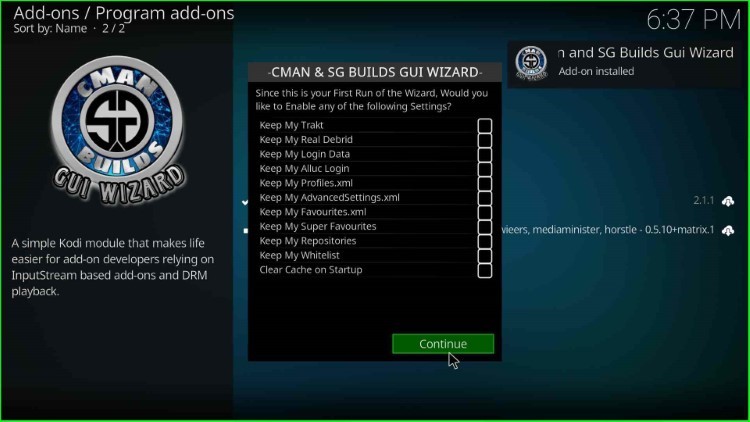
Tap the Continue button.
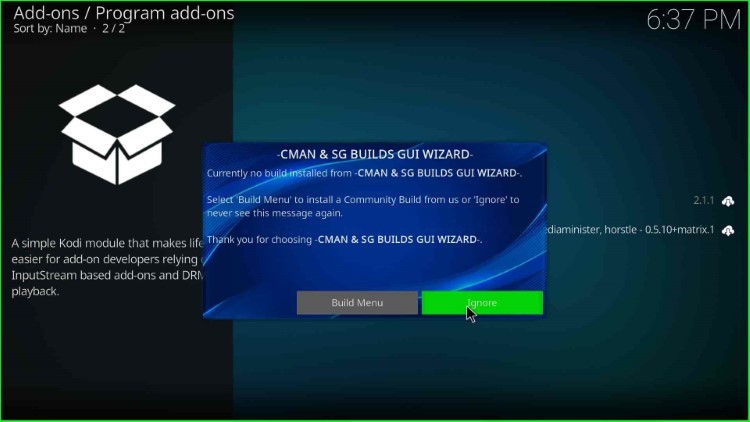
Hit the Ignore button.
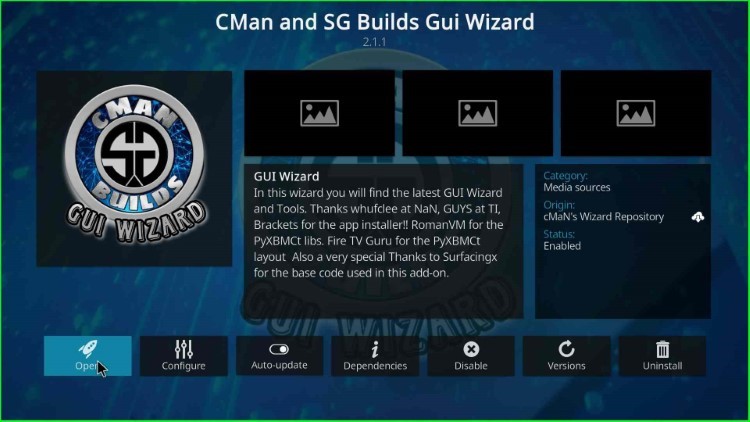
Press the Open key to open the cMan Wizard.
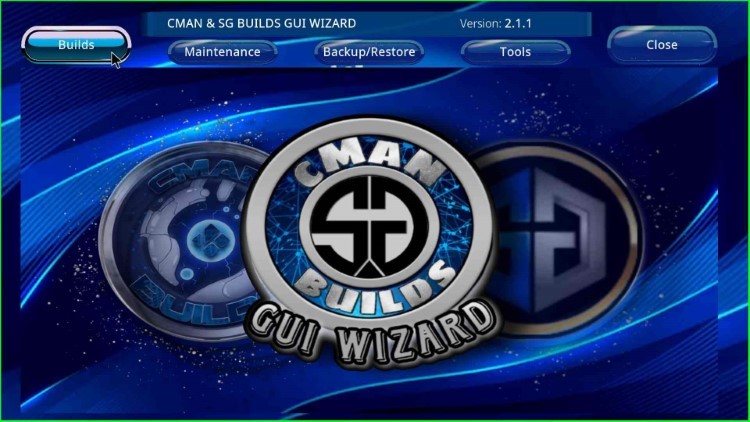
The cMan Wizard dashboard appears with different sections, including Builds, Maintenance, Backup/Restore, Tools, and Close. Here, I choose Builds.
Once you click on it, it displays lots of CMan Wizard Builds like Onyx, Nitro 20, Cosmo, Simplex 20, Prism, EmE, Rush, House of Gratis, etc.