In this guide, you will see the steps to install Doomzday Wizard on Kodi for Android TV Box, MacOS, Firestick Lite, Apple TV, Mecool Boxes, Linux, Samsung TV, Fire TV Cube, Nvidia Shield, Roku, Firestick 4K, Raspberry Pi, iOS, and Chromecast.
Doomzday Wizard is one of the best Kodi Wizards, which you can easily find on the Doomzday Wizard repository. It is a lightweight wizard with popular Builds to install, including Sports 101, Harley c, Aspire, Flix-Mx, The Small Builds, etc. Also, all of the builds offer various pre-loaded add-ons that provide you with unlimited streaming options. Additionally, it enables you to stream a variety of movies, live TV, TV shows, and sports categories.
Installation Steps
Some of the best steps to install Doomzday Wizard on Kodi are the following:
Enable Unknown Sources
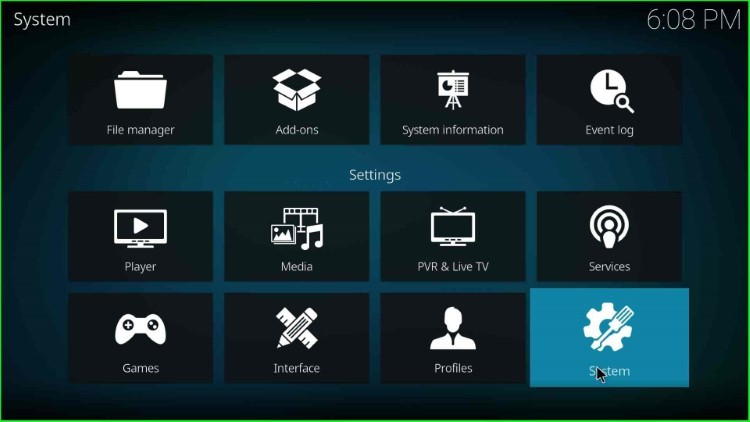
Start the Kodi dashboard and tap on the Settings icon available near the Power icon.
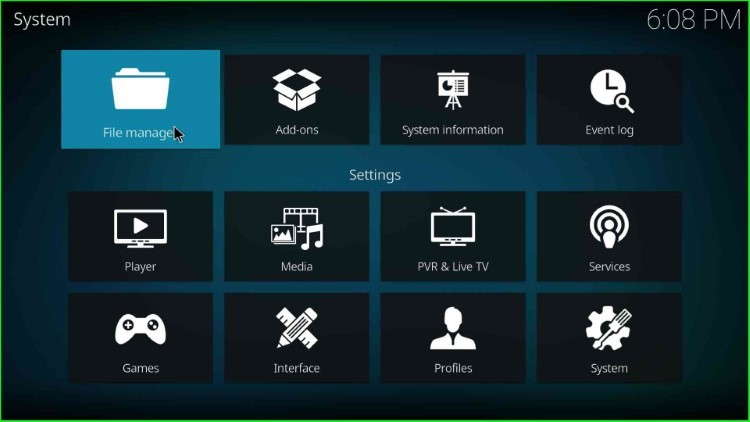
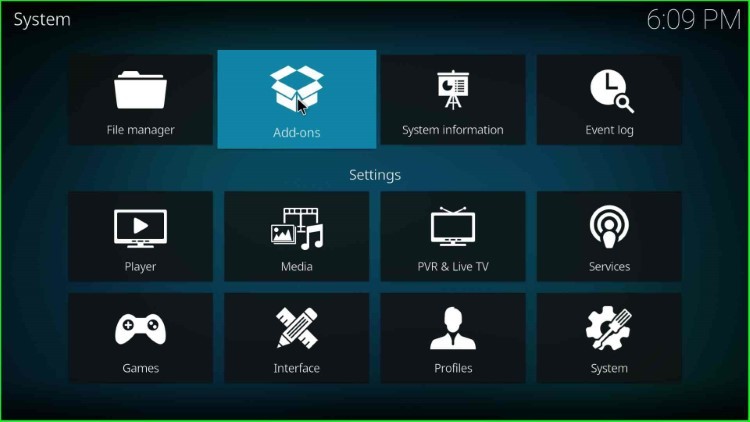
On this page, you can see lots of options like File Manager, Add-ons, Event log, Player, Media, etc. Choose System icon from here.
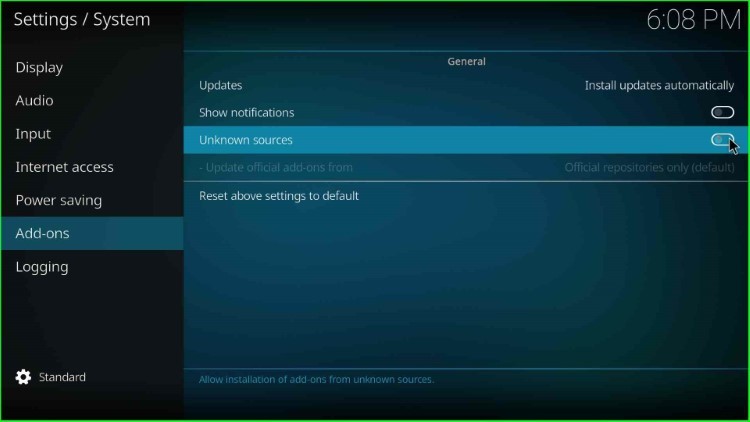
Thereafter, click on the last-second Add-ons tab and turn on the Unknown Sources mode.
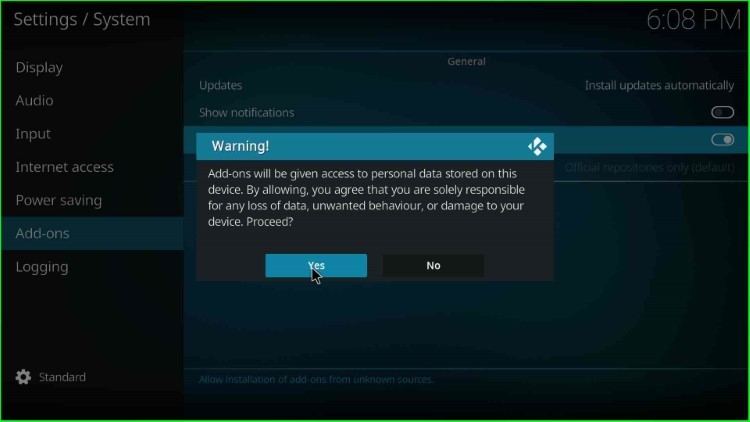
Hit the Yes sign to allow the installation of unknown sources on your device.
Add Media Source and Repository URL
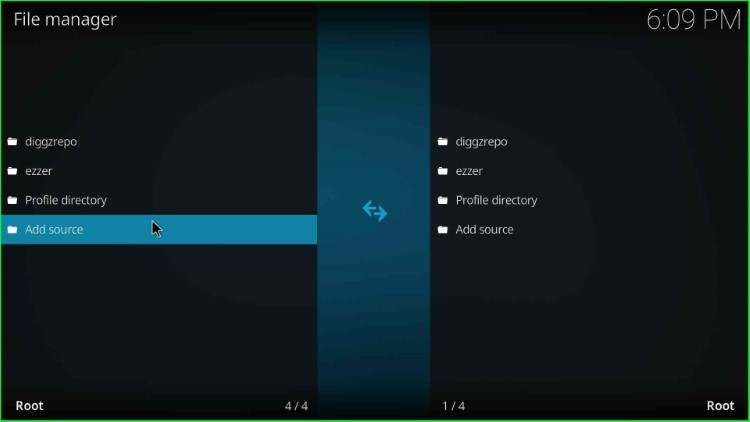
After enabling the unknown source, go back to the System window and choose the File manager key.
Hit the Add source option located just after the Profile directory.
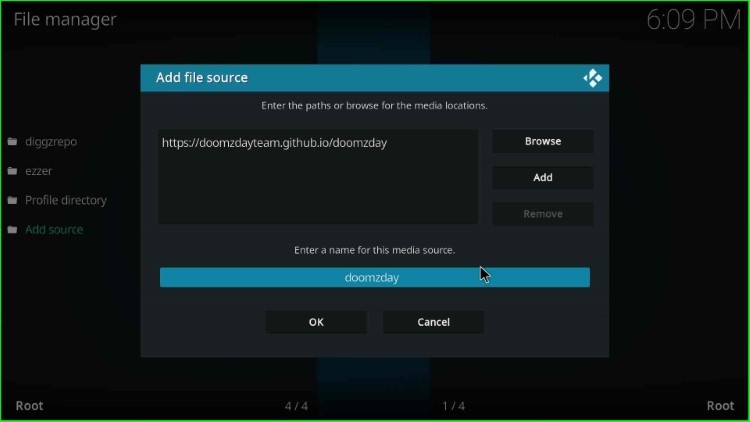
Now, the page shows the Add File Source window with two text fields: enter the path for the media location and enter the name for the media source. Here, select the first highlighted option, <None>.
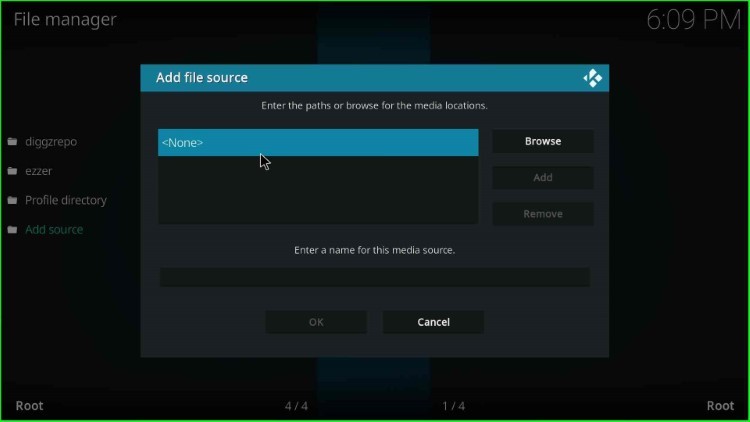
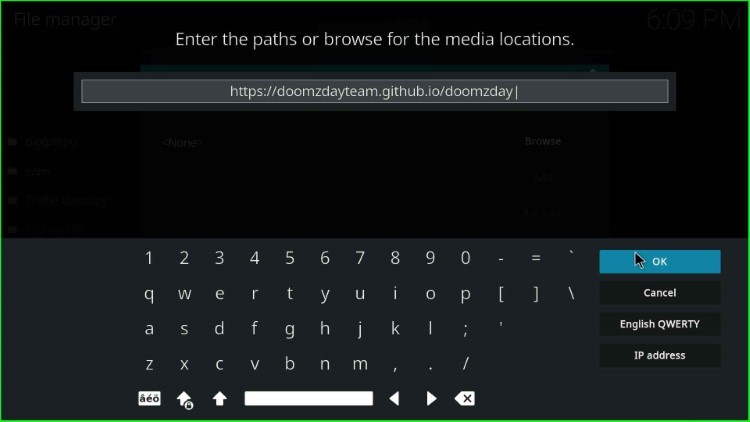
A black screen appears, asking you to enter the path for the media location.
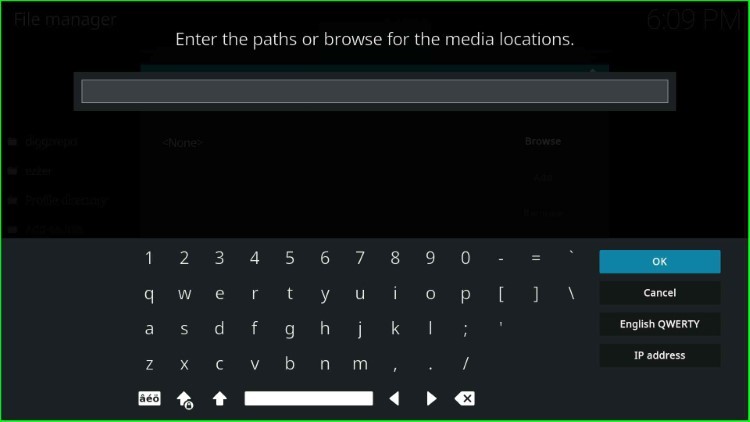
In this step, just enter the media path as https://doomzdayteam.github.io/doomzday and press the OK button.
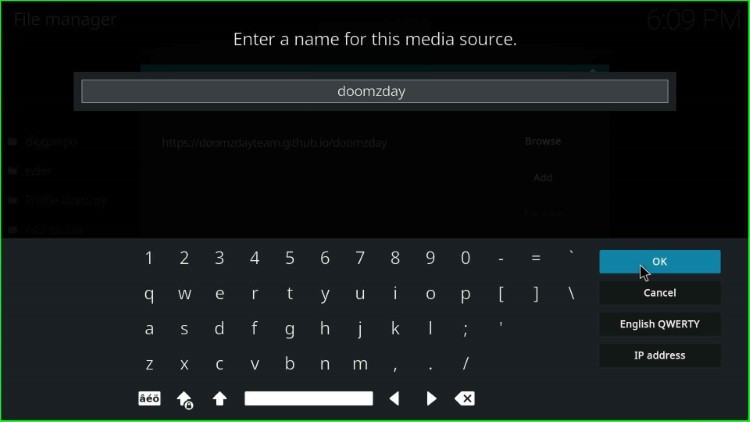
After entering the media path, click on the media source name text box.
Here, it shows a by-default name: doomzday. Remain as it is and hit the OK button.
Check the doomzday URL and source name carefully, and after that, tap the OK button to save the details.
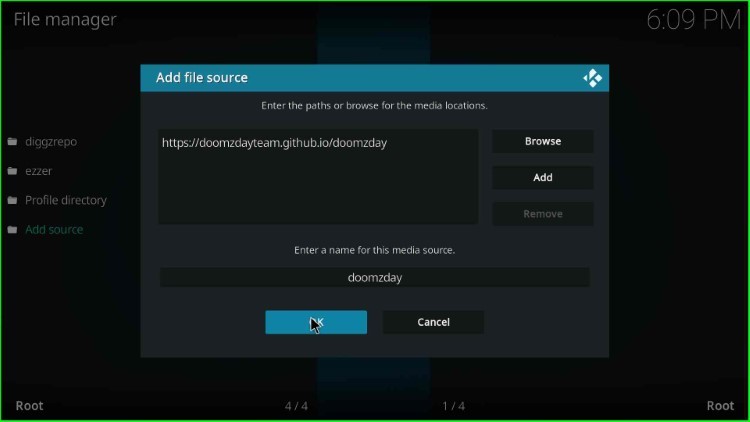
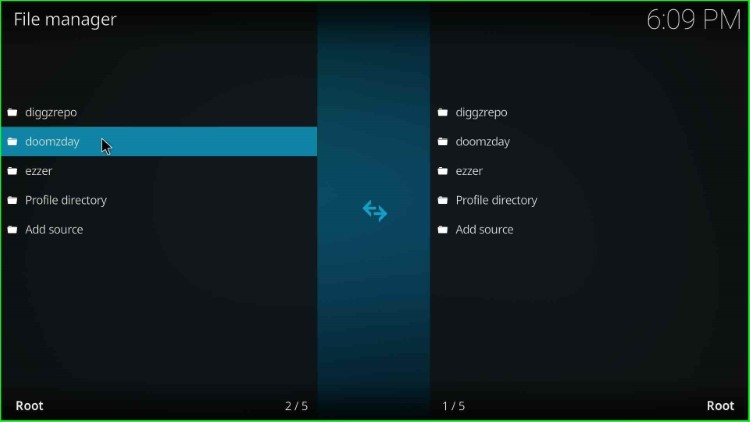
The File Manager page added the recently saved source, doomzday.
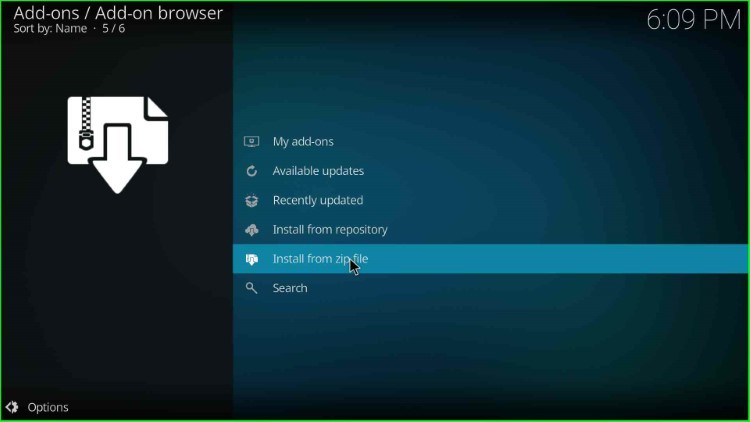
Install from Zip File
Again, return to System Settings and select the package icon, Add-ons.
Inside it, choose Install from zip file tab.
Select the available doomzday source in the Install from zip file window.
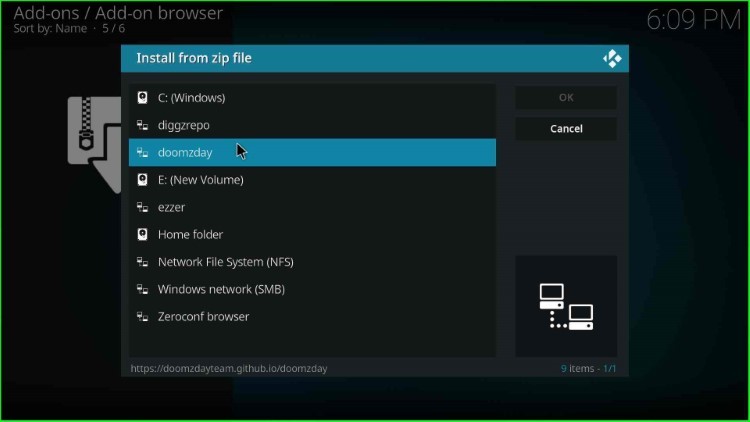
Now, hit the repository.doomzday-x.x.x.zip file and press the enter key.
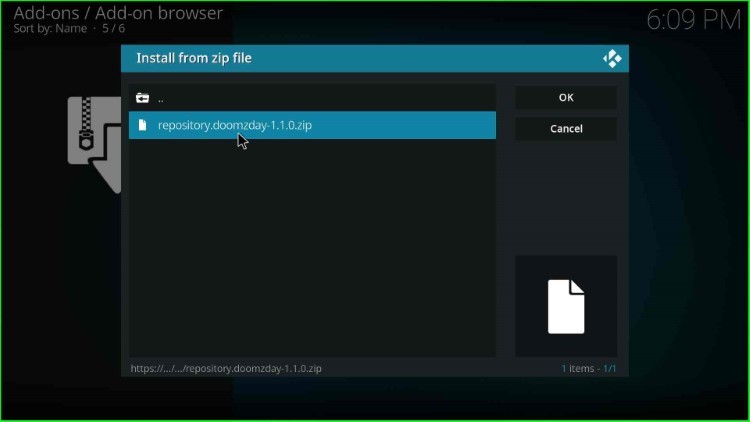
Wait for the Doomzday repo installation message, i.e., Doomzday Repo Add-on installed on the screen.
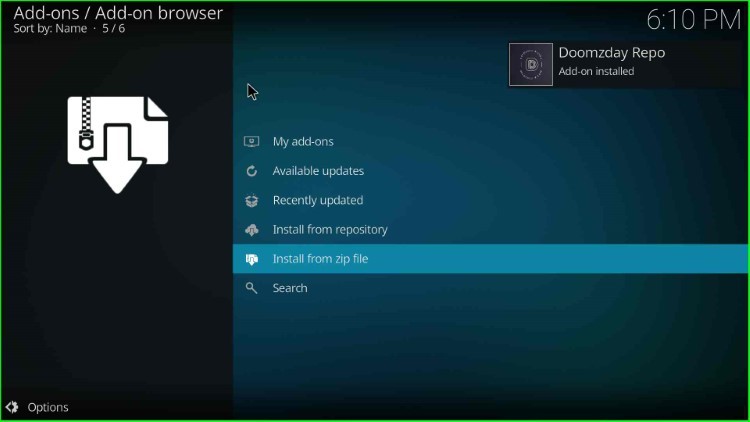
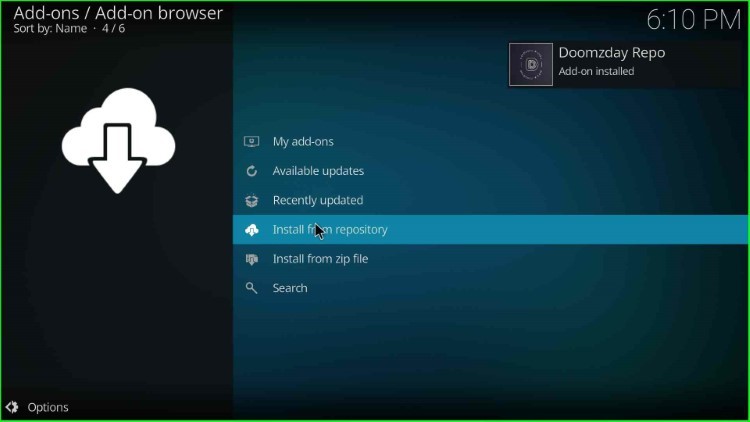
Install from Repository
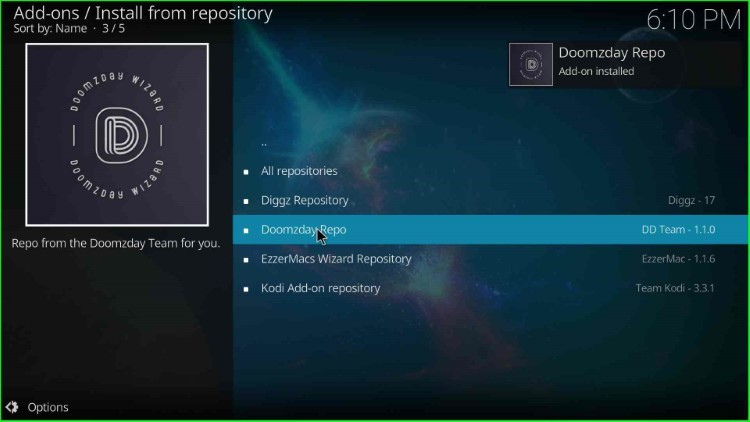
Next, click on the Install from repository tab.
Here, tap on the third option, Doomzday Repo.
Install Doomzday Wizard
Now, single-click on the Program add-ons available after the Add-on repository.
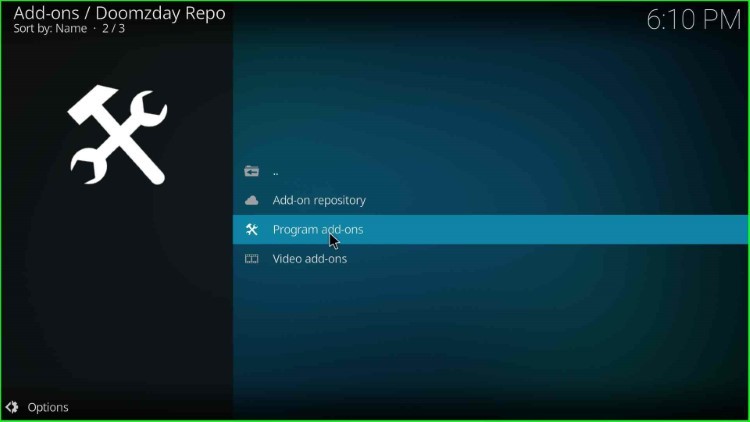
You can see Doomzday Simple Wizard here; tap on it.

In this step, press the Install key.
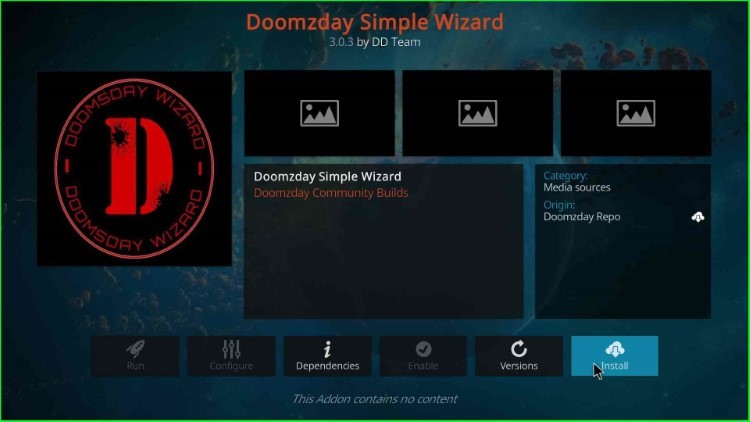
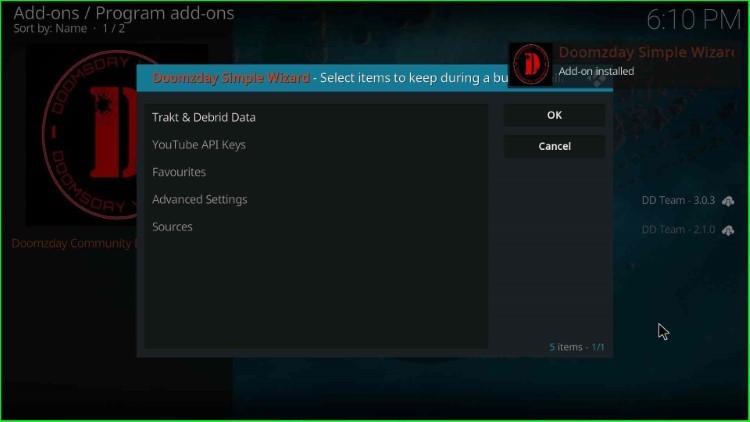
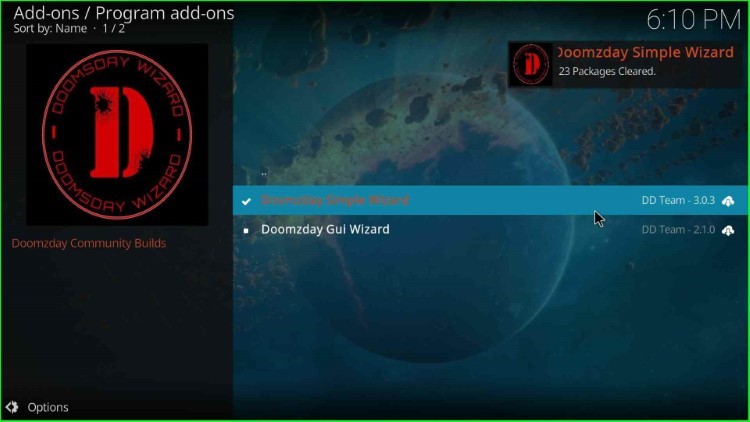
Now, click OK to agree with the pop-up window message. Wait until you see the notification that Doomzday Simple Wizard has been successfully installed on the window.
Launch Doomzday Wizard
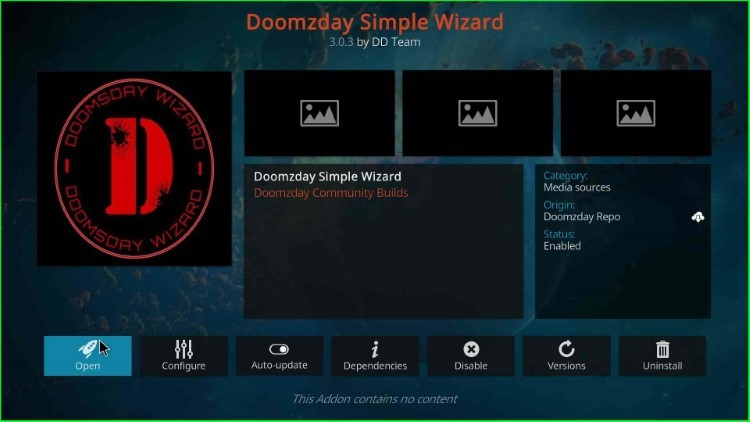
After installation, choose the Doomzday Simple Wizard.
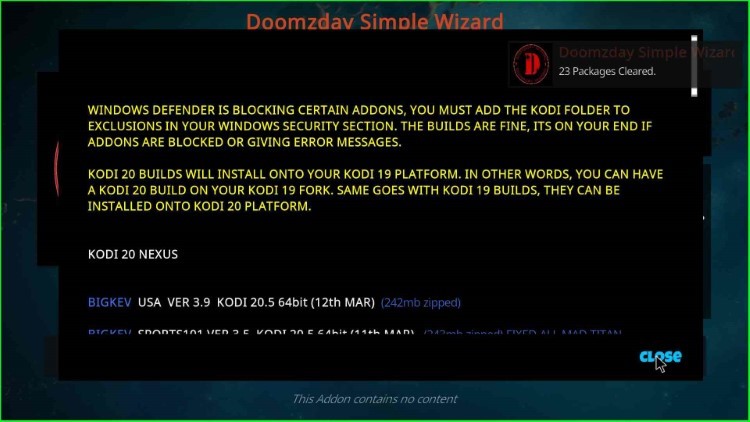
After installation, it again displays a popup box; hit the Close button to remove it from the screen.
Click on the Open button to open the Doomzday Simple Wizard.
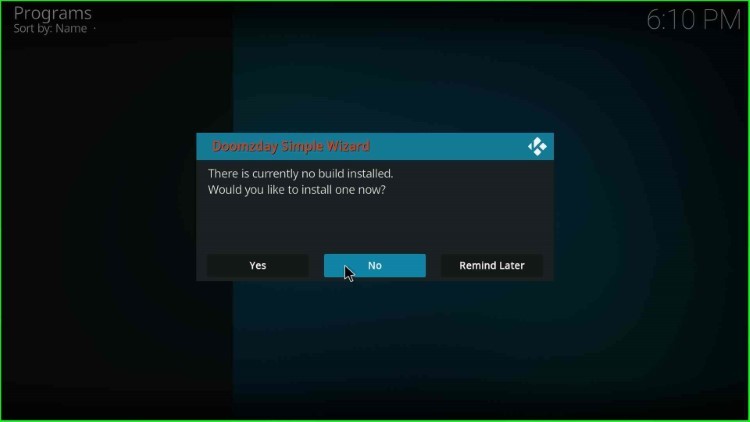
Here, click on the No button and move further.
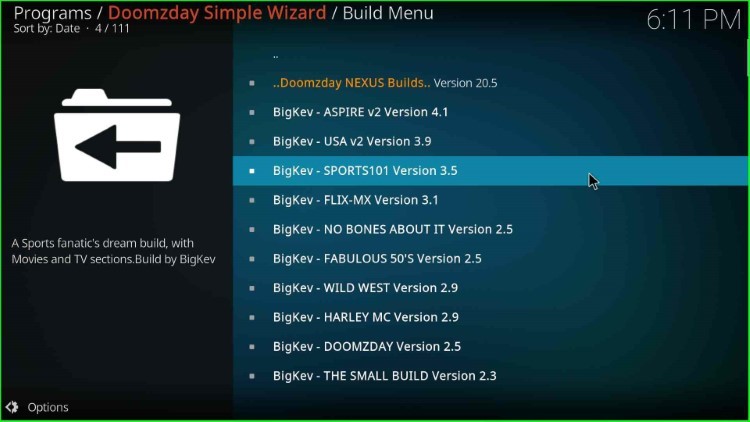
The Doomzday Simple Wizard home page appears with different sections, like Build Menu, Maintenance, Notification, Settings, etc. Here, I select Build Menu.
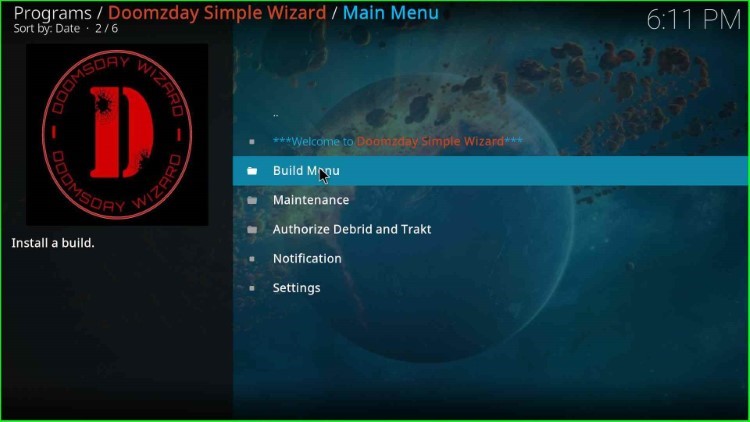
The Build Menu offers different builds for installation, like Aspire, Flix-MX, Wild West, Sports 101, USA, Harley Mc, and Doomzday. You can choose anyone, install, and start streaming.
Final Words
Overall, Doomzday Wizard provides a wide collection of Kodi Builds and a lot of quality add-ons for streaming.
