Within the article, we will discuss the necessary steps to install Flix-Mx Kodi Build on Firestick. These steps are also helpful for other Kodi-supported devices, including Nvidia Shield, Windows, Google Chromecast, Android TV Box, Roku, Raspberry Pi, etc.
Flix-Mx is the popular Kodi Build to stream your favorite movies, TV shows, and entertainment programs in one place. You can easily find the Build on the well-known Doomzday repository.
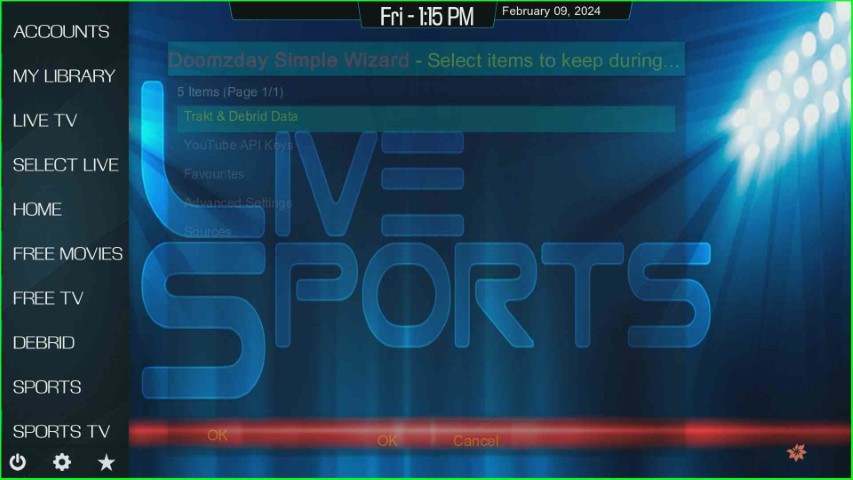
On its Home page, you can look for different sections like Accounts, My Library, Live TV, Select Live, Home, Free TV, Free Movies, Sports TV, etc.
Additionally, the Build contains very easy navigation, and all sections are arranged in a well-organized manner. Following are the steps to install Flix-Mx Build.
Installation Steps
Enables Unknown Sources
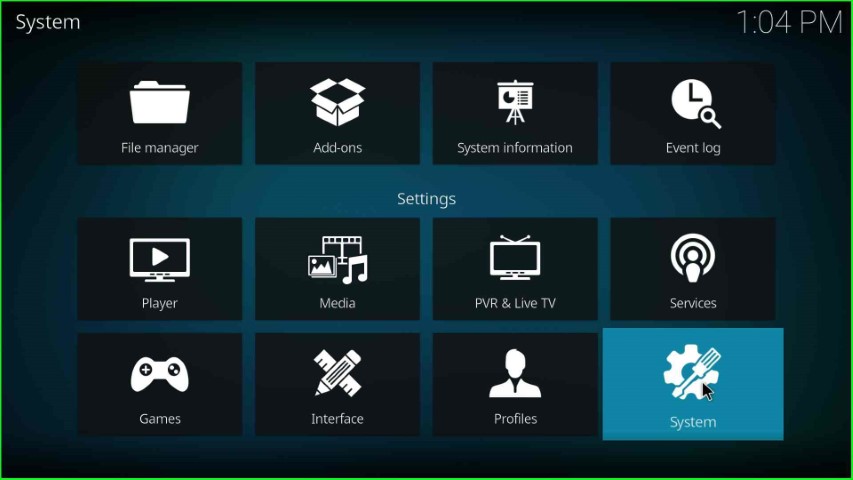
Go to the Kodi Home screen and select the Settings tab.
Here, tap on the bottom-right corner icon, System.
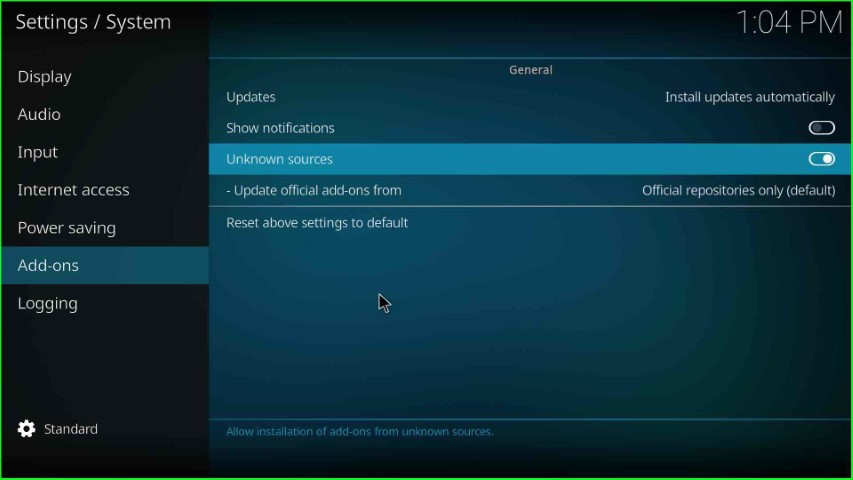
Put the cursor on the Add-ons and turn on the Unknown sources slider button.

Hit the Yes key as shown on the warning popup.

As you click on Yes, you can see the Unknown sources button enabled automatically.
Add Media Source and Repository URL
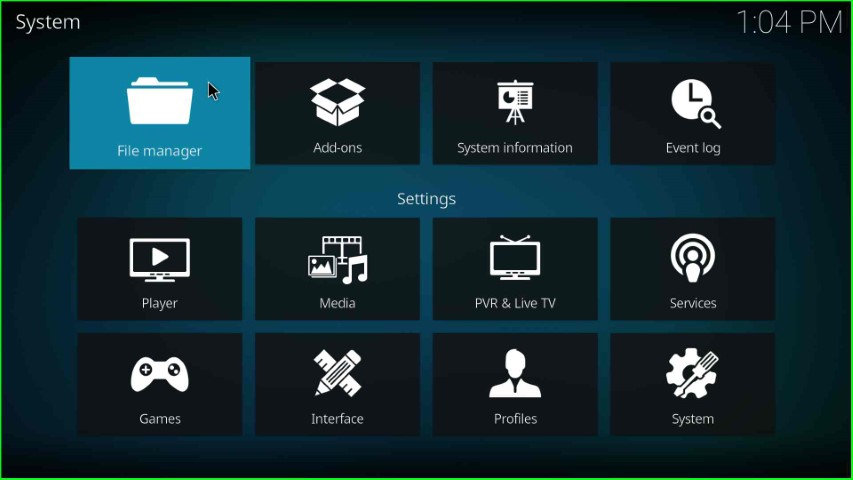
Now, open the next File Manager icon from System Settings.
Here, select Add Source to add a file source for the media repository.

In this step, click on <None> to enter the new path for the media location.

Now, write the repository path as https://doomzdayteam.github.io/doomzday.

Thereafter, put the cursor on Enter a media source label text.

Here, remain the media source name, doomsday, and click OK.
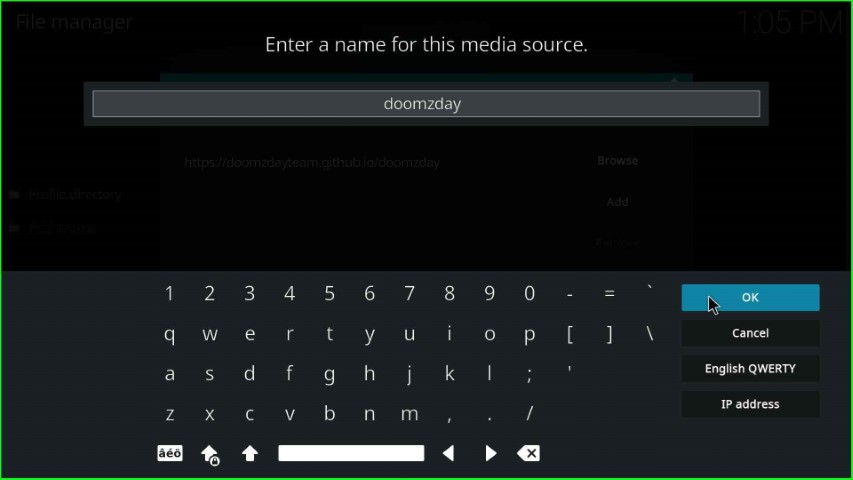
Check the entered repository path and media source name carefully, and press the OK button to save the details.

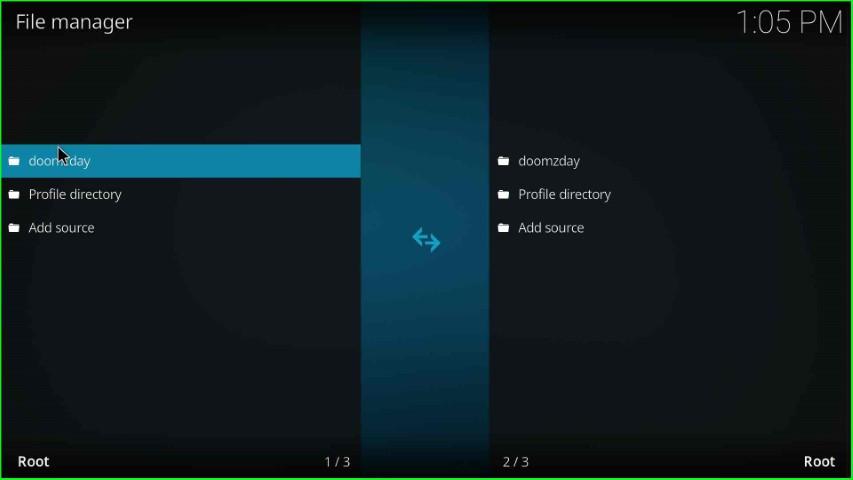
The doomzday media source is successfully added to the File manager window.
Install from Zip File
Return to the System page and click on the next icon, Add-ons.

Choose Install from zip file tab.

Select the doomzday file source.

Click on the repository.doomzday-x.x.x.zip file.

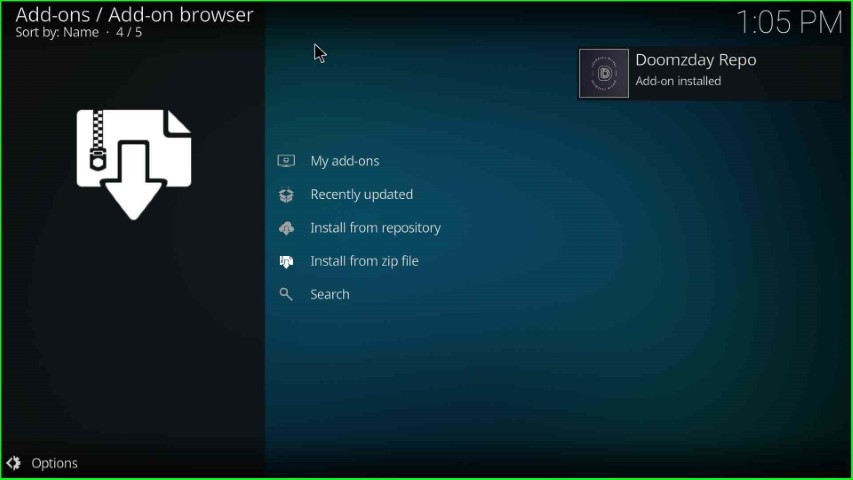
Wait until the Doomzday Repo Add-on installed notification appears on the Add-on browser page.
Install from Repository
After installing the Doomzday repository, move ahead and select the option Install from repository.

Tap on the Doomzday Repo.

Install Doomzday Wizard
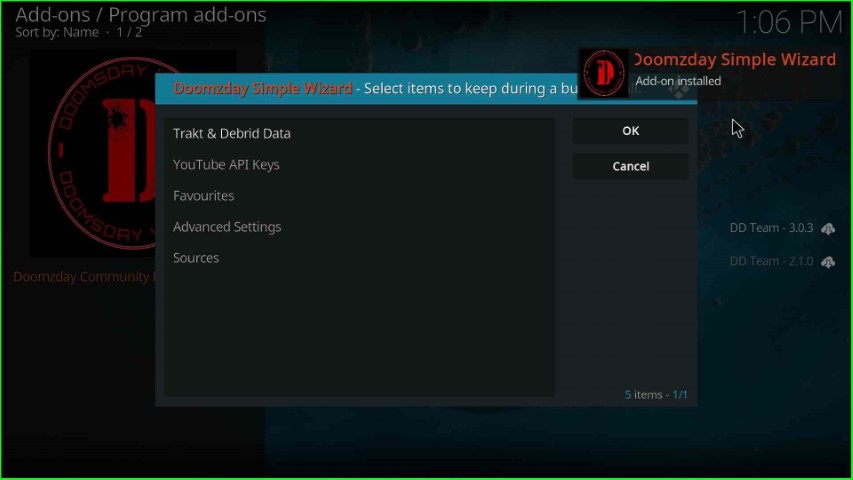
Select Program addons.

Inside it, choose the Doomzday Simple Wizard.

Hit the Install key.

Wait for a few seconds until you see the Doomzday Simple Wizard Add-on installed on the screen.
Click on the Close button.

Install Flix-Mx Kodi Build
Hit the Yes key to install the new Build on Doomzday Wizard.

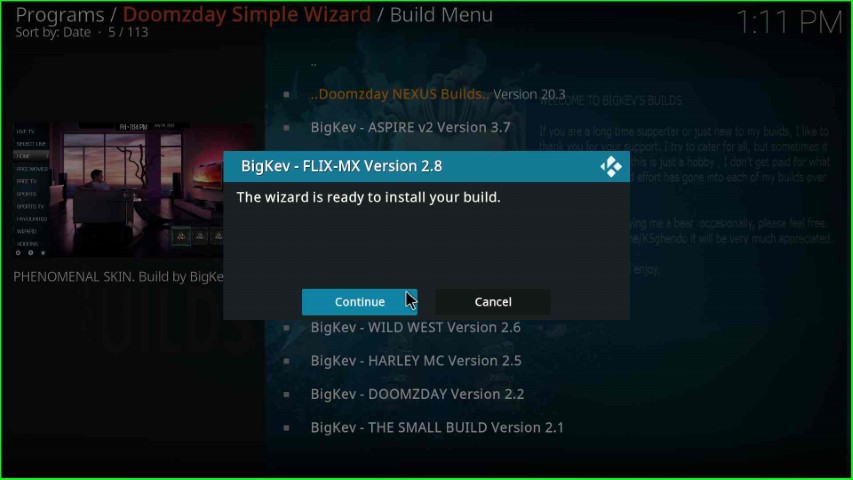
The Doomzday Wizard shows lots of Builds; here select the FLIX-MX Version x.x.

Tap on the Continue button to install the Flix-Mx Build on the Kodi screen.
Flix-Mx Build starts downloading; wait for the over.
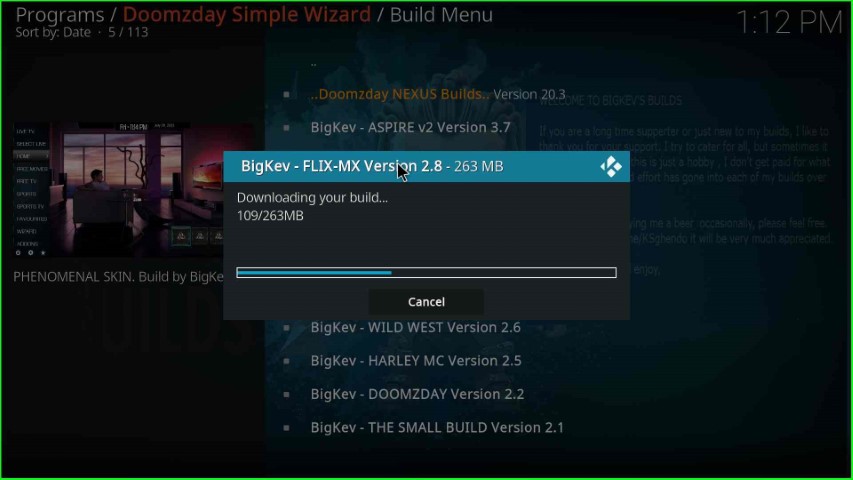
After downloading the files, the Build starts the file extraction process.

After some time, the Flix-Mx installation is complete, and the page asks you to click OK to close the Kodi screen.

Enjoy your favorite streaming on Flix-Mx Kodi Build.
Final Words
Overall, the article provides all the information regarding how to install Flix-Mx Build on Kodi. So, read the article carefully, install using the available steps and screenshot, and tell us your experience in the comment section.