The post will tell you about the necessary steps to install the IPTV NZ addon on Kodi. Here, we will install it using Windows, but it will also support Firestick, Android, iOS, Chromecast, Roku, MacOS, Linux, Raspberry Pi, PCs, smartphones, and tablets.
IPTV NZ (New Zealand) is among the top live TV Kodi addons from the SlyGuy repository. It provides a wide range of live TV channels like Sky Open, Te Reo, Duke, Three, Bravo, Eden, and HGTV from different countries and regions.
In addition, the addon contains very simple and attractive features that help you search for your desired streaming shows quickly. Moreover, some of its popular alternatives are NZ Filma, Nebula, NEON, Optus Sport, HBO Max, Minno Kids, etc.
Installation Steps
Enable Unknown Sources
Start the Kodi app on Windows and click on the left-side tab, Settings.
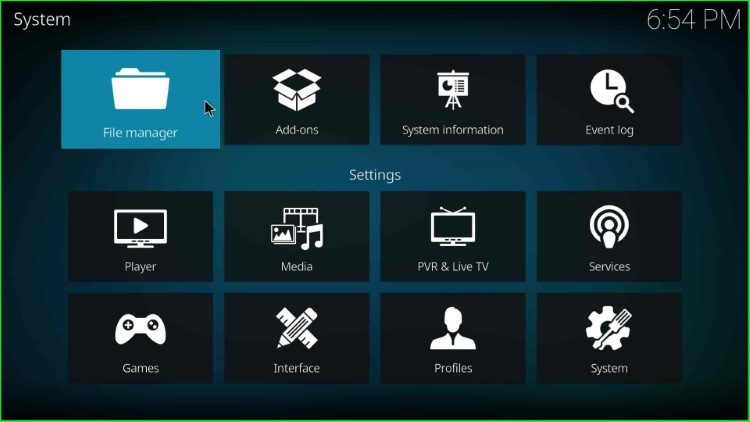
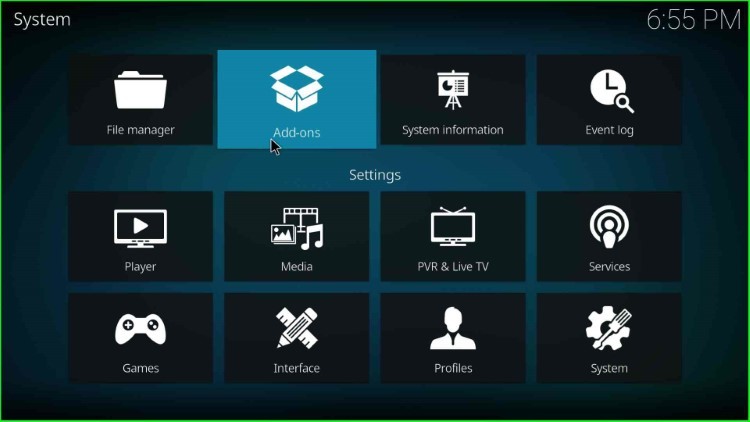
Here, choose the System icon from the last corner of the page.
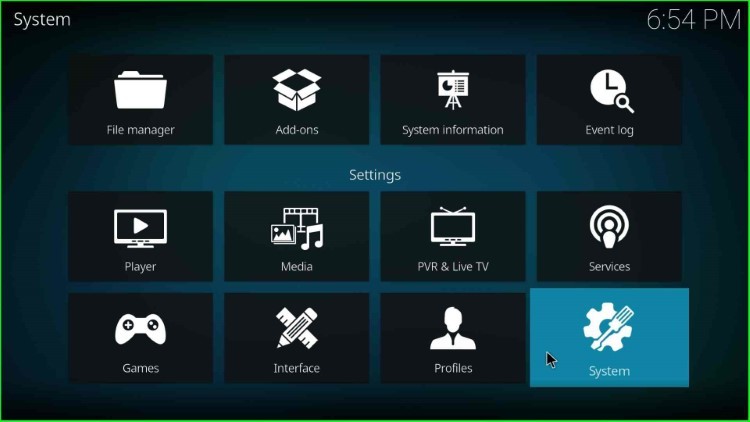
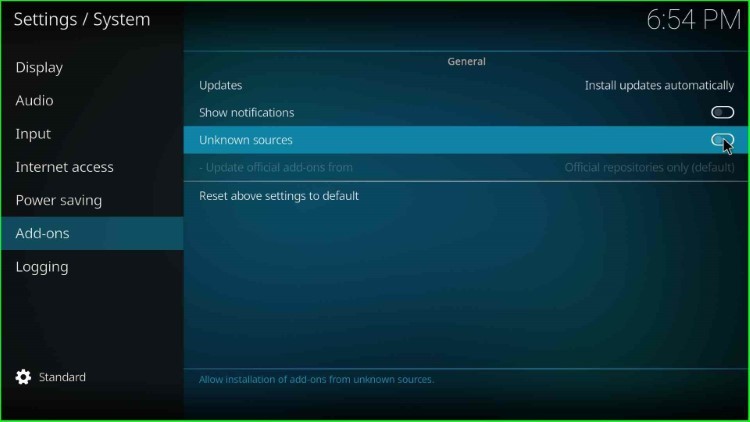
Now, choose the last-second option, Add-ons, from the left of the screen.
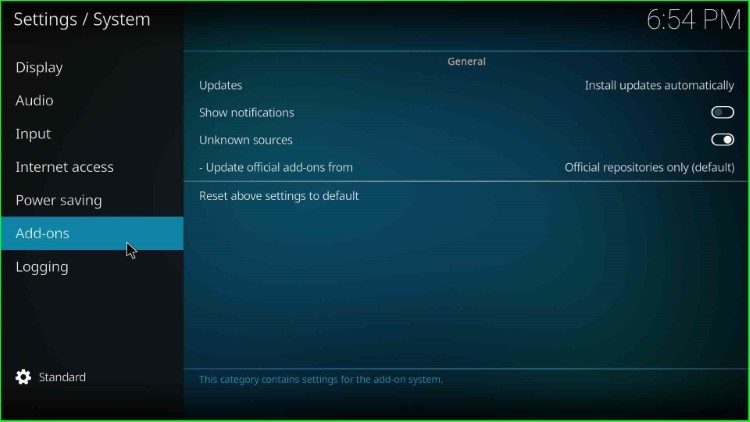
After that, enable the Unknown sources tab.
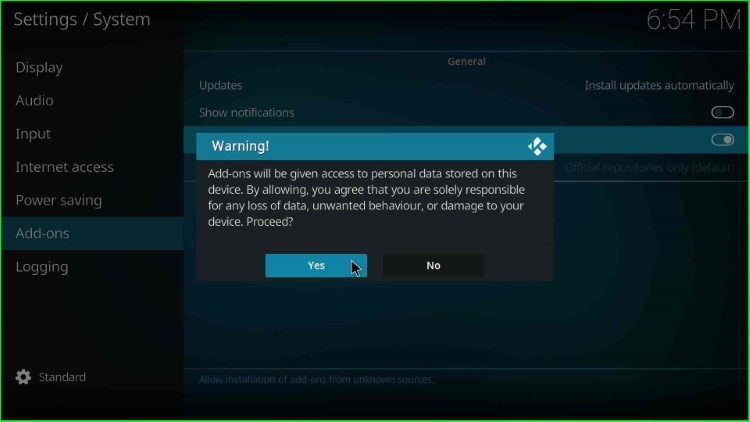
As you enable it, the page asks you to allow the installation of unknown sources on your device. Here, hit the Yes button and proceed further.
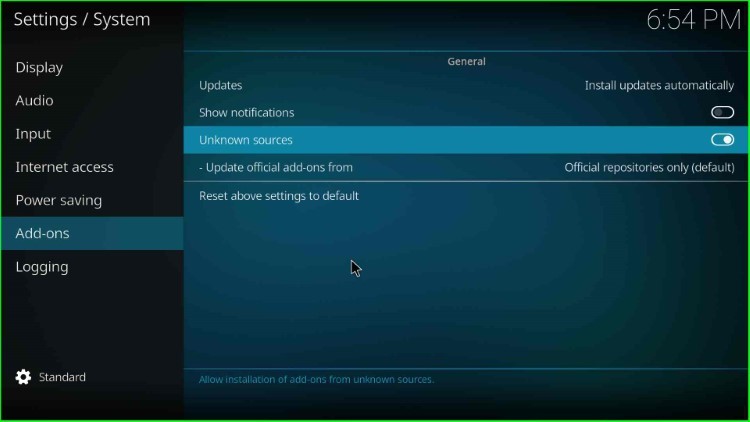
In this step, the unknown source button was enabled successfully.
Add Media Source and Repository URL
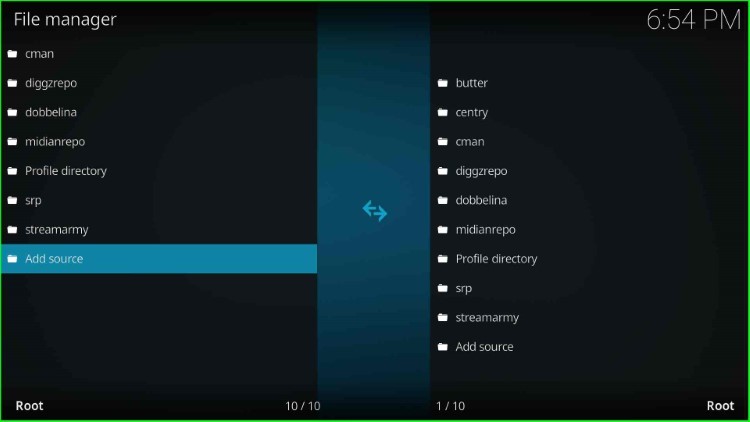
Go back to the System window and choose the first icon, File manager.
Now, choose the Add source option to add a media source for the addon.
Click on the <None> tab listed inside the Add file source window.
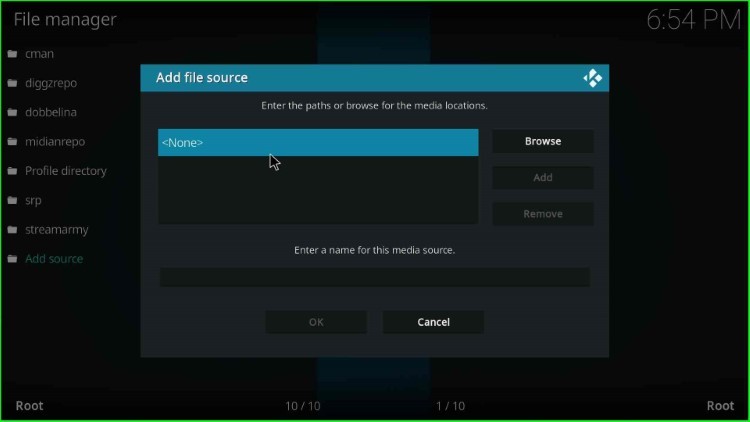
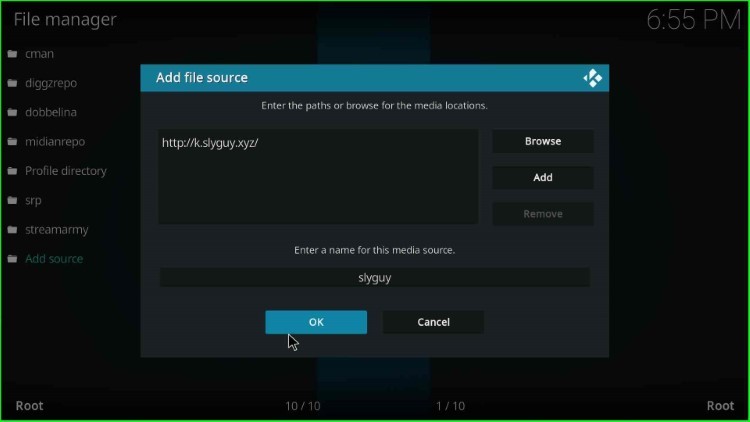
A black screen appears where you need to enter the path for the media location.

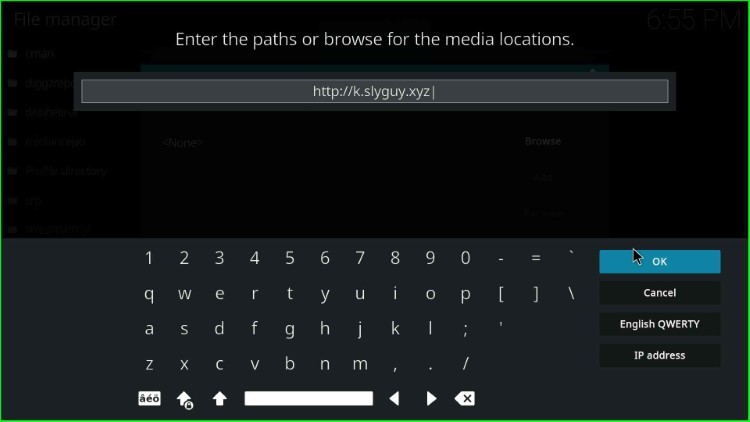
Write the media location path here as http://k.slyguy.xyz and hit the OK sign.
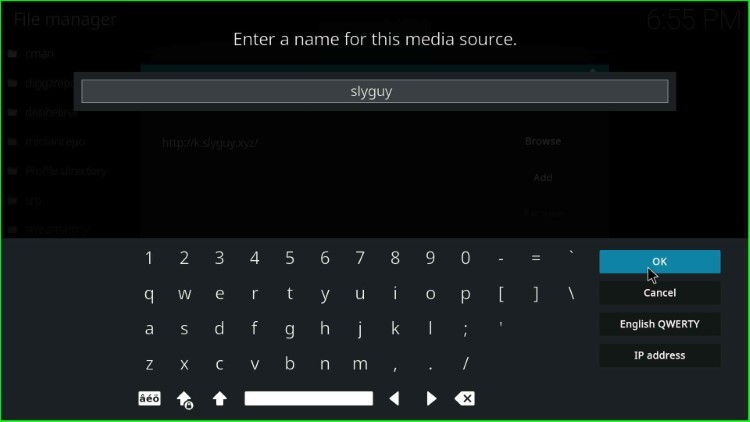
After entering the URL, go ahead with the media source name text box.
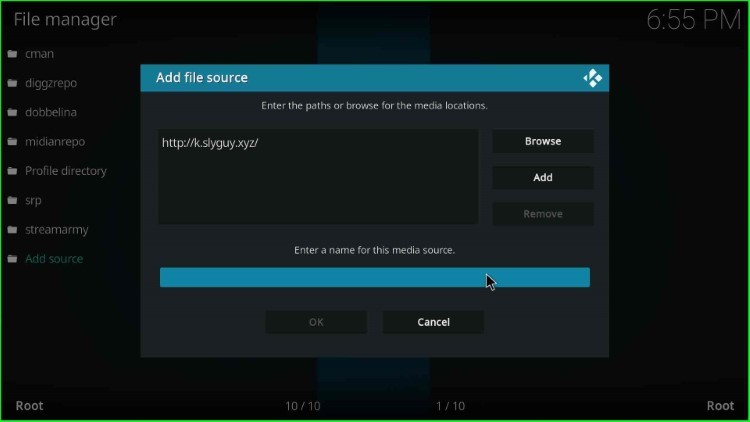
Give the media source name according to the Slyguy repository, i.e., slyguy, and hit the OK button.
Check all the entries, like media location and name, and click on the OK toggle to save them.
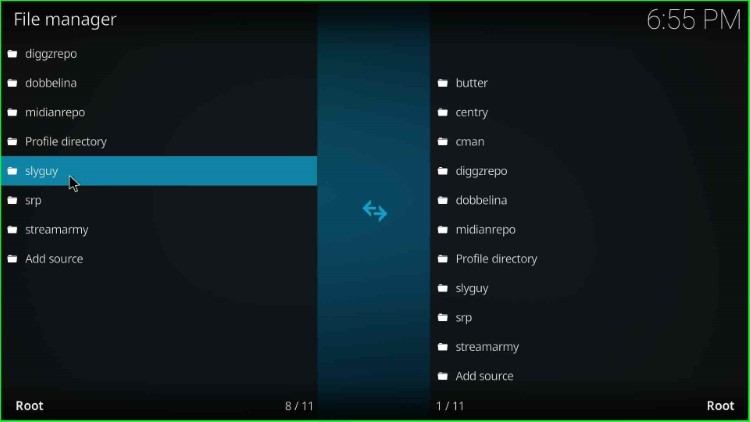
On the File manager window, your slyguy source is saved successfully.
Install from Zip File
After adding the media source, return to the Kodi System page again and tap on the Add-ons sign.
Here, single-click on the Install from zip file option.
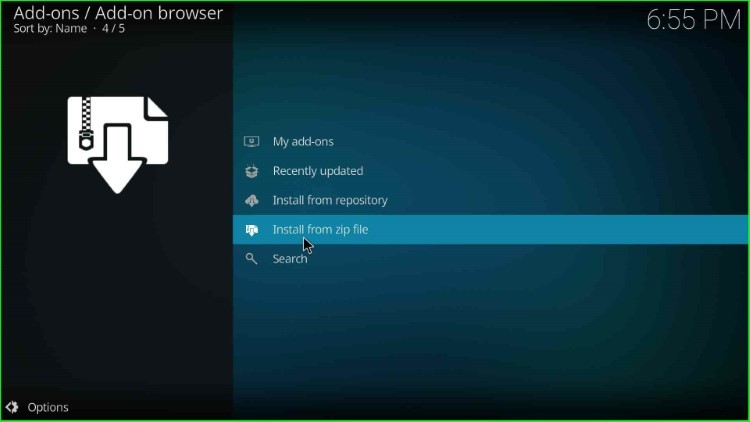
Choose the slyguy media source.
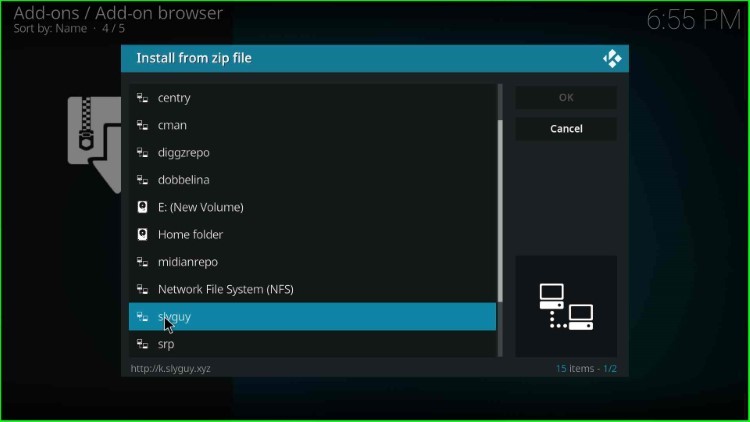
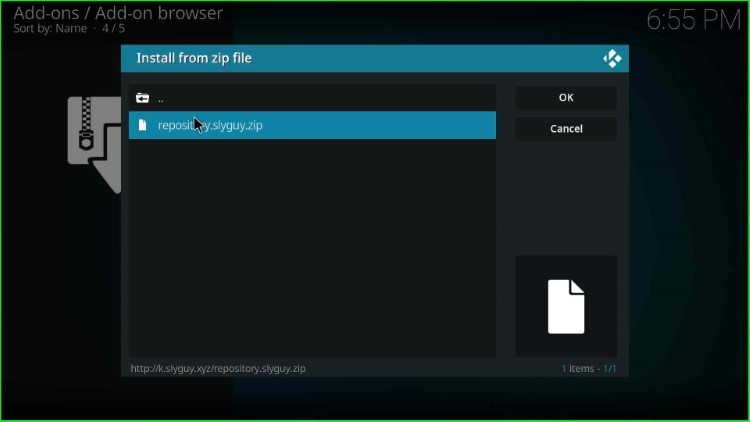
Next, select the repository.slyguy.zip file.
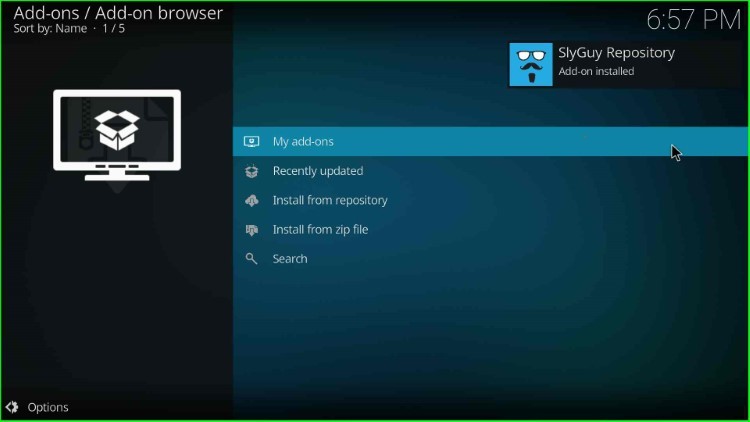
Wait for some time until the notification of the SlyGuy Repository Add-on installed appears on the screen.
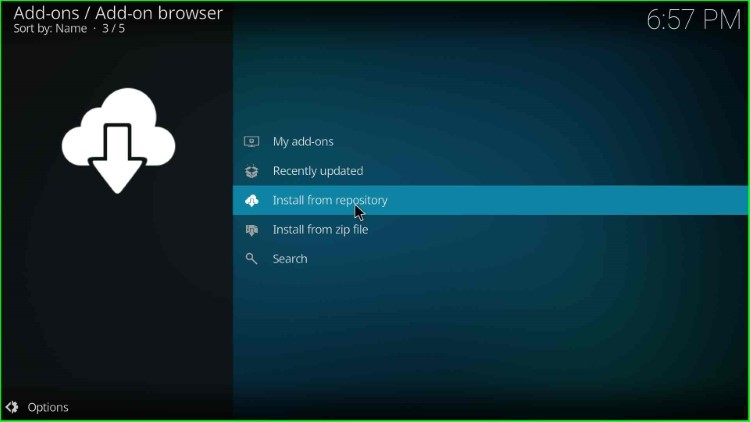
Install from Repository
Choose the third tab, Install from repository.
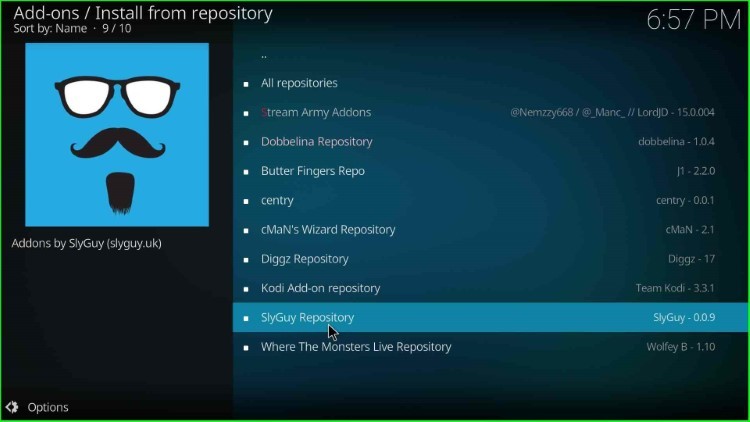
Now, scroll down the cursor and select SlyGuy Repository.
Install IPTV NZ Addon
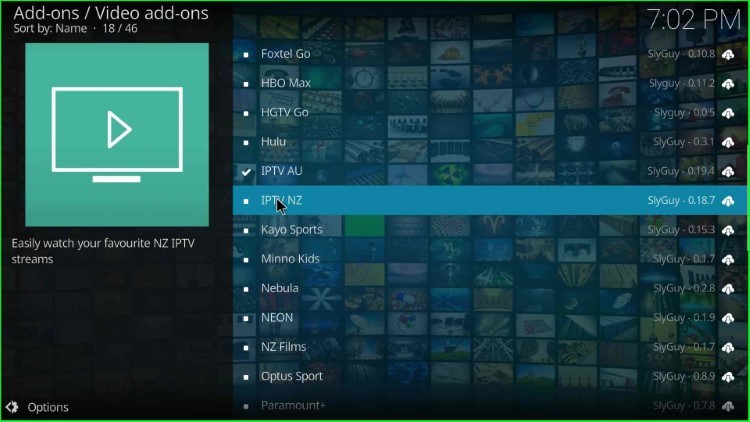
Click on the Video add-ons option from here.

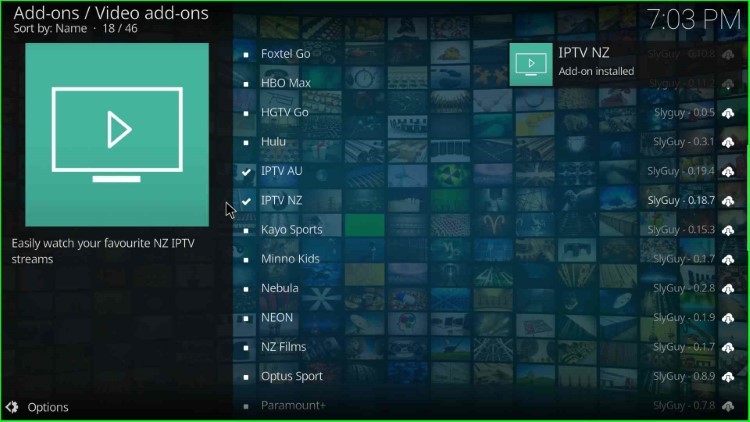
Tap on the IPTV NZ addon.
Press the last key, Install.
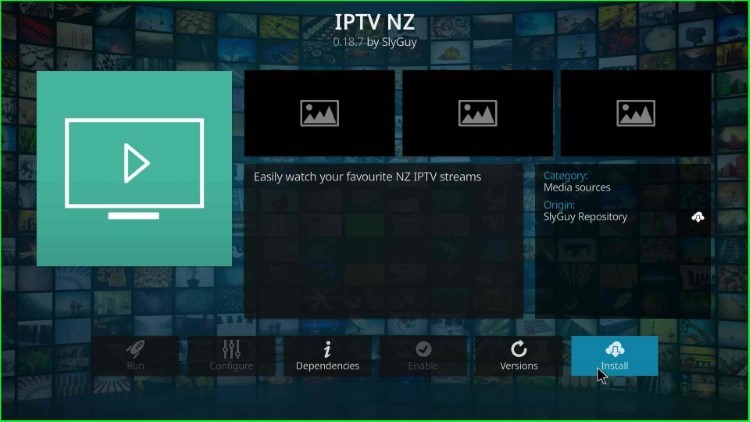
Wait for the installation message IPTV NZ Add-on installed on the Add-ons page.
How to Use IPTV NZ Addon
Let’s know how to use the IPTV NZ addon on Kodi.
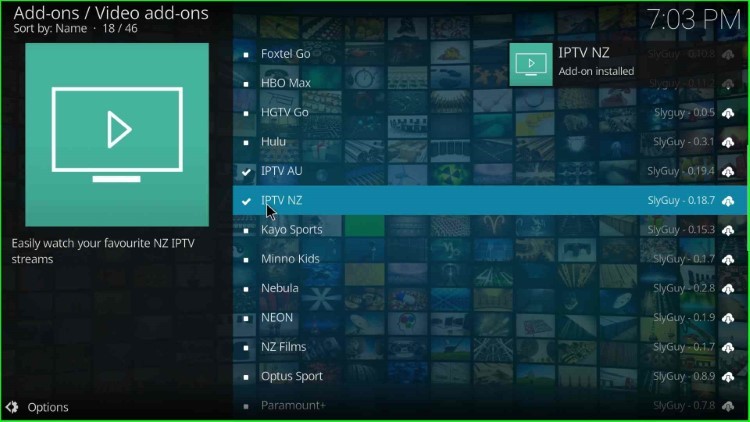
After installing it successfully, click on the IPTV NZ addon.
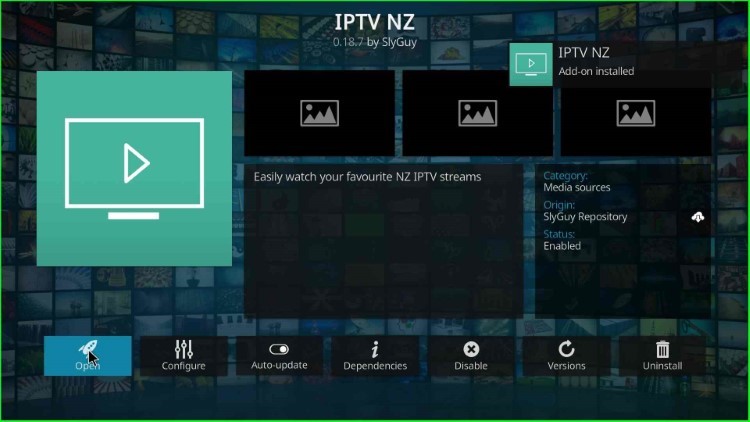
Choose the Open tab.
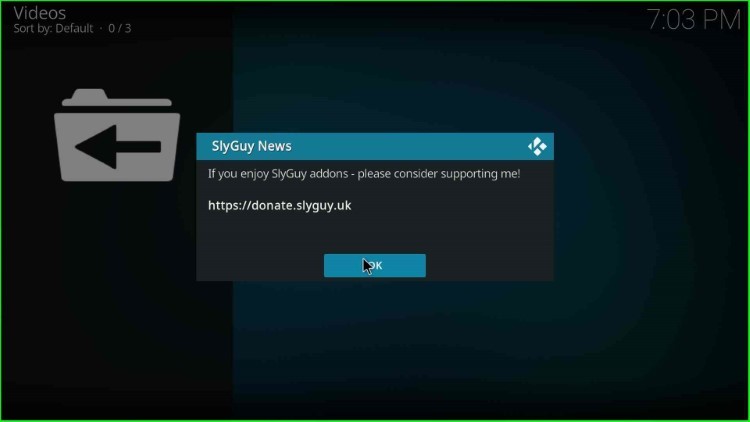
Click OK and move ahead.
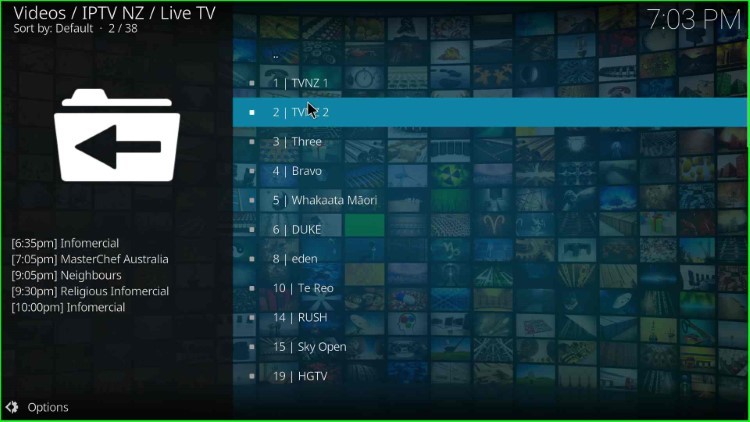
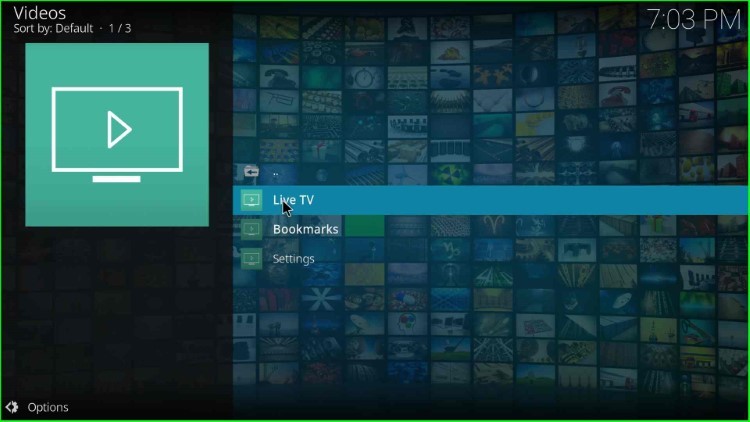
The IPTV NZ dashboard screen appears with a list of different sections. Here, I select Live TV.
Now, choose your desired live TV channel and start watching the shows.