Within the article, we will provide information about how to install Karaoke Free addon on Kodi. These installation processes work on MacOS, Android, iOS, Firestick, Roku, Linux, Chromecast, Apple TV, Raspberry Pi, Smart TV, etc.
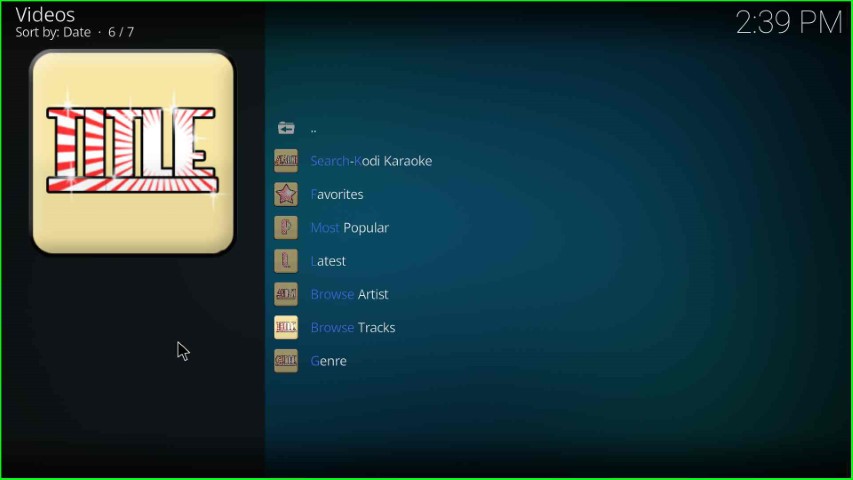
According to its name, the Kodi Karaoke Free addon is an addon that provides free karaoke videos for different music songs. For that, it includes different sections like Most Popular, Search, Latest, Genre, Browse Artist, and Browse Tracks.
Additionally, you can install the addon easily using the well-known Diggz Repository. The notable point about the addon is that all streaming content is from YouTube, so you can enjoy your favorite content without buffering.
Installation Steps
Following are the necessary steps to install the Kodi Karaoke Free Addon on Windows.
Enable Unknown Sources
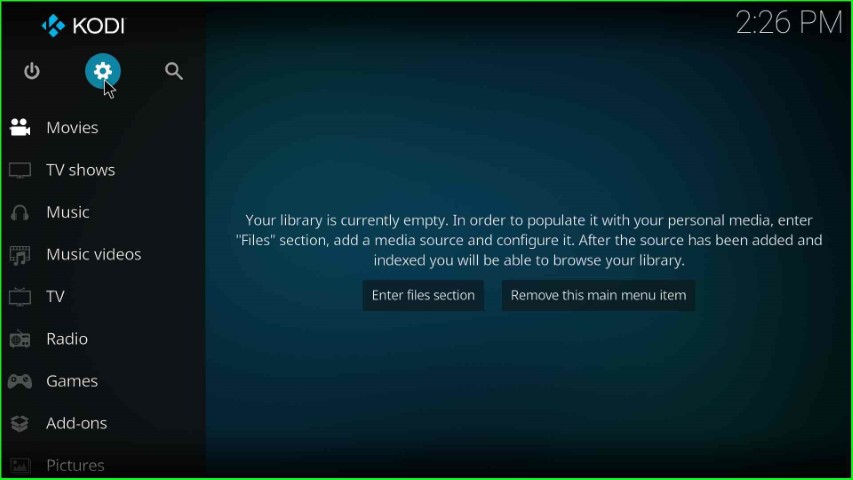
Open the Kodi app and choose the Settings tab.
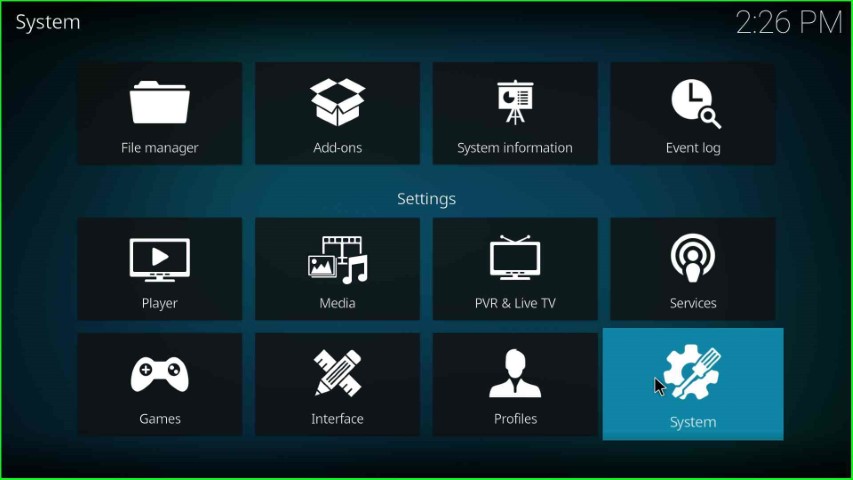
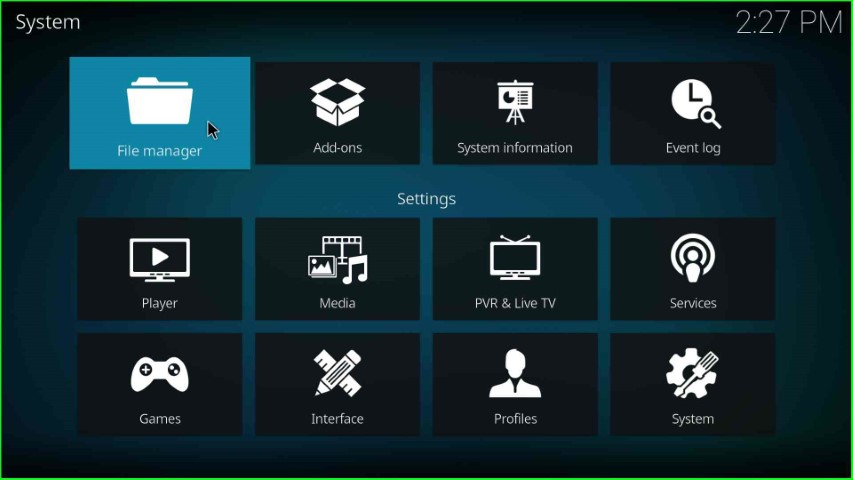
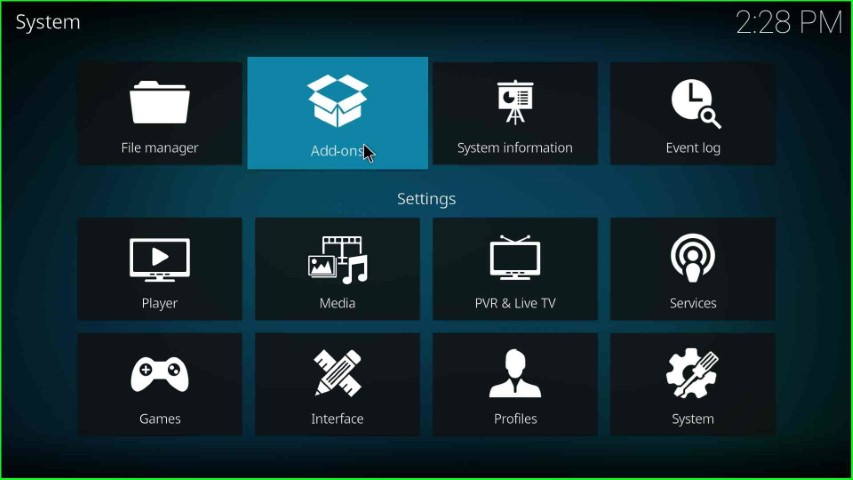
It displays a variety of icons; select the System tab from here.
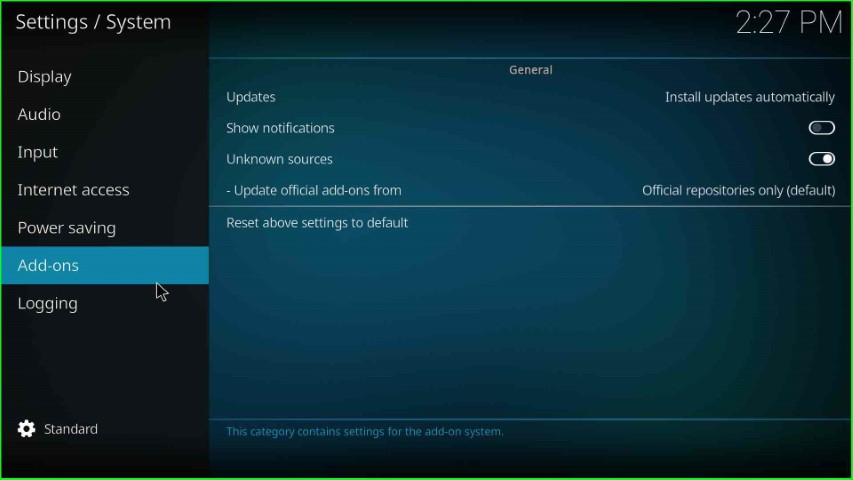
Click on the left-side option, Add-ons.
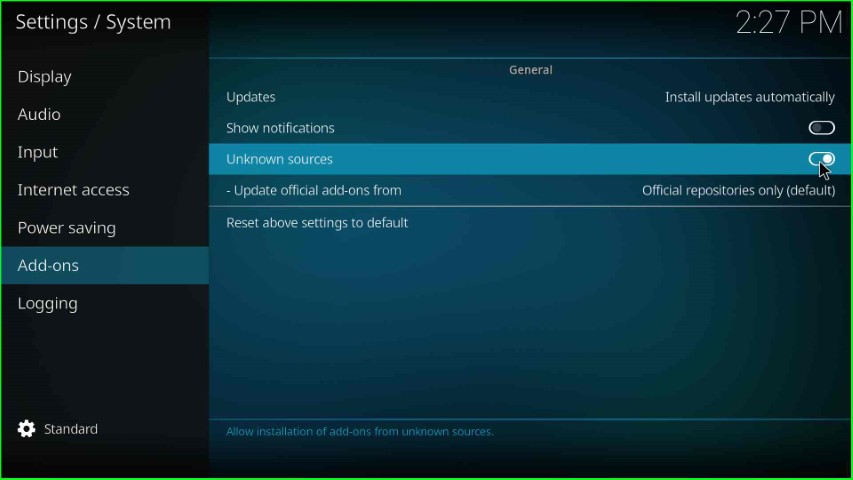
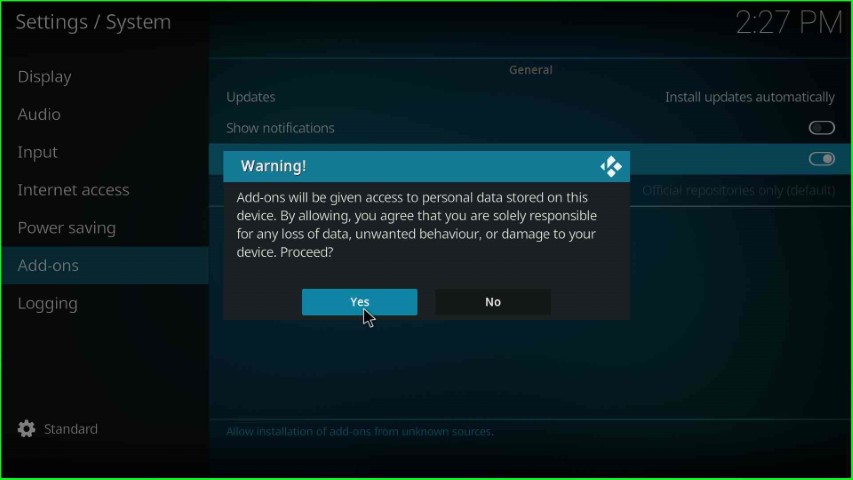
Now, turn on the Unknown sources toggle.
Press the Yes tab that appears in the warning sign.
Add Media Source and Repository URL
Go back and choose the File manager key from the top of the System screen.
Double hit the Add source option.
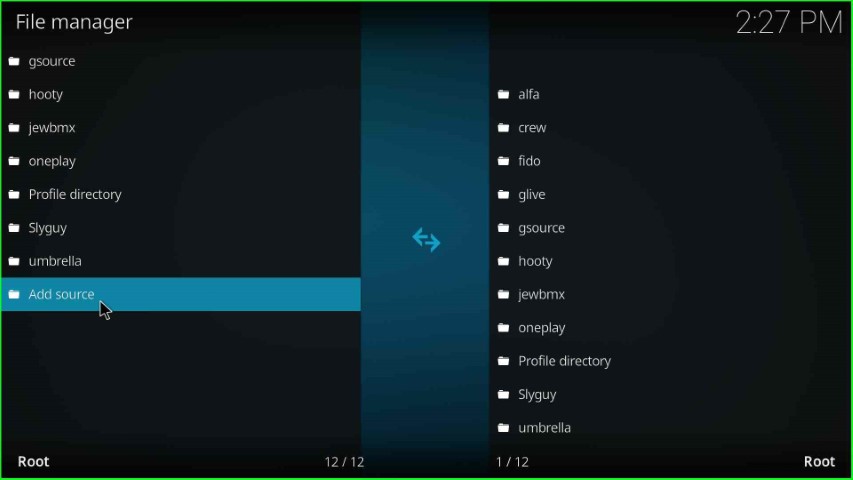
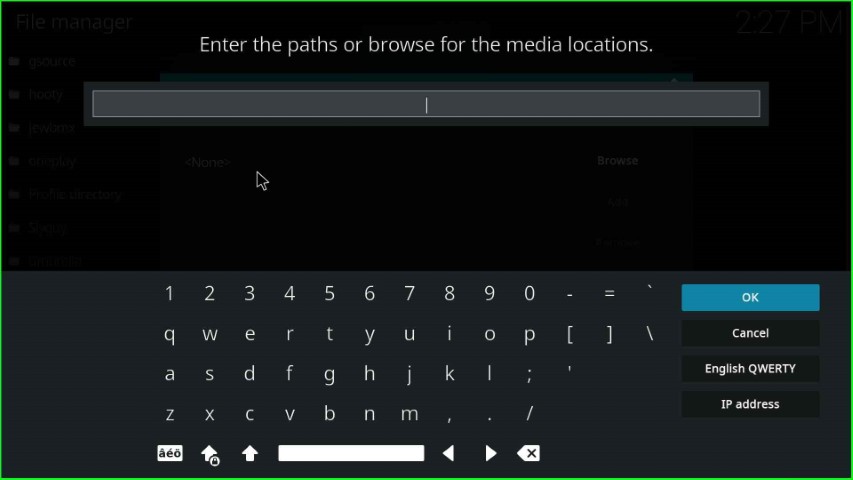
Select the highlighted option, <None>.
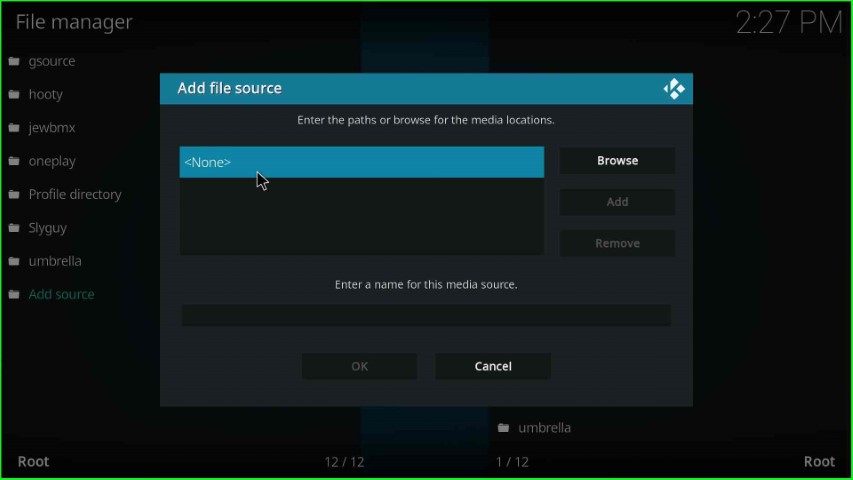
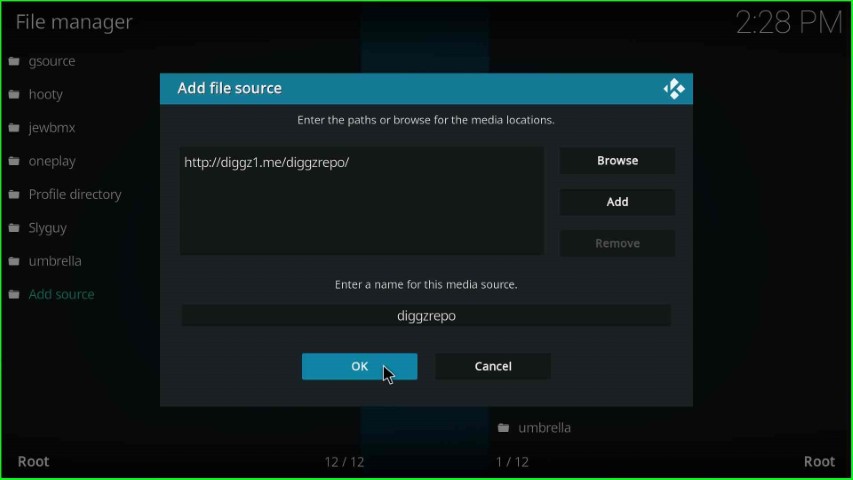
On this page, you need to enter the path for the media repository.
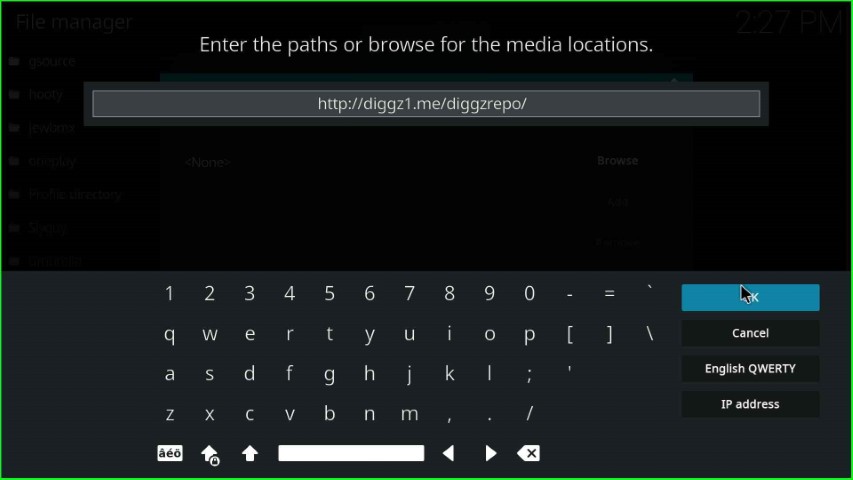
Now, enter the path for the Diggz Repository as http://diggz1.me/diggzrepo/ and choose the OK key.
Scroll down and click on the by-default media source name, diggzrepo.
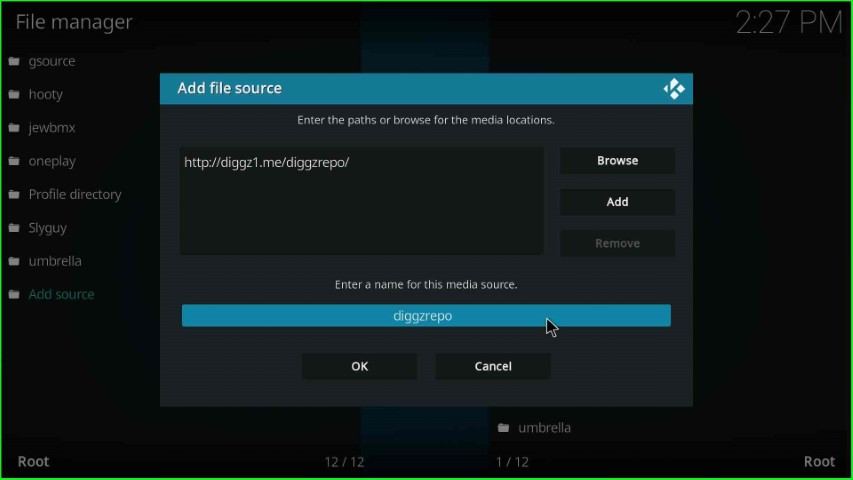
Remain with the source name the same, i.e., diggzrepo, and press the OK sign.
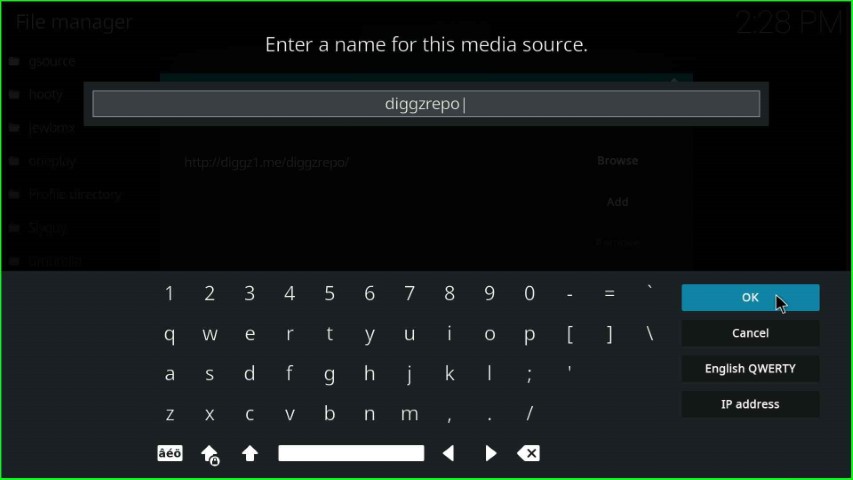
Check both the media path and name once, and click on the OK toggle.
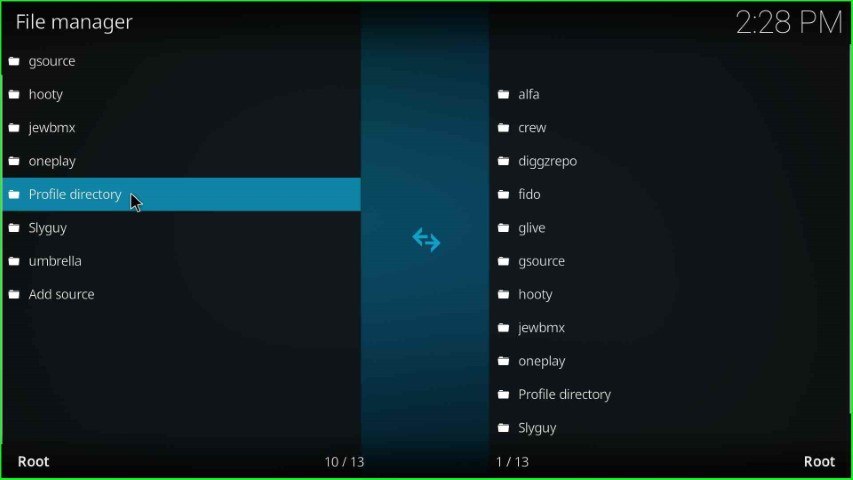
diggzrepo source saved on the File manager screen.
Install from Zip File
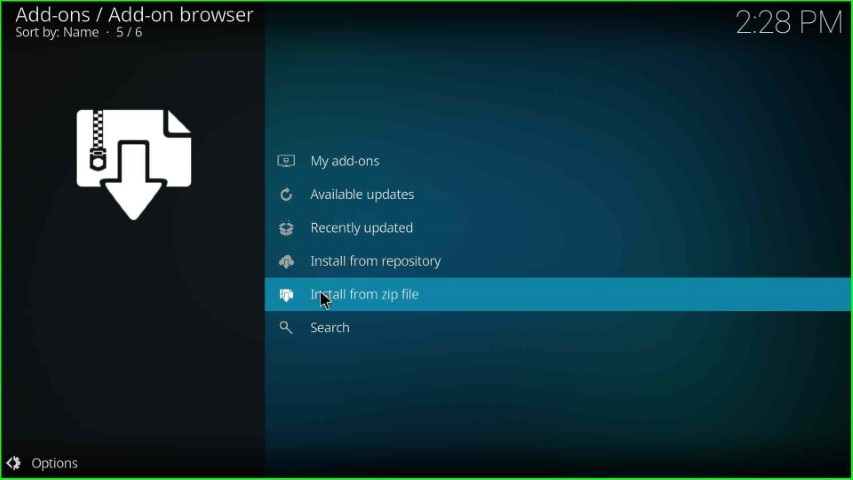
Go back to the System tab and choose the second option, Add-ons.
Tap on the option Install from zip file.
Select the repo source, diggzrepo.
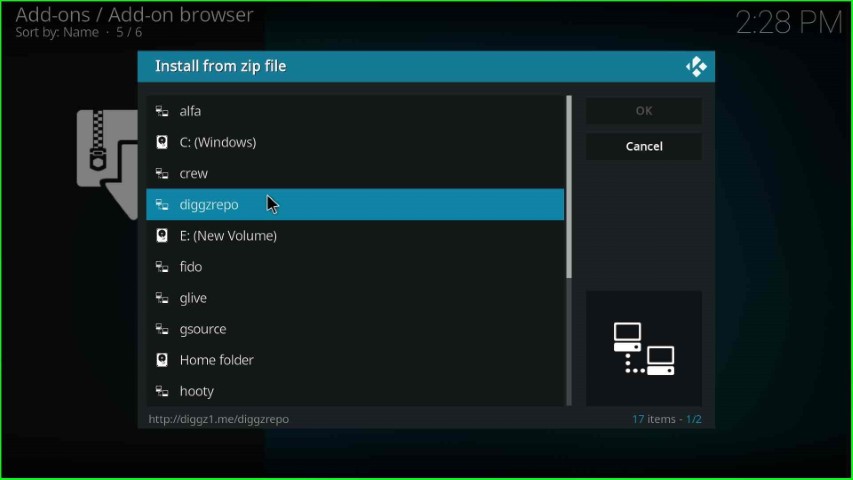
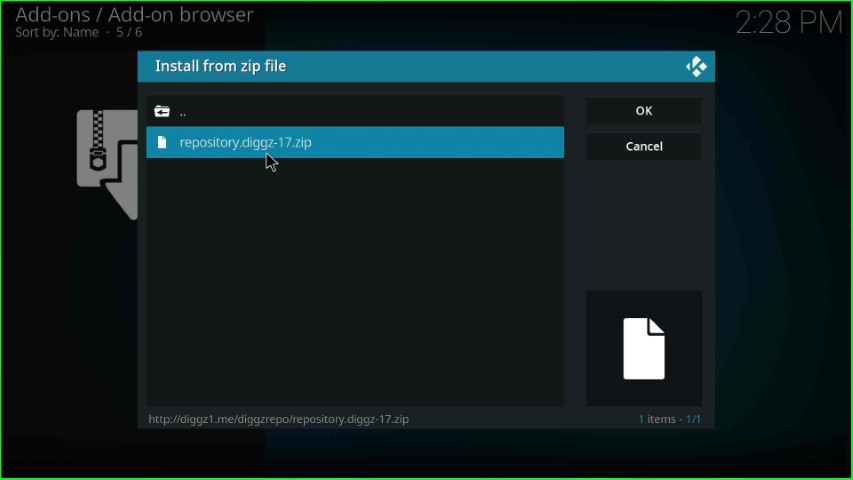
Hit the repository.diggz-x.zip file.
Install from Repository
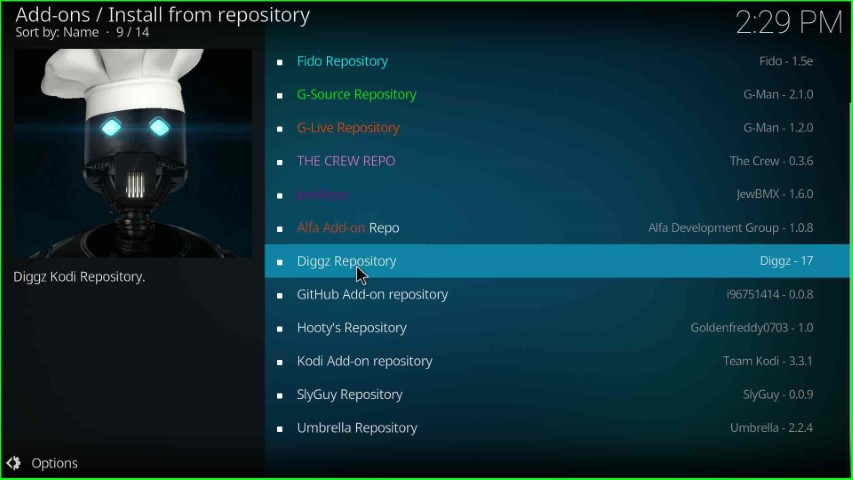
Wait for the installation of Diggz Repository, and after that, click on the Install from repository tab.

Scroll down the page and choose the Diggz Repository.
Install Kodi Karaoke Free Addon
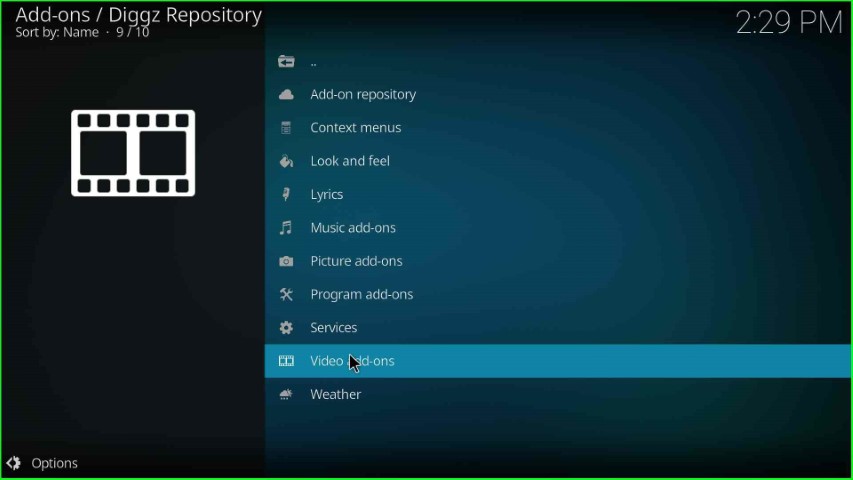
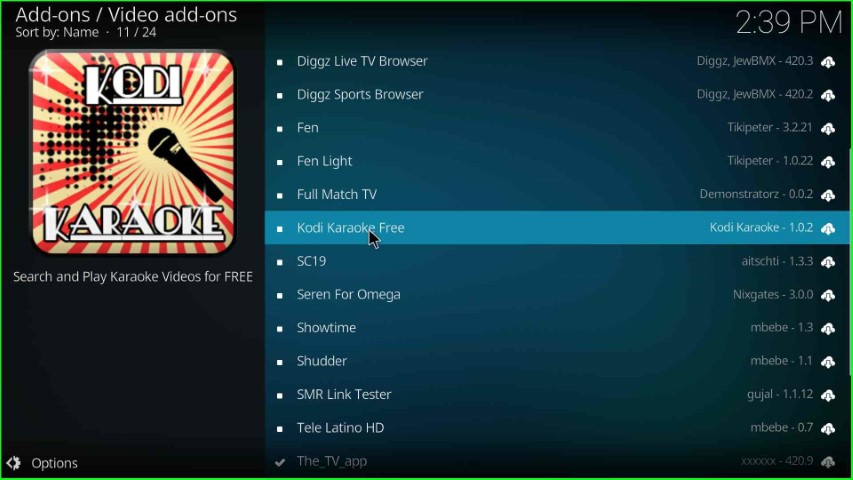
Here, select Video add-ons.
Choose Kodi Karaoke Free from the list of addons.
Hit the Install tab.
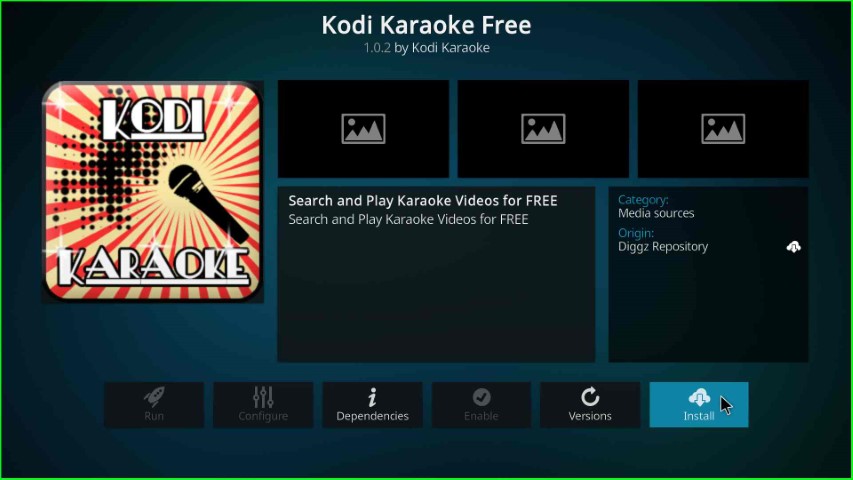
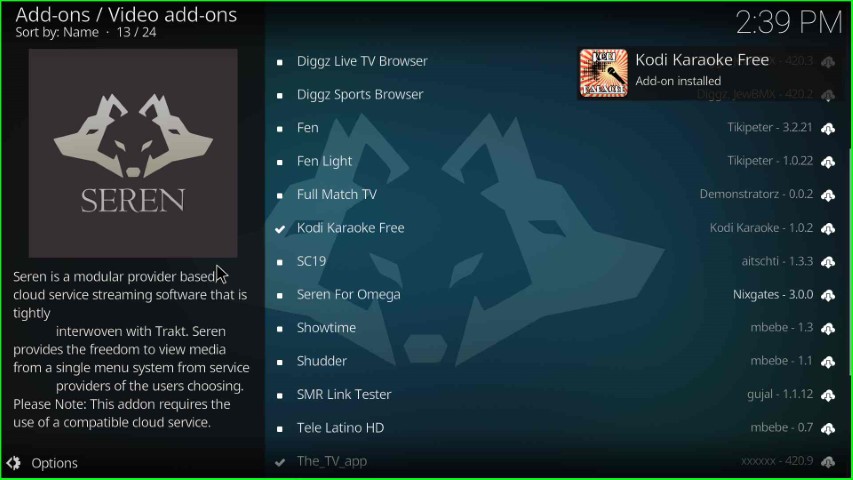
Wait until you see the message Kodi Karaoke Free Add-on installed on the page.
Launch Kodi Karaoke Free Addon
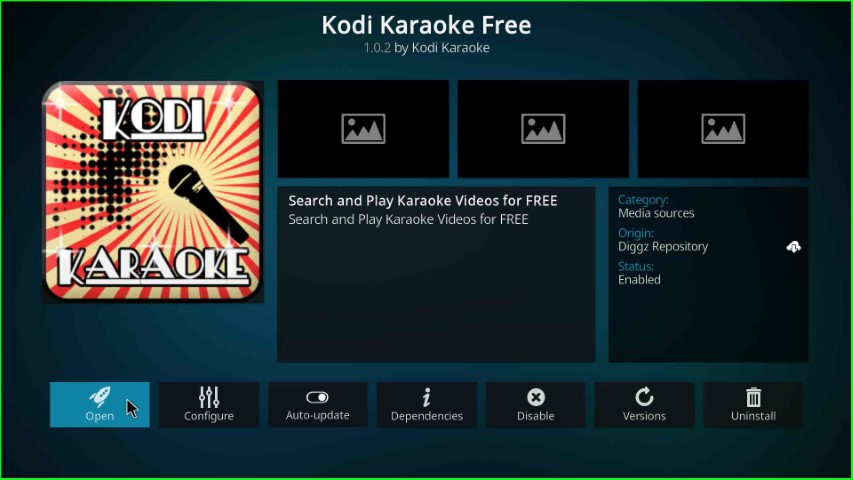
After installation, tap on the Kodi Karaoke Free addon.

Now, choose the Open button.
Kodi Karaoke Free screen appears with options like latest, favorites, most popular, genres, browse artist, etc.
Final Words
Overall, we have mentioned all the necessary steps to install the Kodi Karaoke addon on Kodi. So, go ahead with the installation steps on your device and share your experience in the below section box.
