In this post, I will discuss POVico Kodi Build, installation steps, and how to use it on Firestick, Firestick Lite, Max, Pro, Android, Roku, iOS, Apple TV, Mac, Linux, etc.
POVico is a lightweight Kodi Build for streaming every type of Movie and TV Show in high streaming quality. It allows to stream lots of content categories like Sports, Live TV, Movies, TV Series, etc. The Build belongs to the 7o9 Kodi Wizard.
Some of the popular POVico add-ons are Mad Titan Sports, DaddyLive, The Loop, The Crew, LiveNet, and SportHD.
Following are the steps to install the POVico Kodi Build.
Installation Steps
Step 1 – Enable Unknown sources
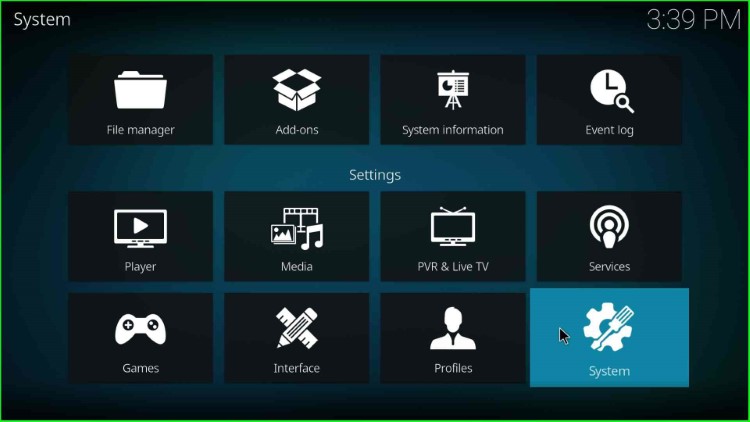
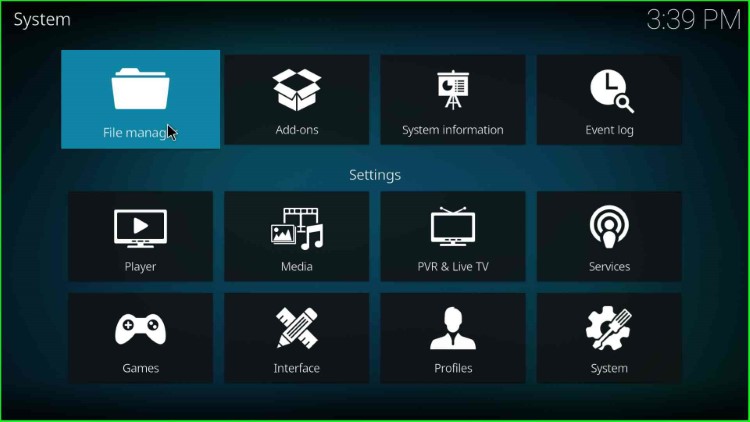
Click on Kodi and tap on the Settings icon.
Hit the last tab, System.
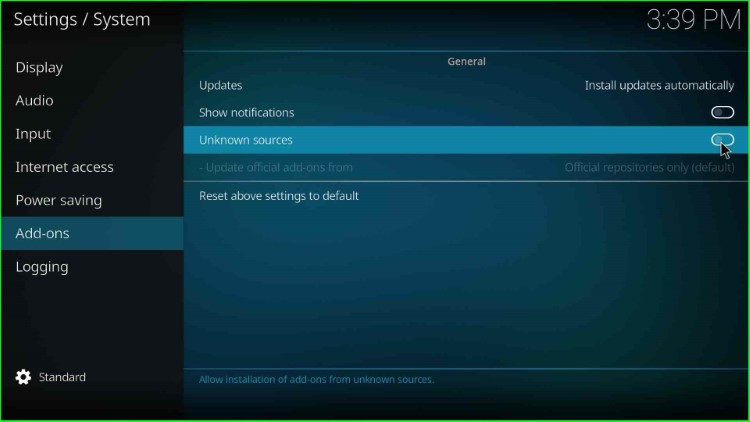
Choose the Addons key and enable the Unknown sources option.
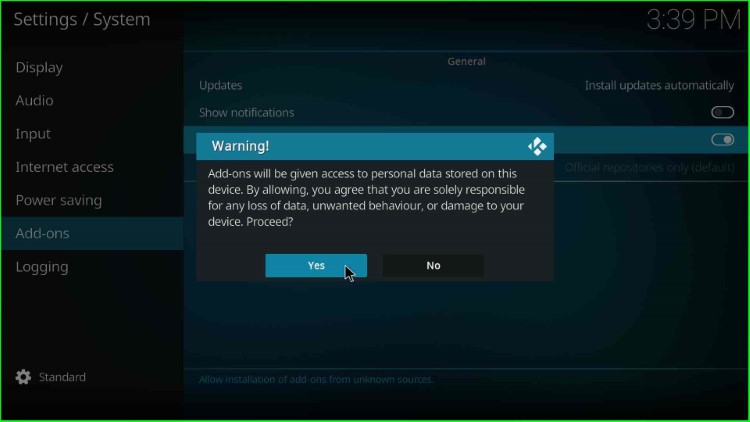
Tap Yes to allow access to an unknown Build.
Step 2 – Add Media Source and Repository
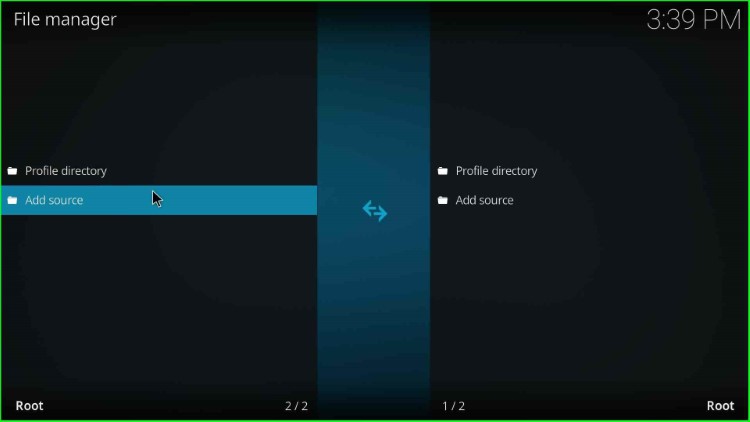
Go back to the Settings page and choose the File Manager.
Select the Add source tab.
Choose <None>.
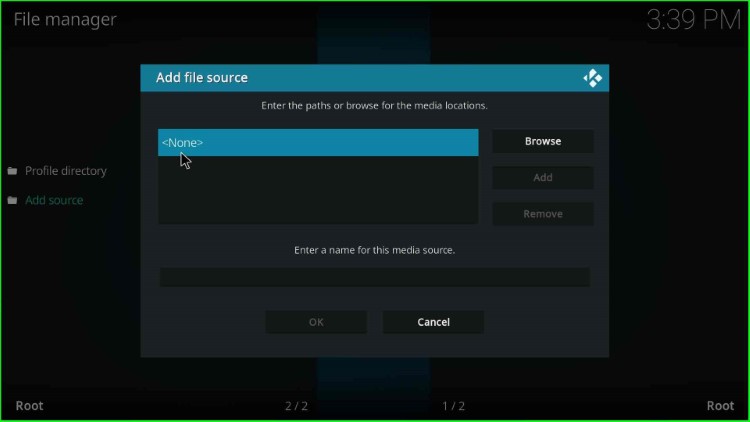
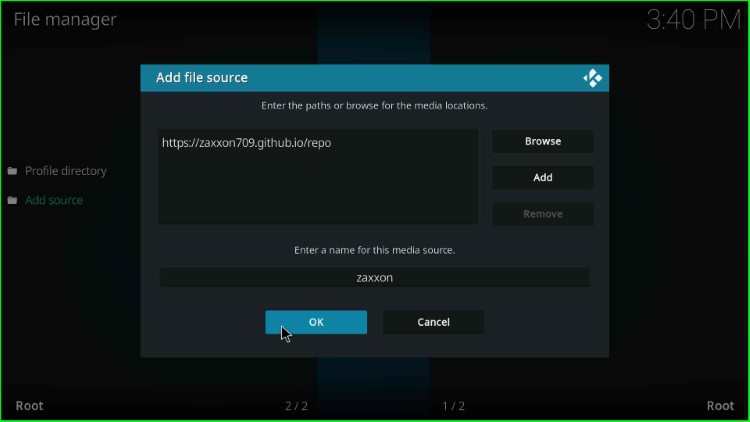
Type the official URL as https://zaxxon709.github.io/repo and hit the OK button.

Click on Enter a name for this media source and enter a new name here.
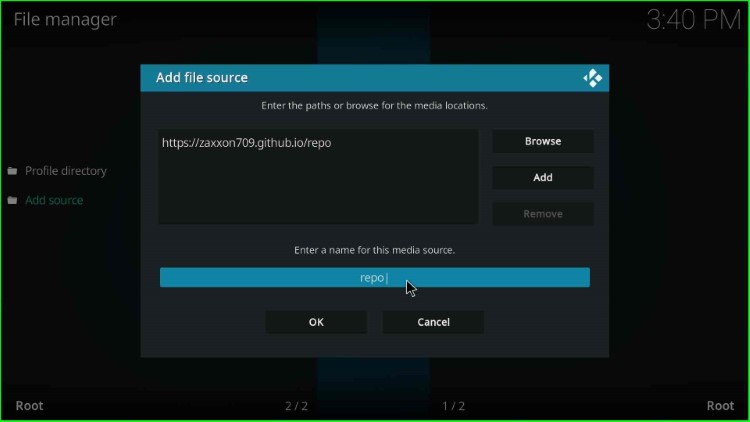
Now, give the media source name as zaxxon and press the OK key.

Check both the entered repository URL and media source again, and tap on the OK key.
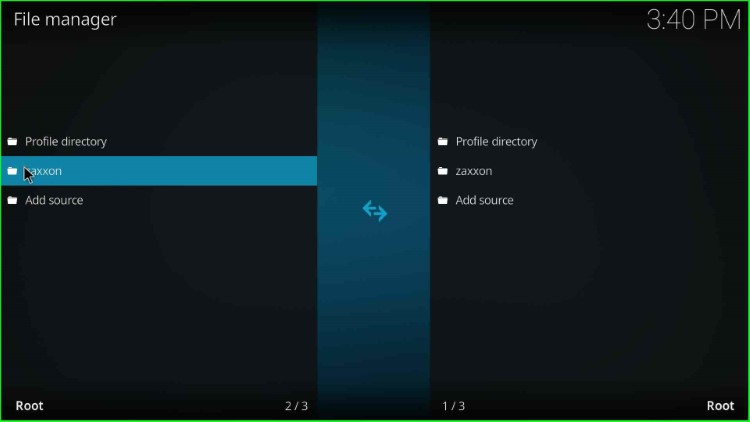
Here, you can see the media source, zaxxon.
Step 3 – Install from Zip File
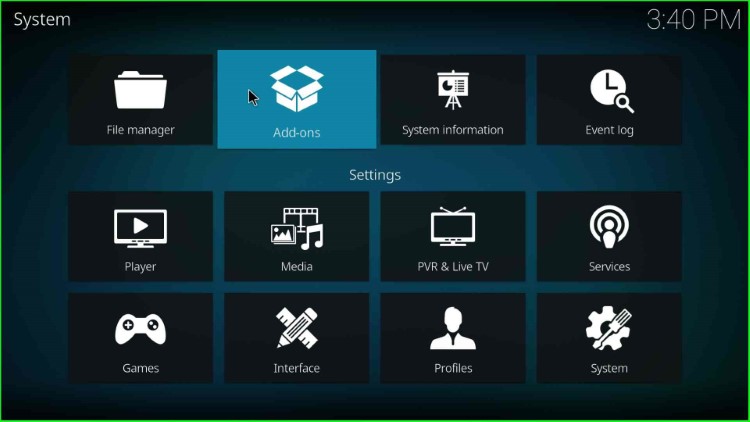
Go back to the Settings tab and hit the Addons option.
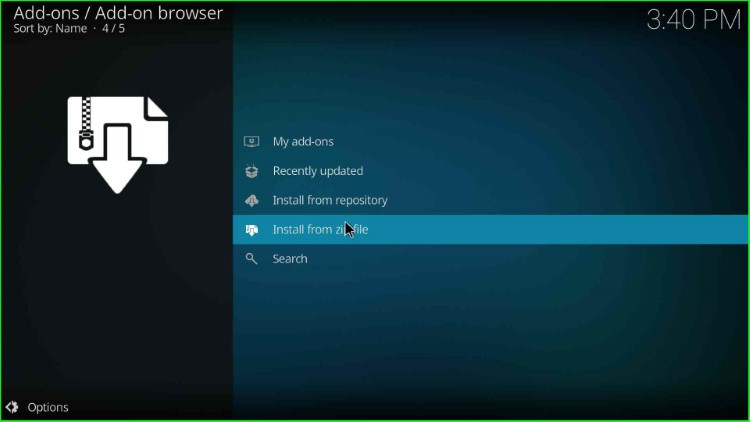
Select the Install from zip file.
Choose the media source, zaxxon.
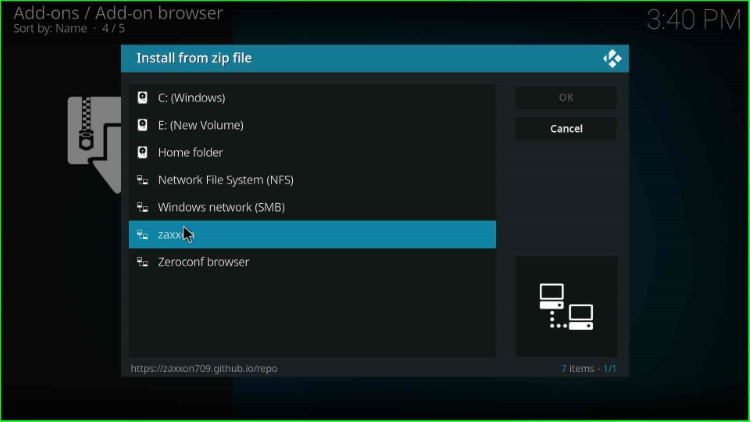
Tap on the repository.709-x.x.Nexus.zip file.
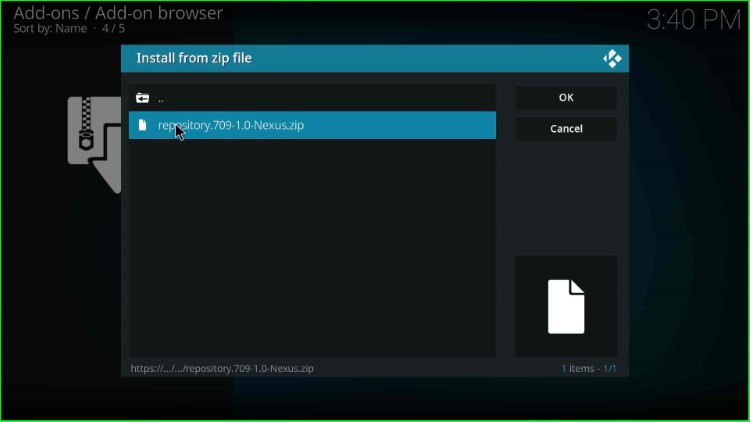
Wait until you see the “The709 Repo Add-on installed” notification on the Addons page.
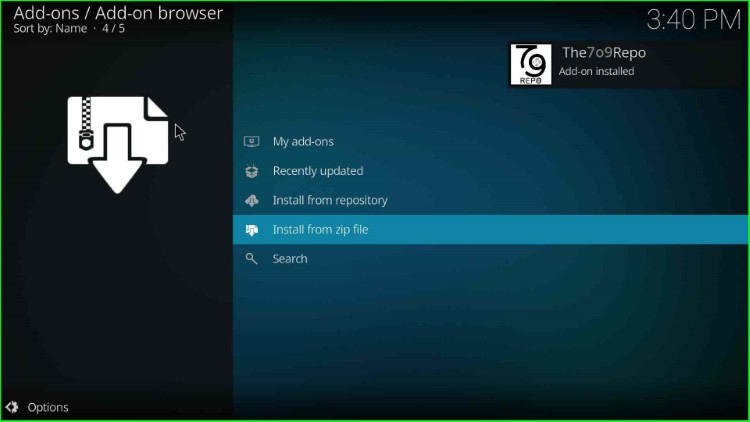
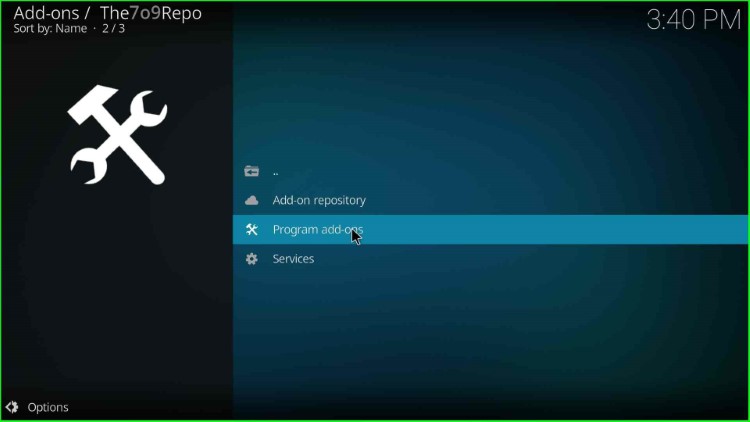
Step 4 – Install from Repository
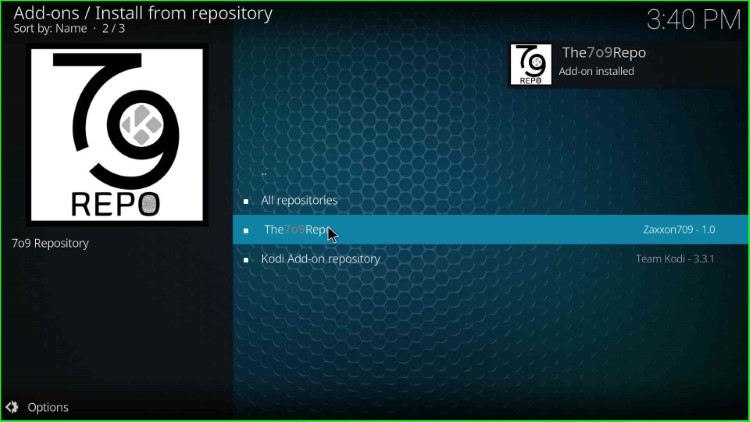
Click on Install from repository.

Tap on The709 Repo.
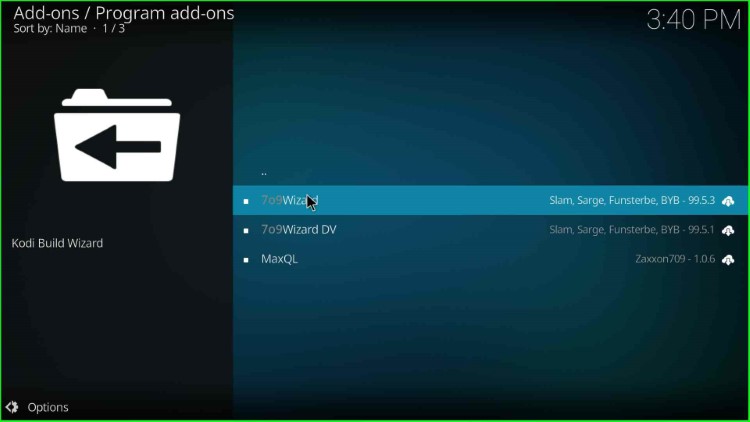
Step 5 – Install 709 Wizard
Select the second option, Program addons.
Choose the 709 Wizard.
Hit the Install key.
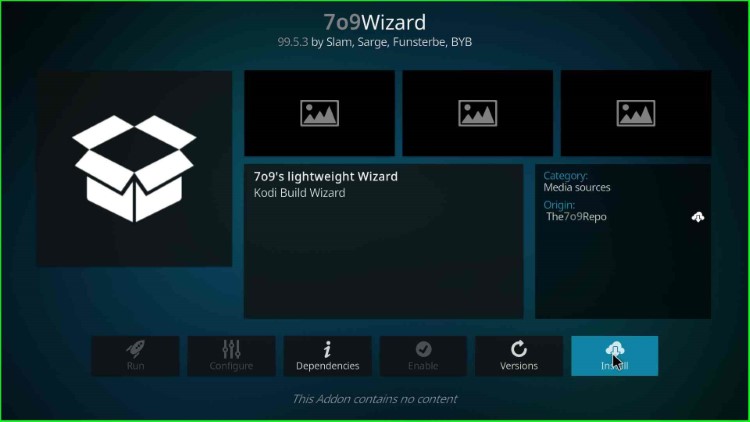
Wait for the 709 Wizard installation message.
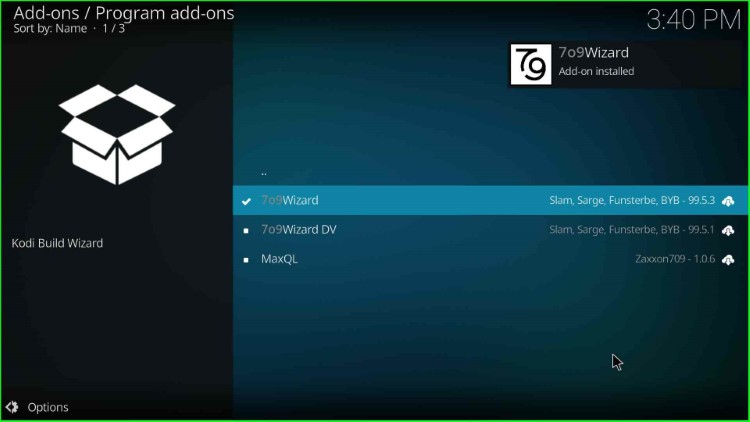
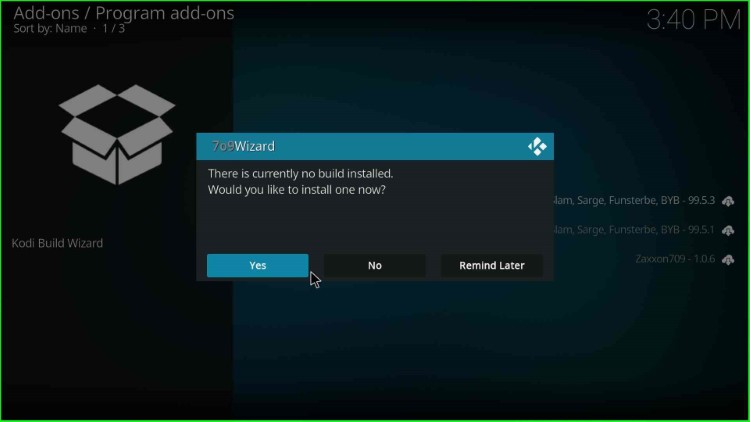
Click on the Close key.
Choose the Yes key to install Build.
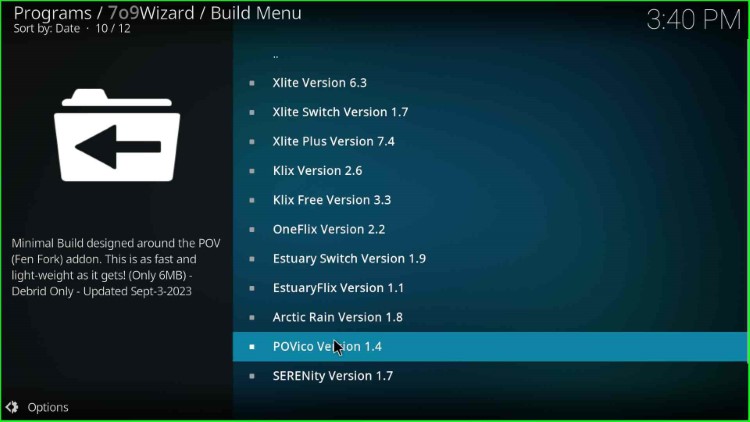
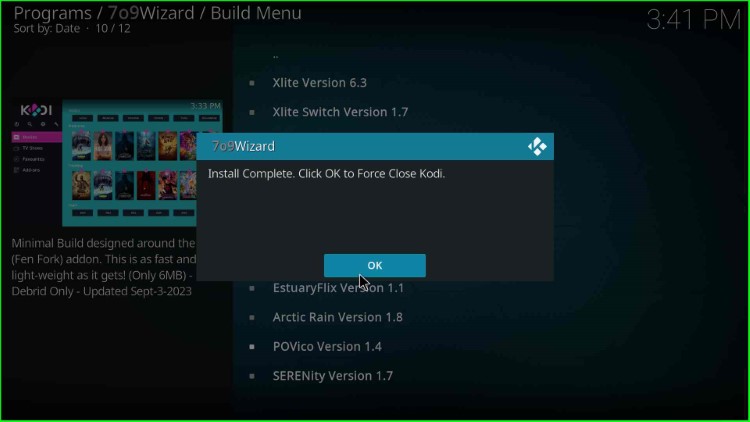
Step 6 – Install POVico Kodi Build
Here, select the second last Build, POVico Version.
Choose the Continue button.
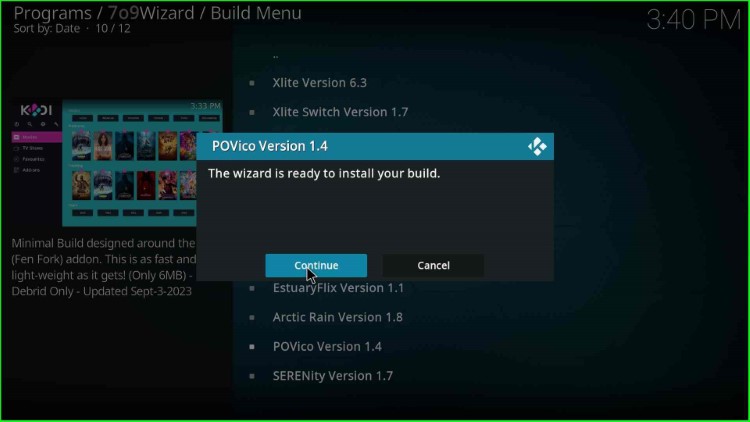
Wait for some time to complete the Build installation. After that, click OK to save the changes in Kodi.
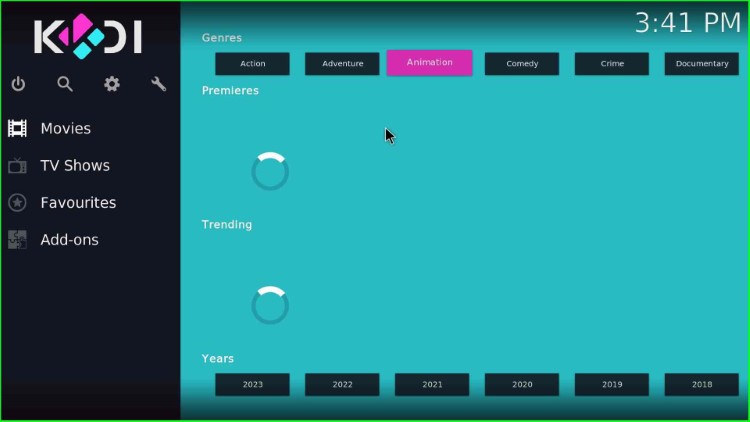
Open Kodi and stream your desired content on POVico Build.
Final Words
Finally, we have installed POVico Build on Kodi step by step. So, try to install the POVico Build using the above steps and freely ask if you get stuck anywhere during the installation process.