Steam Kodi Build is a popular Kodi and works with Kodi. I will show you how to install and use Steam Build on Kodi. Installation steps mentioned here will work on all platforms like Firestick, 4K Max, Lite, FireTV Cube, Chromecast, Android, iOS, and Linux.
It is a third-party Kodi Build that belongs to the Crew Wizard Repository. Moreover, it is a lightweight Kodi Build that has a size of around 300MB. This Build is popular because it has everything that you need on a perfect Build, for example, it has many popular add-ons like Wasteland, The Boys, Chains, and Ghosts.
Following are the steps to install Steam Build on Kodi.
Enable Unknown sources
Go to the Kodi Home page and click the cog icon, Settings.

Choose the System icon.

Tap on the Add-ons option.

Slide right to the Unknown sources button.
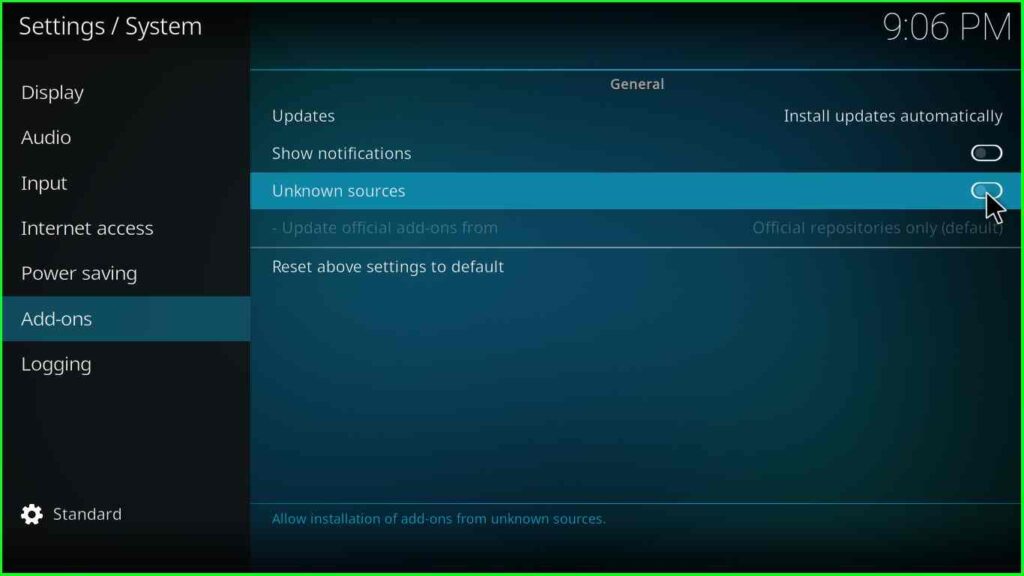
Click Yes appears in the warning box, and move ahead.

Add Media Source and Repository
Return to the System page and open the File manager tab.

Tap on the Add source option available on the File manager screen.
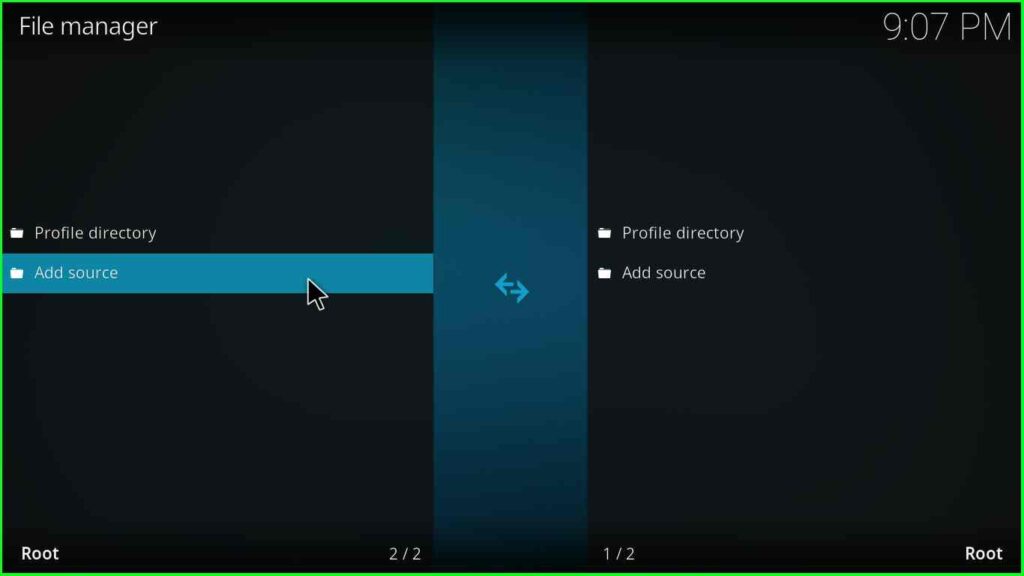
Hit the <None> tab to enter the path for the media location.

Enter the path URL: https://team-crew.github.io.

Here, enter a new name for the media source.

Enter the name of the media source as steam.
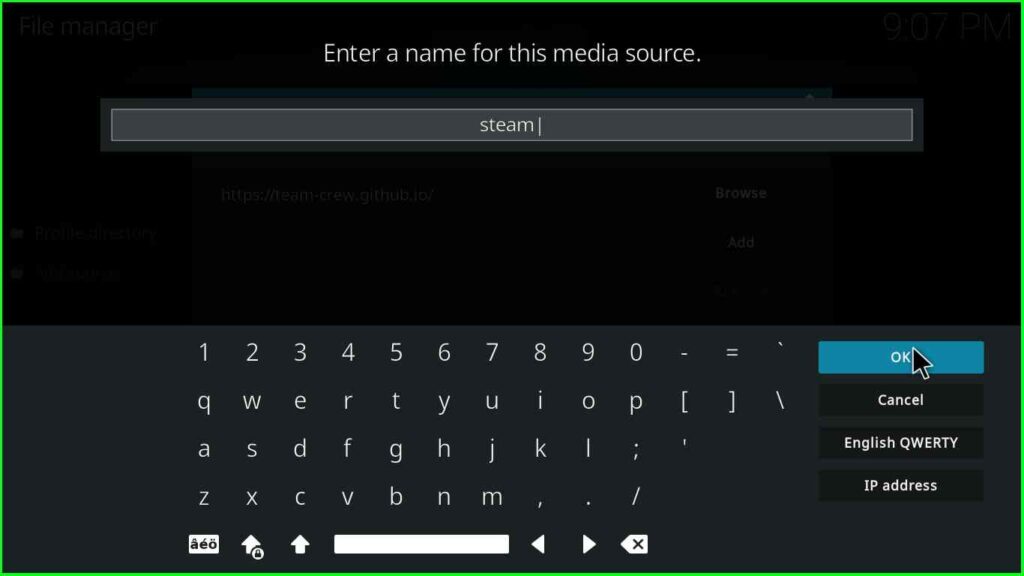
Confirm the details you entered and save the OK button.

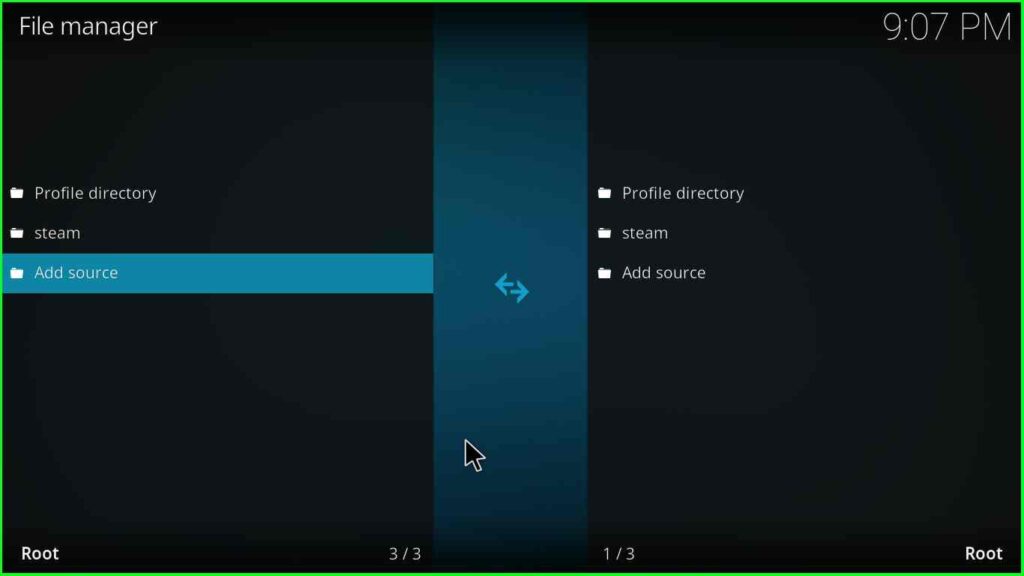
steam source is successfully saved on the File manager page.
Install from Zip File
Choose the second icon Add-ons after adding the source for the media repository.

Here, select Install from zip file.
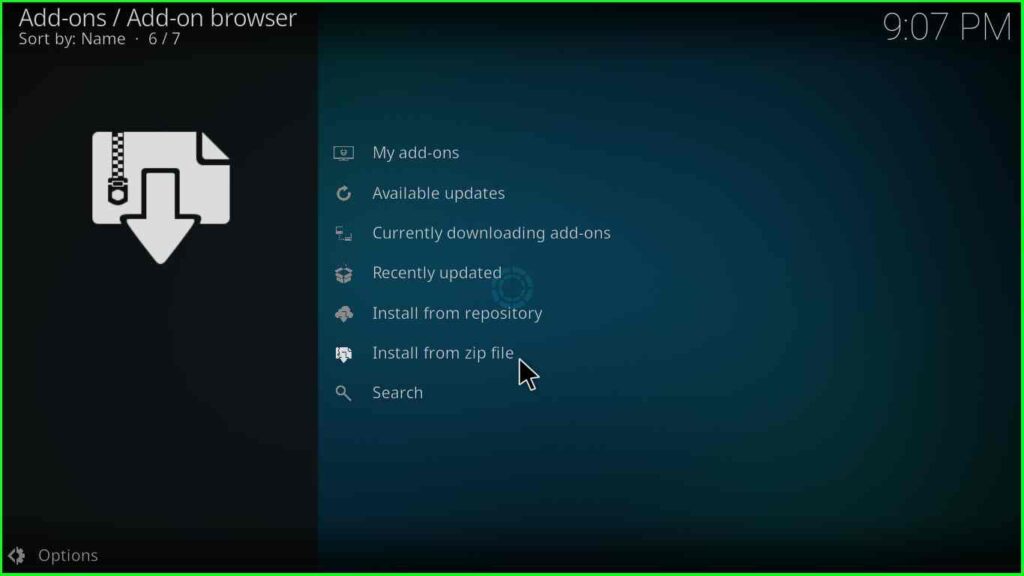
Choose the media source steam.
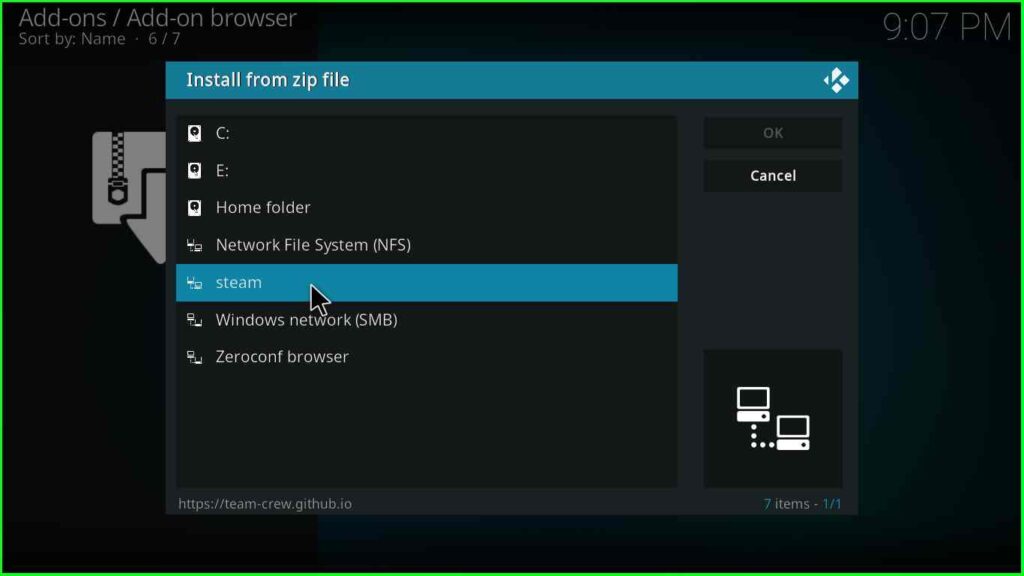
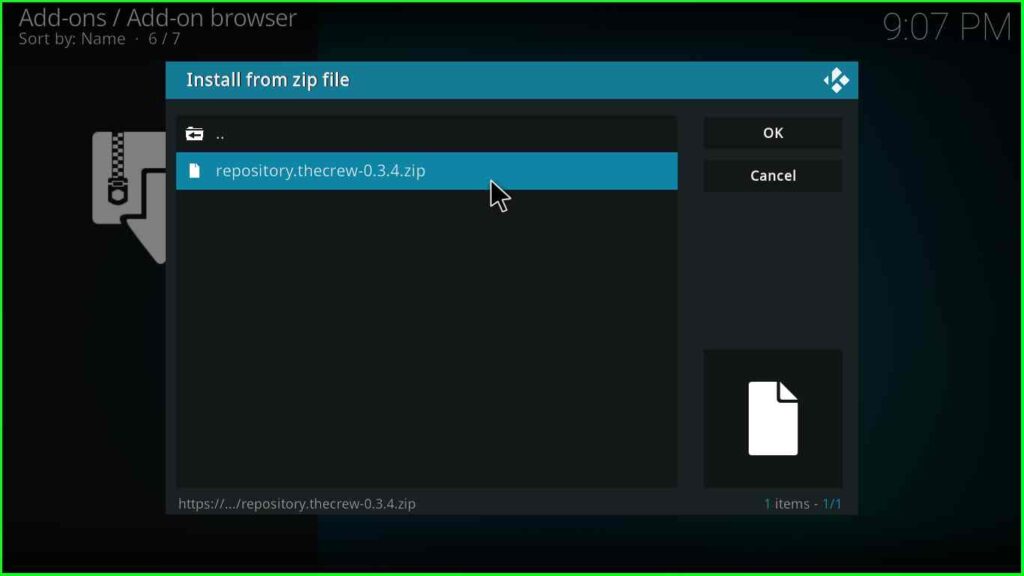
Select the repository.thecrew-x.x.zip file.
Wait for The Crew repo installation, and after that, select Install from repository.
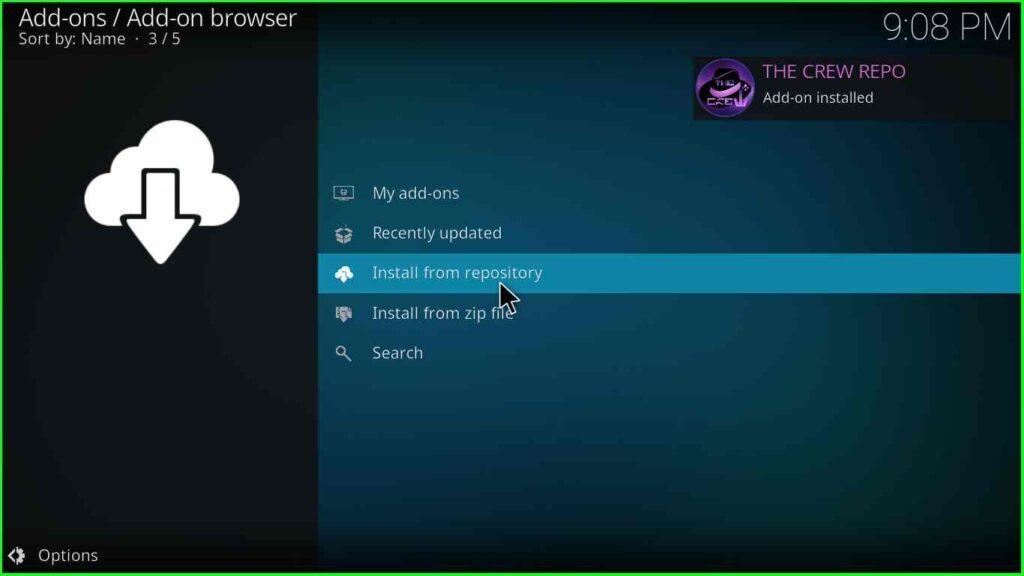
Now, choose The Crew Repo.

Choose the Program add-ons located just after the Music add-ons.

Select the Chains Build Wizard.

Hit the Install key.

Click OK available on the prompt screen.
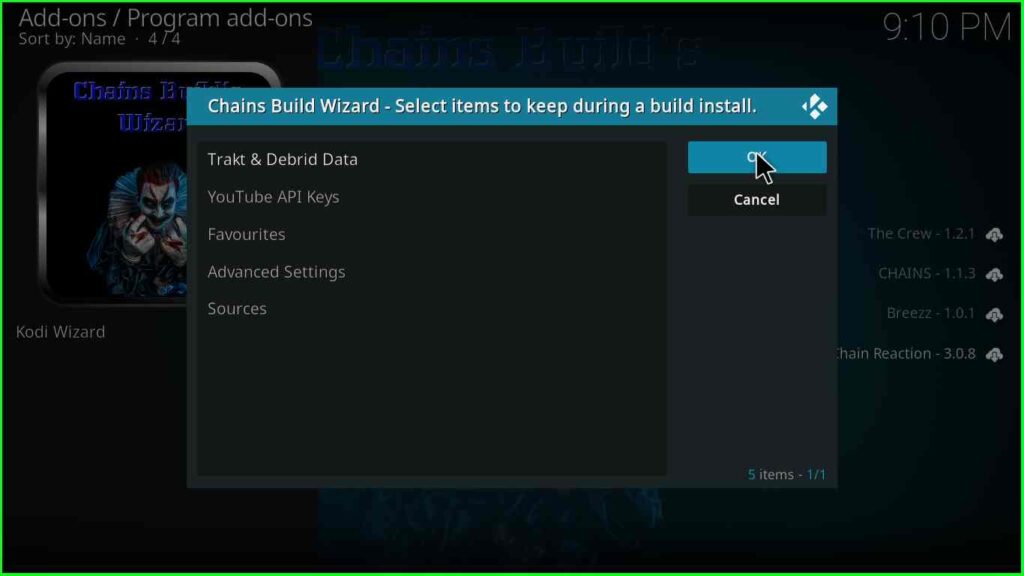
Select the Chains Build Wizard.
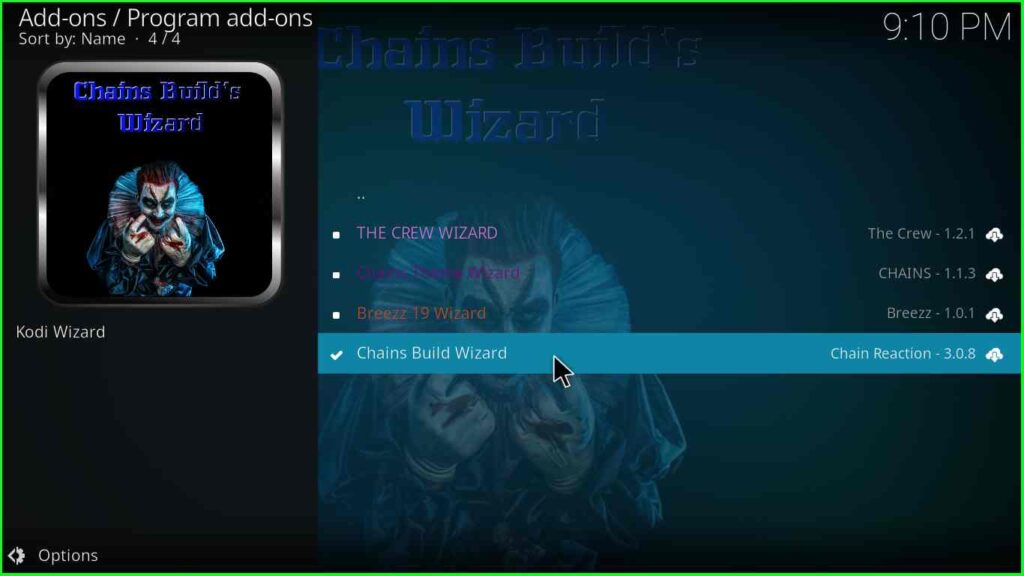
Wait for the installation of the Chains Build Wizard and select the Open button.

Inside it, click on the Build Menu.

Select the Steam Version x.x.

Click on the Continue key to install the Build.
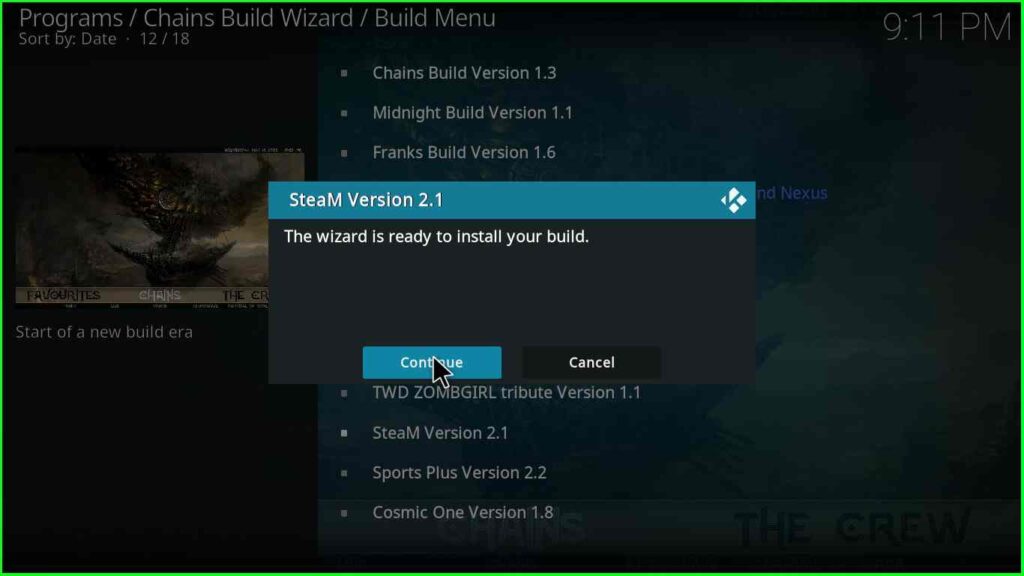
Thereafter, wait for the installation of the Steam Kodi Build and enjoy the streaming content.
Final Words
Finally, we have discussed everything about Steam Kodi Build that you need to know. Follow the steps and screenshots mentioned above and share the experience with us through the comment section below.