This post will teach you the basic steps to install the Thunder addon on Kodi. Thunder is the Spanish video addon that is available on the OnePlay repository. Here you can find various categories, i.e., movies, live TV, TV shows, tools, and anime. Although the add-on provides content in Spanish and Portuguese, it also offers subtitles in many languages.
Moreover, there are various alternatives to the Thunder addon like Resolvedor, DORAMAS, Rumble, IPTV Premium, Animes Play, Tube Music, etc.
Installation Steps
Enables Unknown Sources
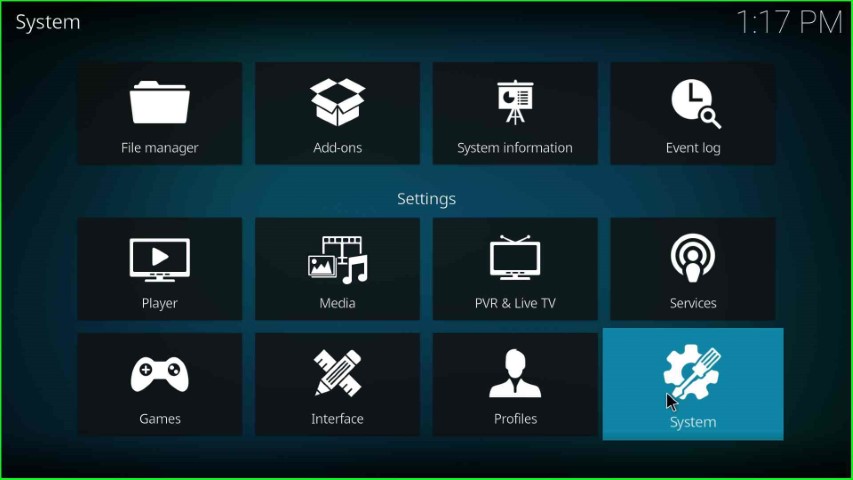
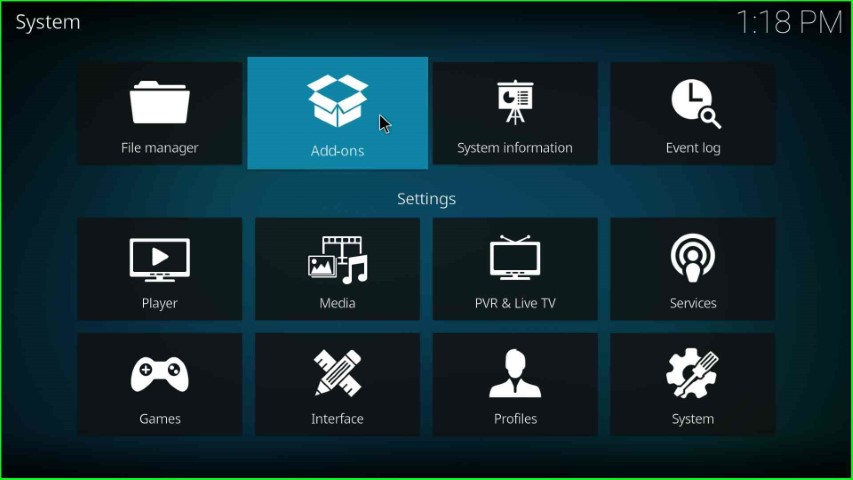
Tap on the Settings icon as shown on the Kodi Home screen.

Choose the System sign from the group of icons.
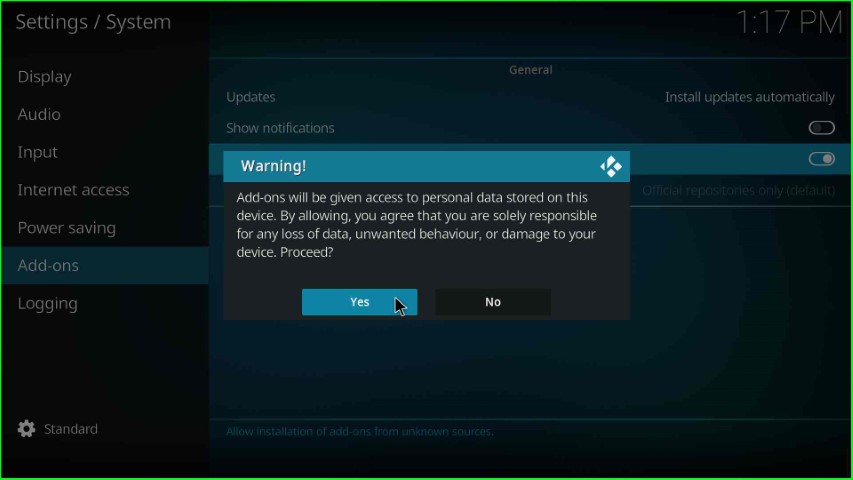
Choose the Add-ons tab and turn on Unknown sources mode.

Tap on the Yes button displayed in the warning popup.
Add Media Source and Repository URL
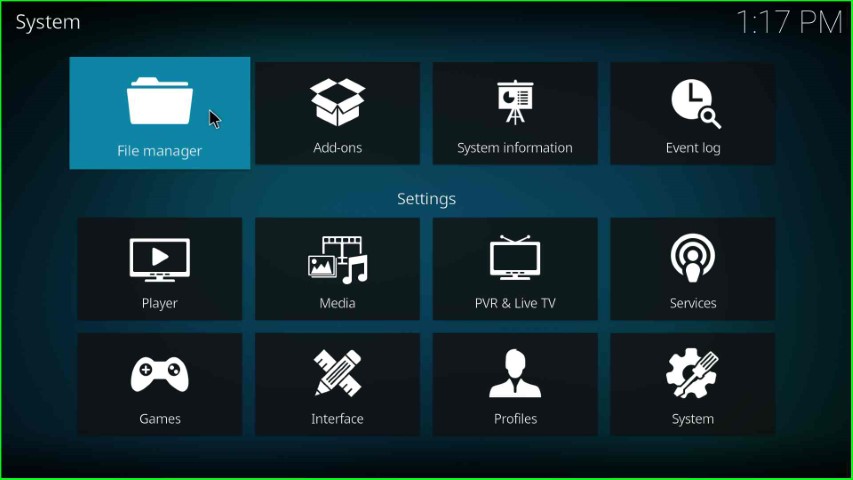
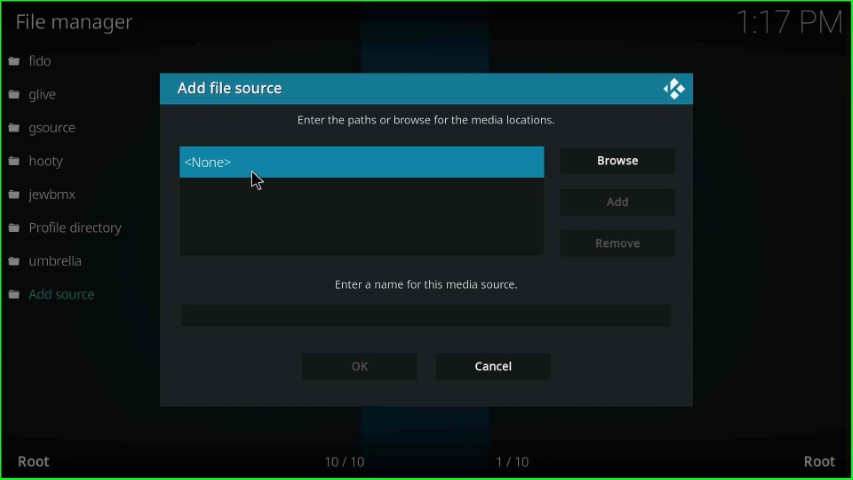
Click on the first icon, File manager.
Tap on the Add source option to add a new media source.
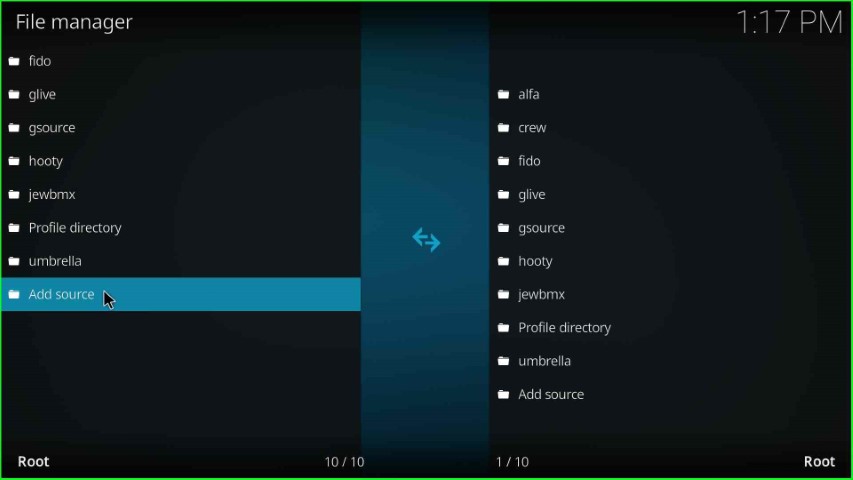
Click on the <None> tab to enter a new media path.
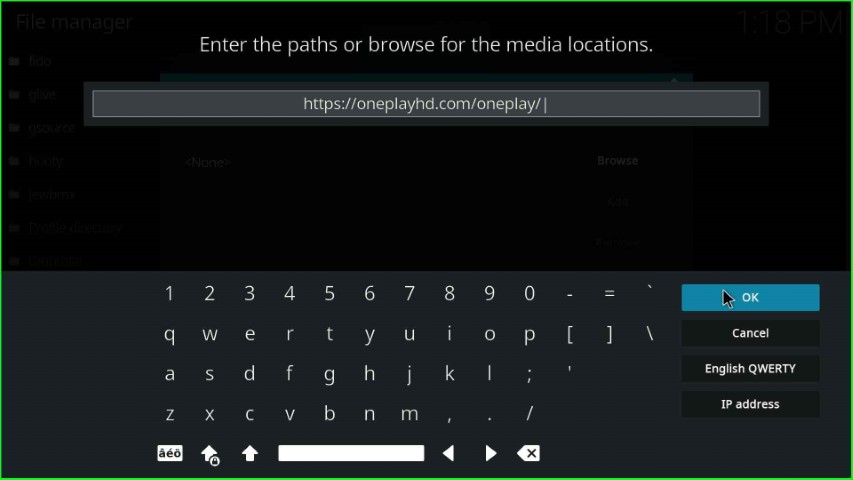
After clicking None, you are redirected to the path location page.

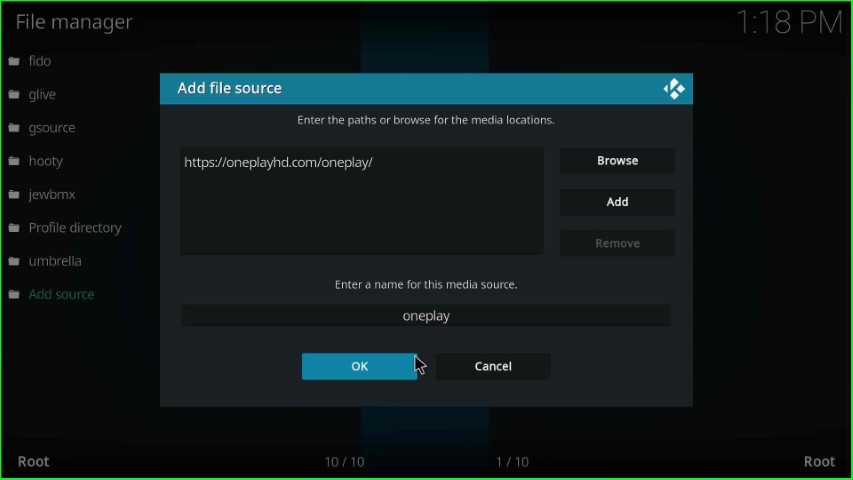
Here, enter the media URL for the repository as https://oneplayhd.com/oneplay/ and press the OK toggle.
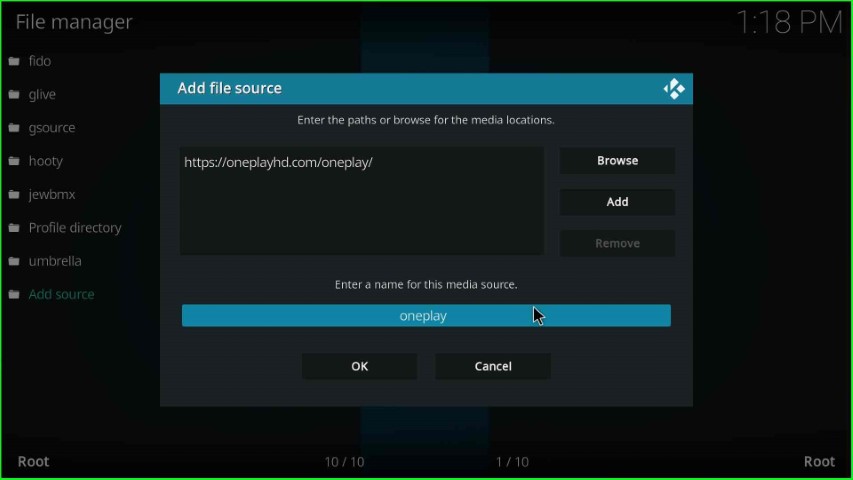
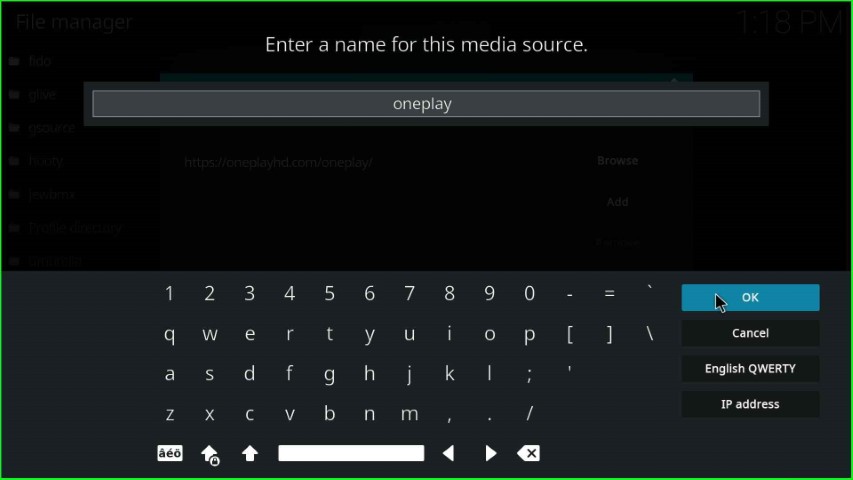
Now, click on the media source name, oneplay.
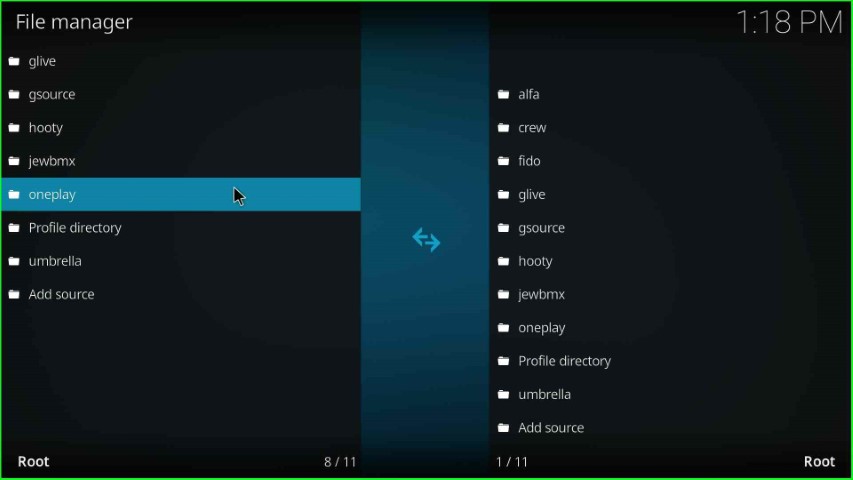
Remain with the source name as it is and hit the OK key.
Check the entered OnePlay repository URL and source name again, and click on the OK sign.
The oneplay media source was successfully saved in File manager.
Install from Zip File
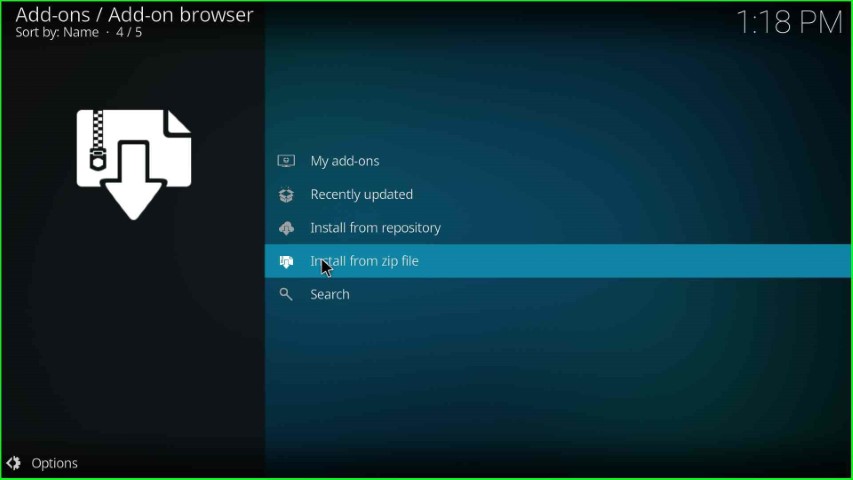
After adding the source, go back and choose the next option, Add-ons.
Tap on the Install from zip file option.
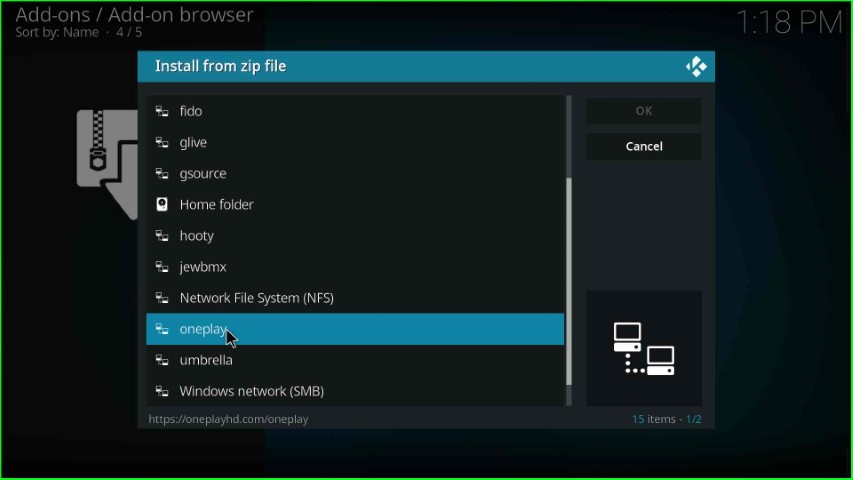
Choose the oneplay source from here.
Select the One.repo-x.x.zip file.
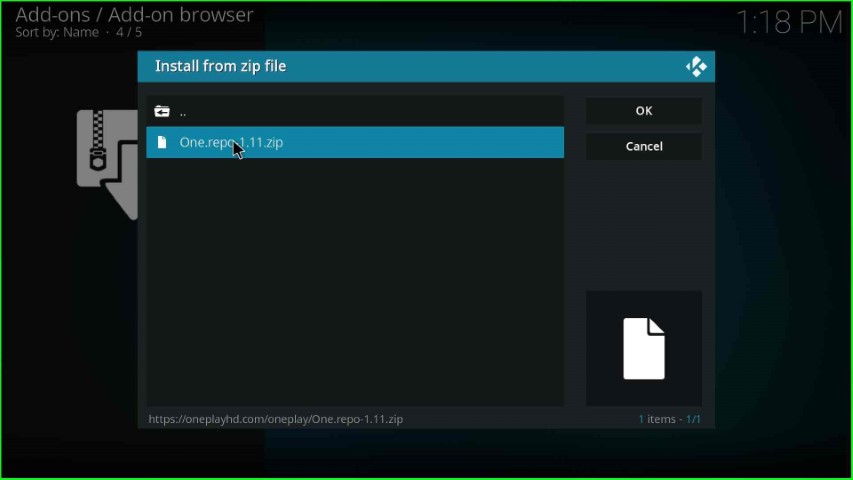
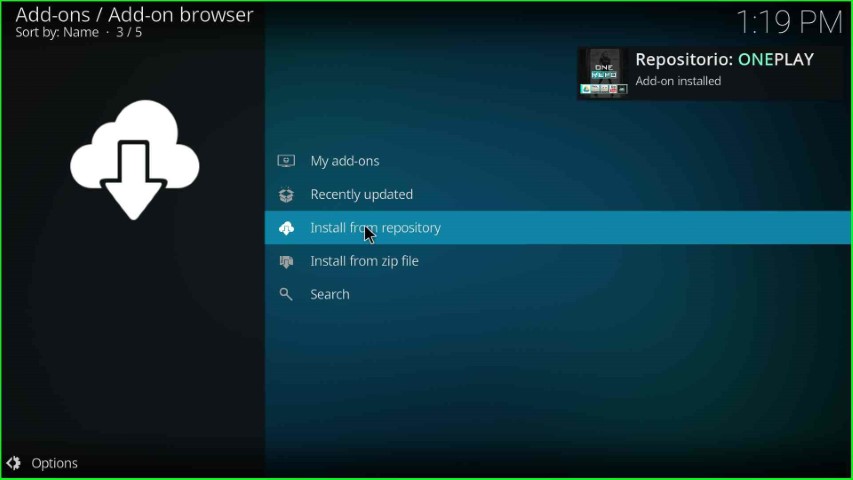
Wait until the Repository: ONEPLAY Add-on installed notification appears on the screen.

Install from Repository
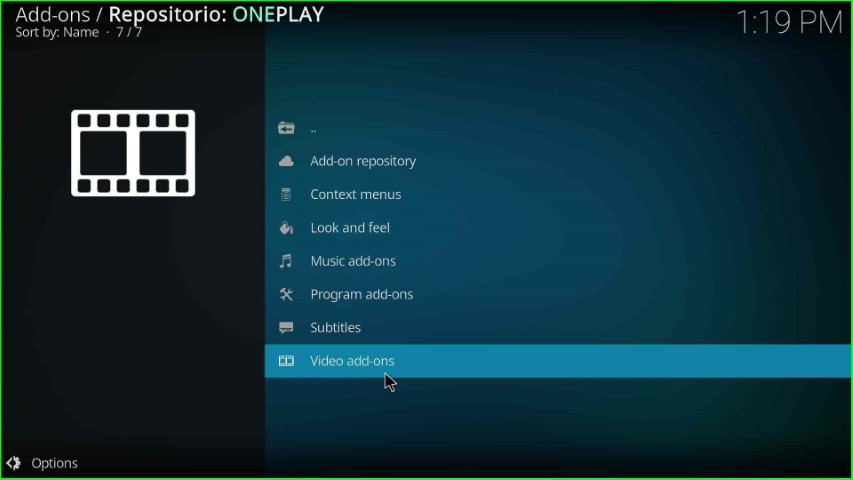
Go ahead and select the next tab, Install from repository.
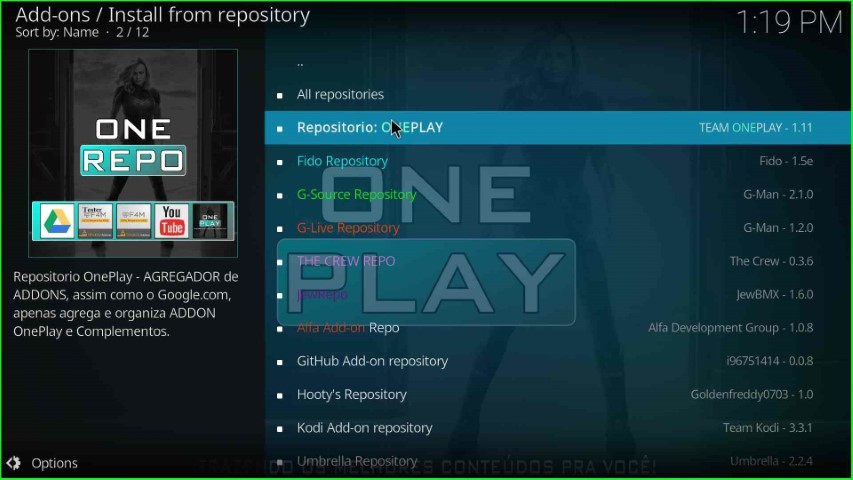
Choose Repositorio: ONEPLAY as listed here.
Install Thunder Addon
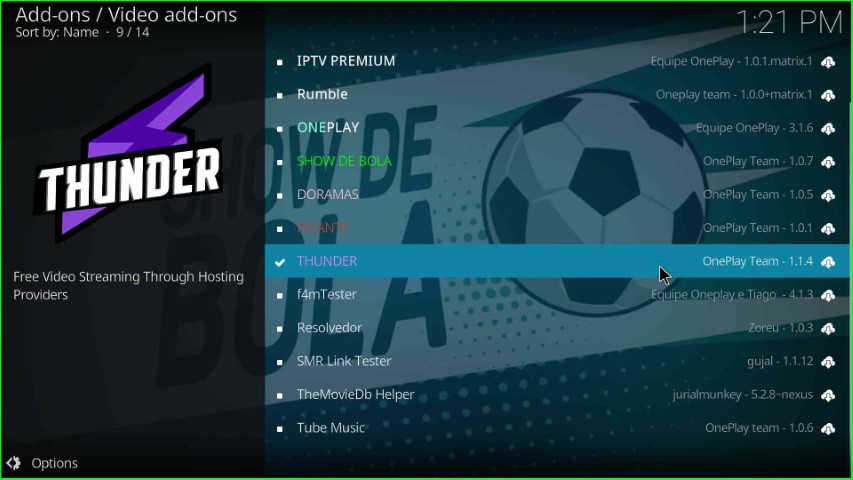
Click on Video add-ons.
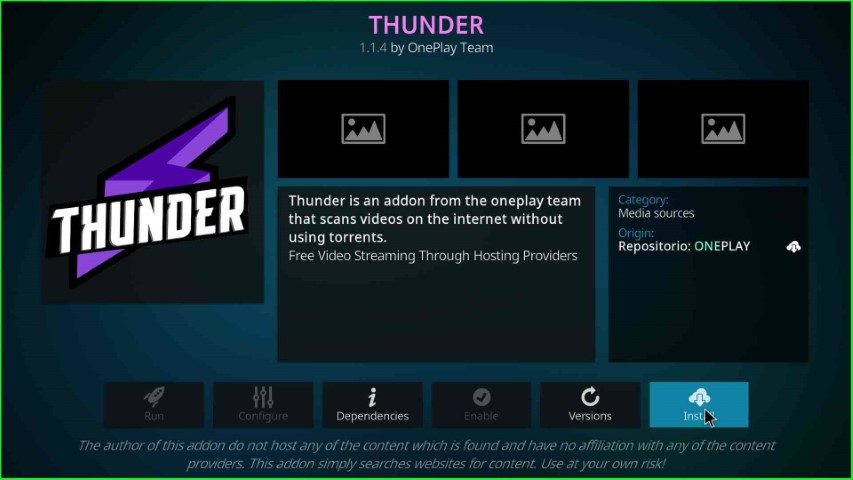
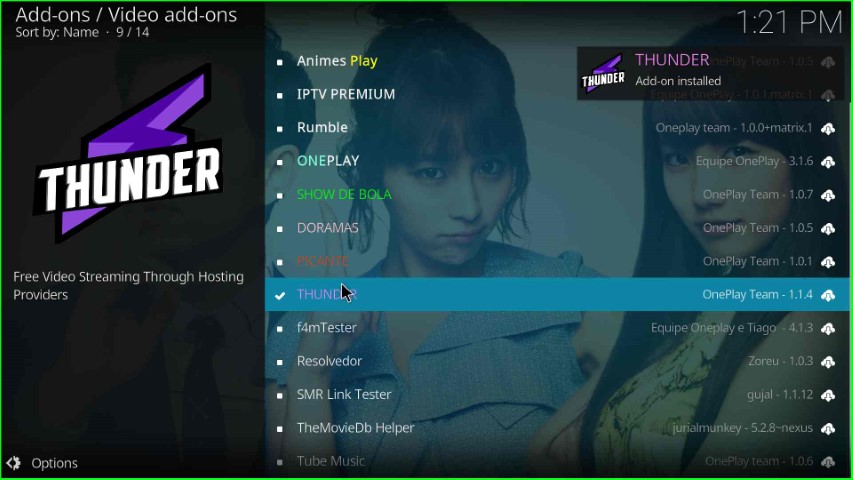
Select the Thunder addon.
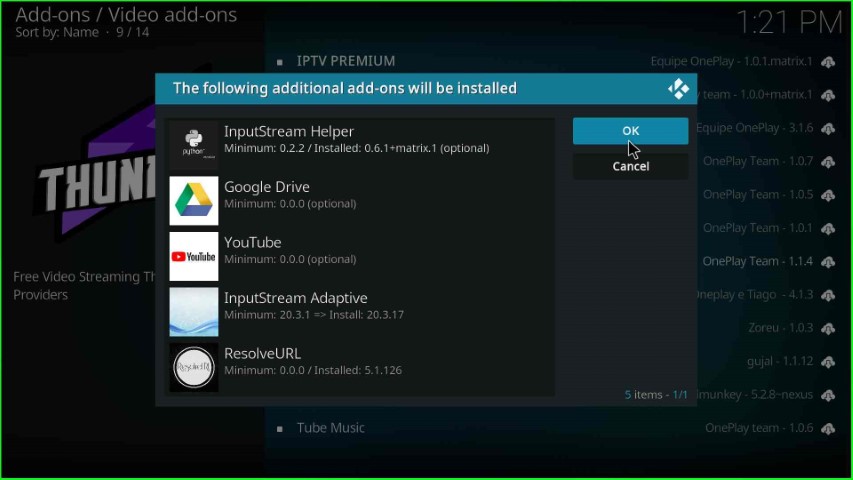
Hit the last button, Install.
Press the OK key and move to the next step.
Launch Thunder Addon
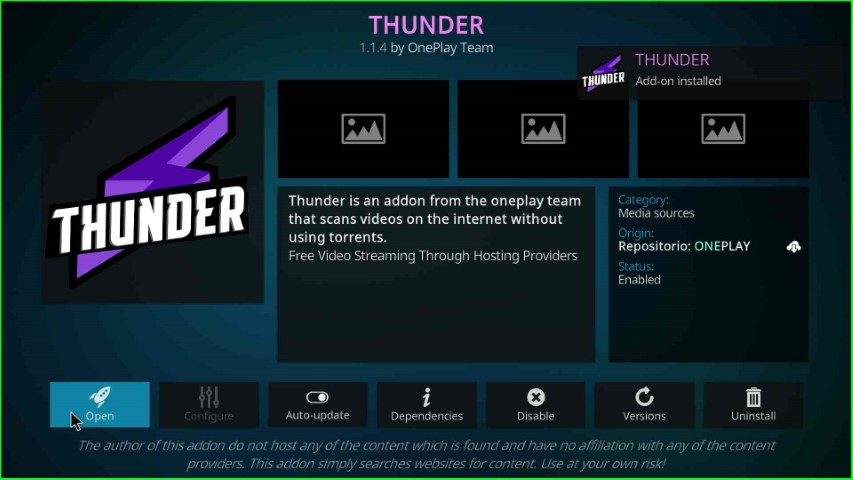
Wait until the Thunder Add-on installed popup message appears on the screen.
Hit the Open button to open the Thunder addon.
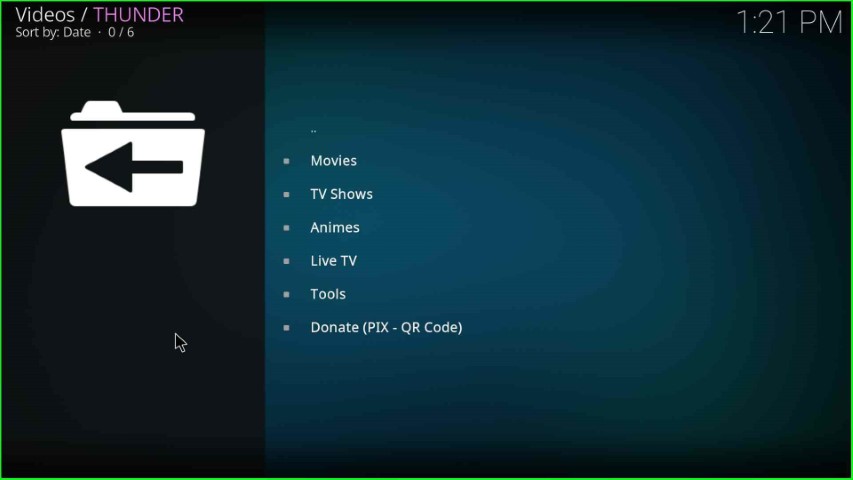
Now, select any of the sections and enjoy the streaming on the Thunder addon.
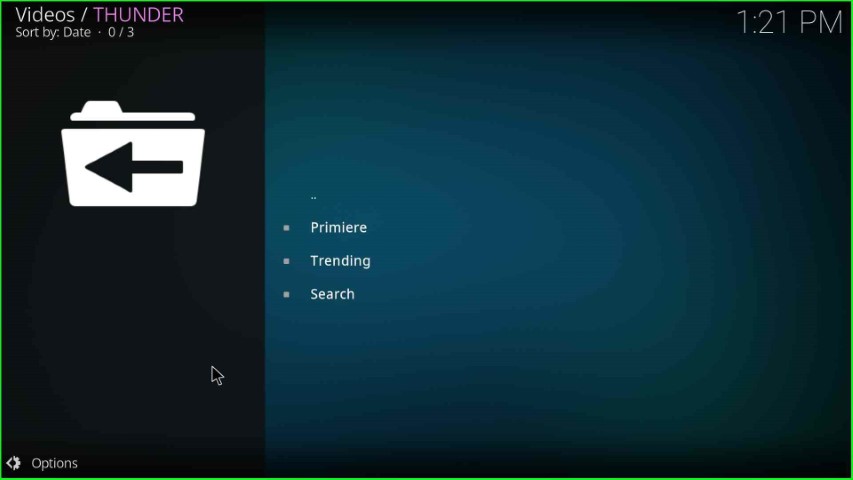
Here, I select the Movies section.
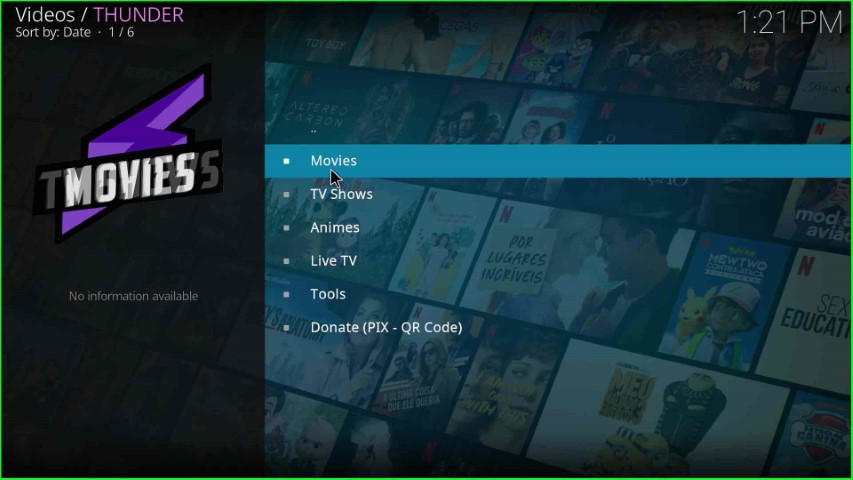
Now, it displays Primiere and trending categories. Choose anyone and enjoy the streaming.
Final Words
The post has discussed steps to install the Thunder addon on Kodi. These steps work on Firestick, Roku, Chromecast, and Android. So, look at the steps and start the installation process, and feel free to ask if you have any questions regarding the post.
