This guide will discuss installing Twitch Kodi addon on Kodi Nexus on different platforms like Windows, Xbox One, Mac, Android, Apple TV, iOS, and Chromecast.
Twitch is an online video addon that allows you to stream all types of gaming videos. You can participate in online competitions, watch live scores, and navigate different game channels.
The addon is directly available in Kodi’s official repository. You can download it from there and stream the quality of videos in 4K and 1080px resolution. The process to install the Twitch Kodi addon is as follows:
Installation Steps
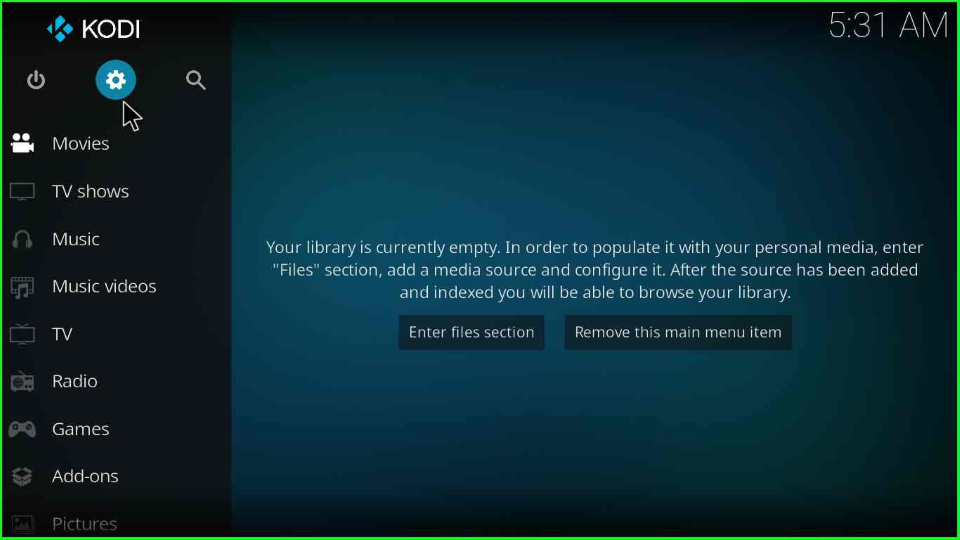
Open the Kodi platform and take the cursor toward the Settings icon.
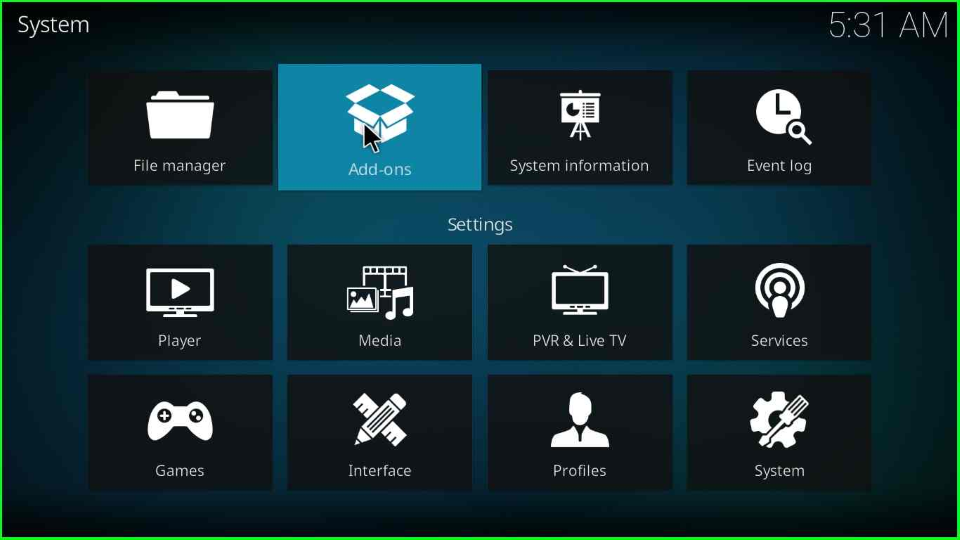
Now, select the Add-ons key from the list of icons.
Install from Repository
Tap on the third option, Install from repository.
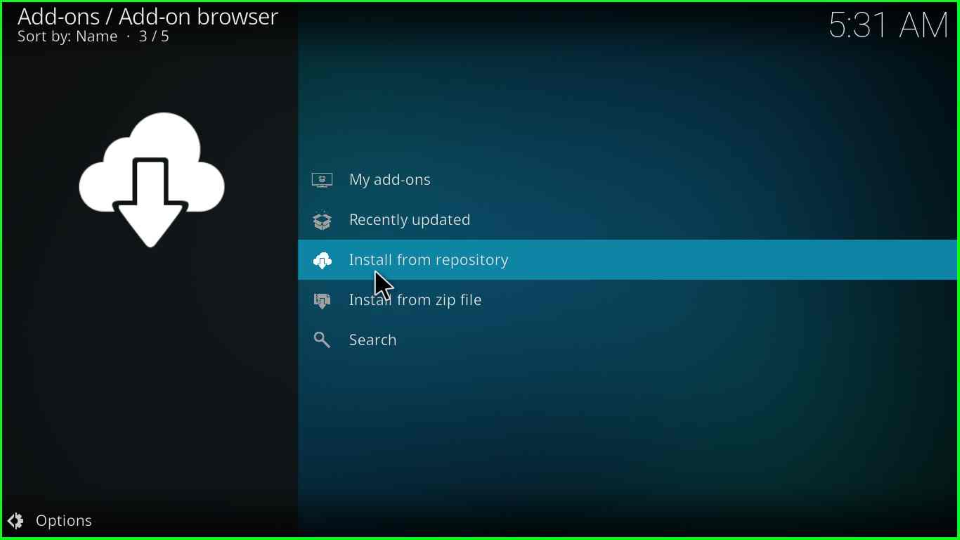
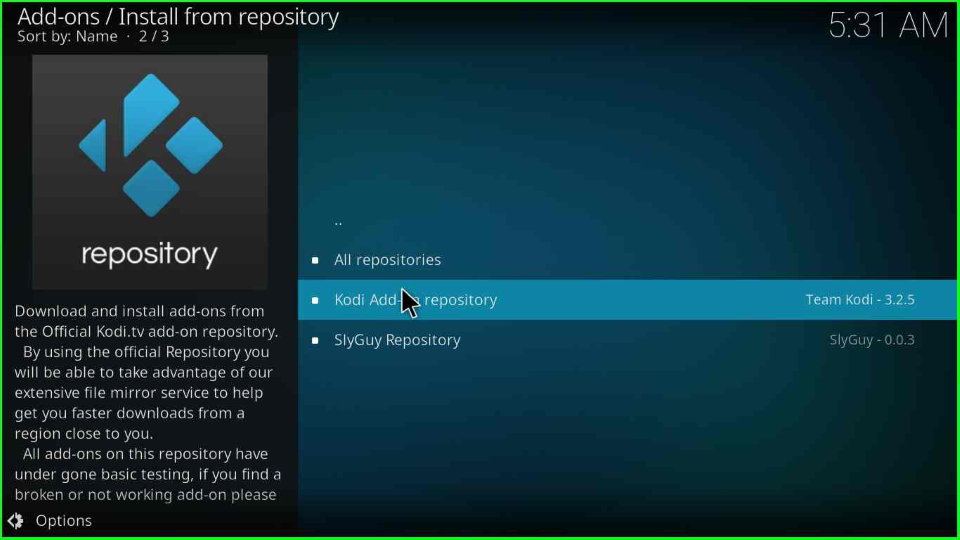
Here, you will see the Kodi Add-on repository option. Click on it.
Install Twitch Addon
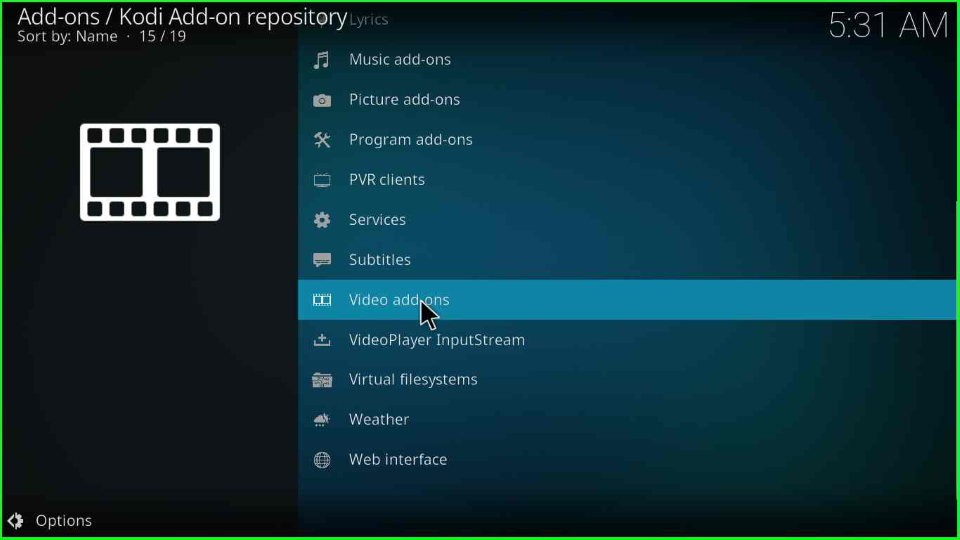
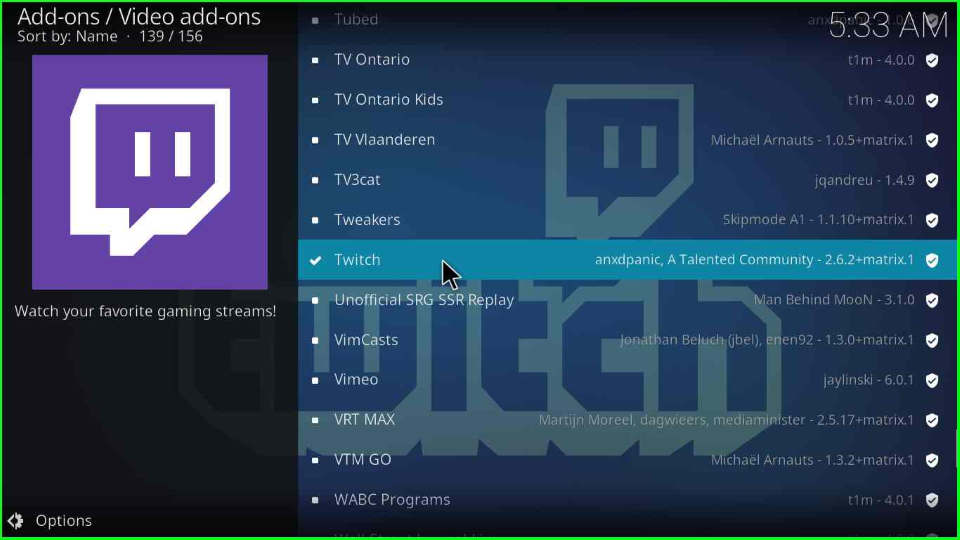
The page displays a list of addon categories; tap on Video add-ons.
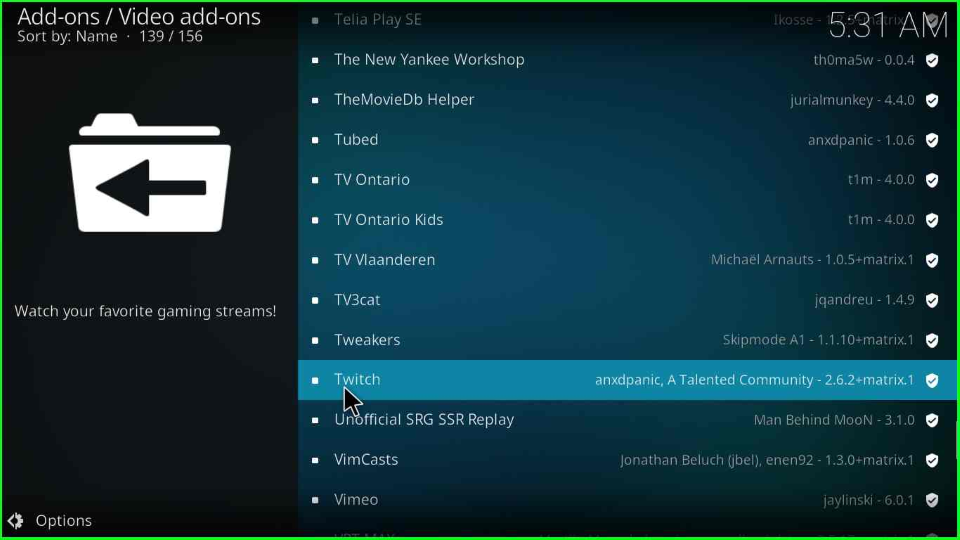
Scroll down the cursor and select the Twitch addon.
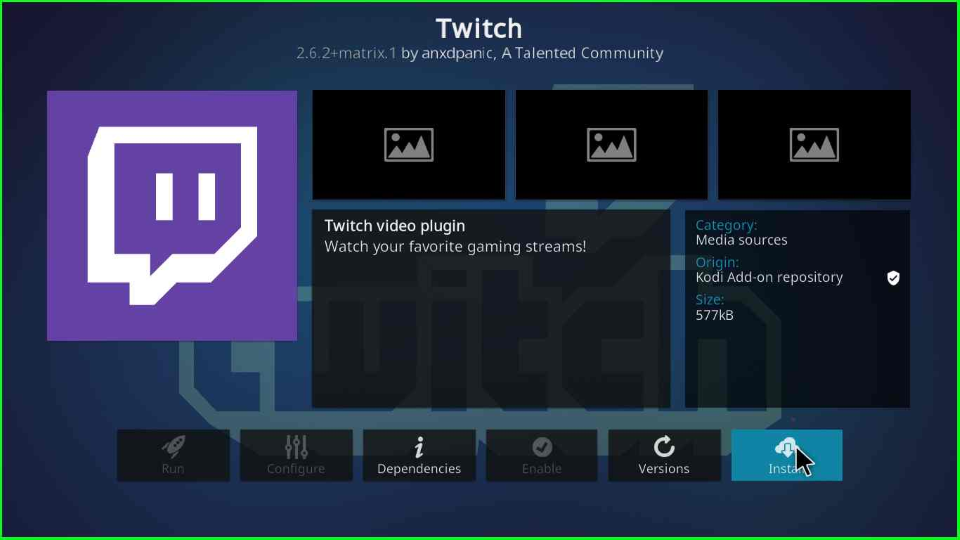
Press the Install key.
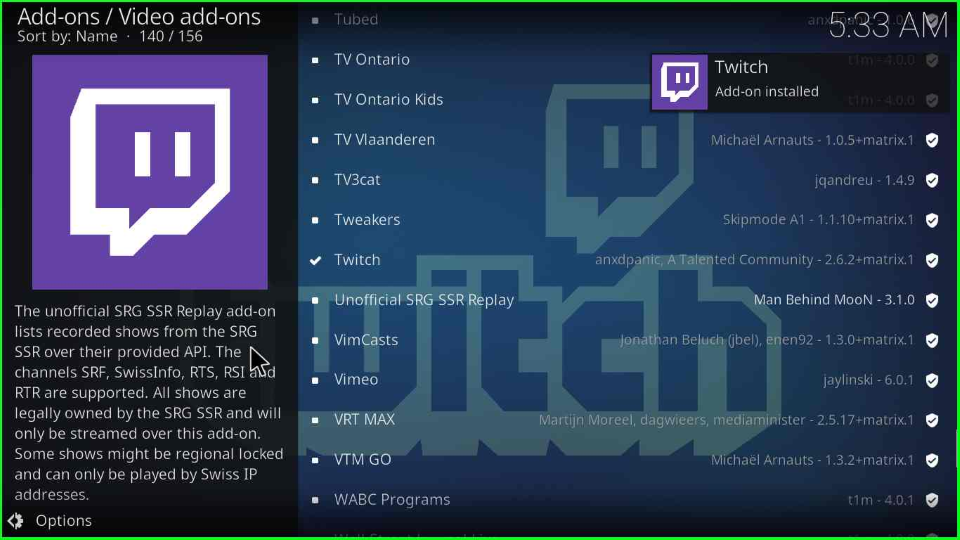
Wait until the Twitch Add-on installed message displays on the page.
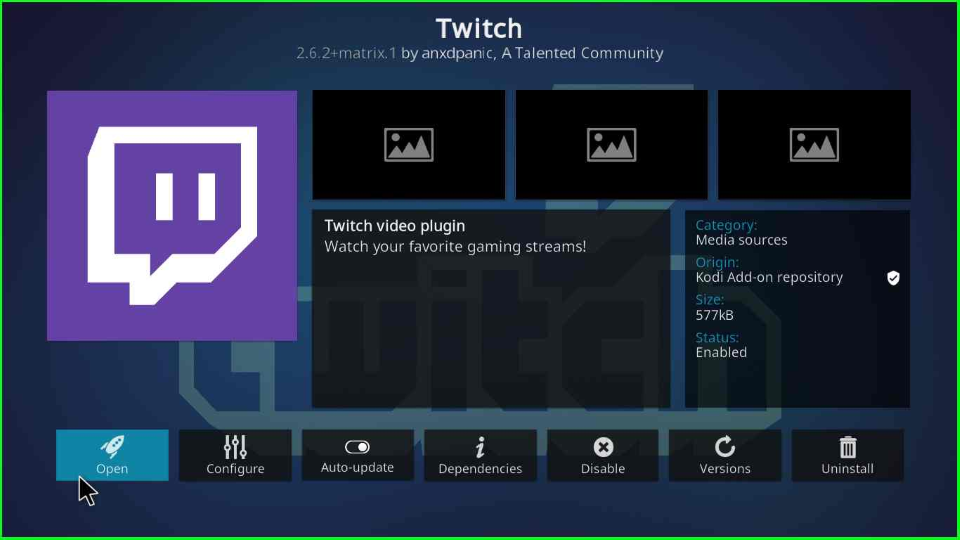
Again, open the Twitch addon.
Tap on the Open key.
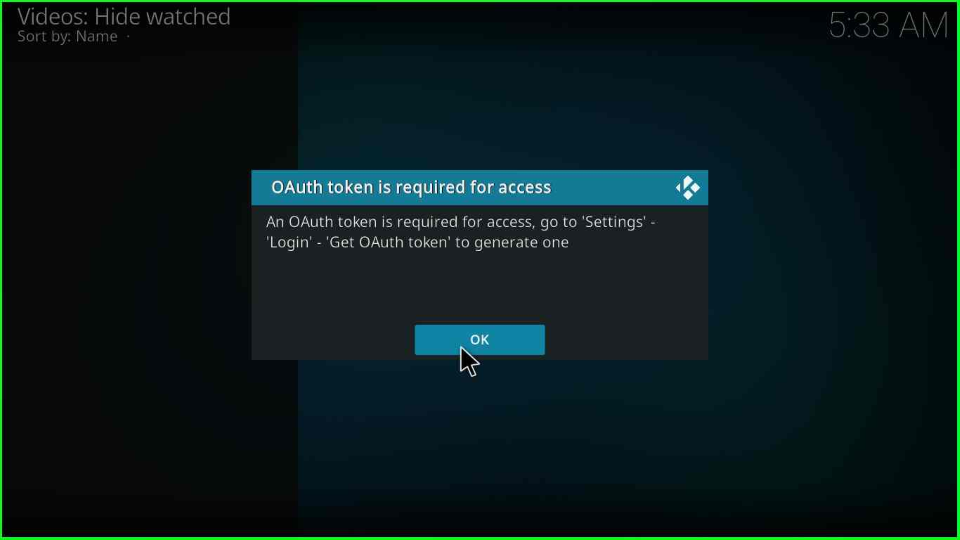
An OAuth token warning box appears; click OK to move next.
The Twitch dashboard appears, where you must complete the Login process to start streaming.

FAQs about Twitch Kodi Addon
Apart from gaming, the addon also offers other categories to stream, like art, podcasts, talk shows, and cooking.
Twitch offers Games Tutorials, Charity Donations, Esports Events, and Tournaments.
OAuth Token is the 30-character random code to authenticate the user account of the Twitch addon.
Final Words
Finally, we have discussed the Twitch add-on installation steps and some related FAQs. The above-mentioned steps are applicable for all streaming devices viz. Firestick, Fire TV, Nvidia Shield, etc.