Through the post, we will provide the information to install the Who’s Your Daddy Live Kodi Addon on Firestick, Roku, Android, iOS, PCs, Smartphones, etc.
Who’s Your Daddy Live addon is a great Kodi addon that belongs to the Dirty-G repository. Here, you can look for different categories of movies, TV shows, sports, documentaries, news, and content in one place.
The addon mainly provides adult content to users, and that’s why it is among the most popular Kodi adult add-ons in 2024. Moreover, you can stream anime, movies, and videos. So, let’s learn how to install the add-on on Firestick.
Enable Unknown Sources
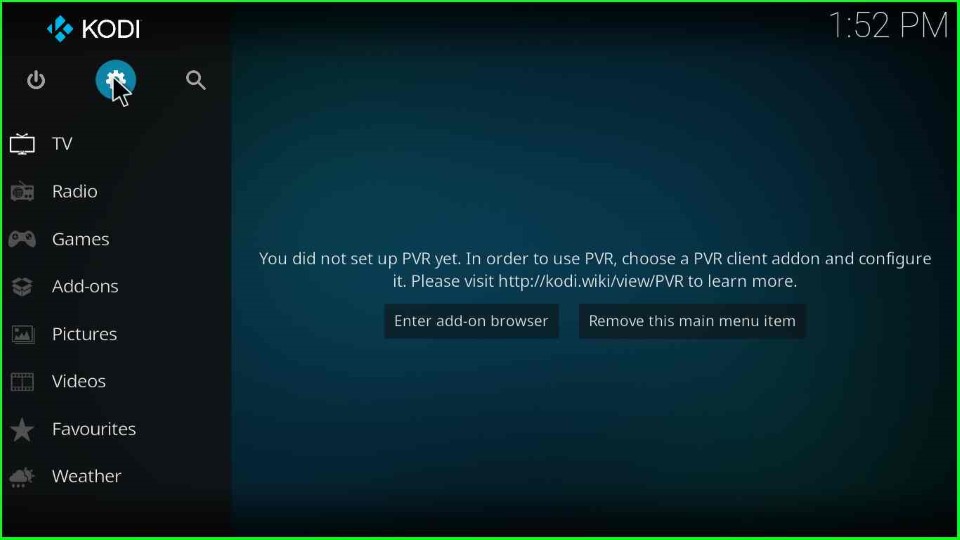
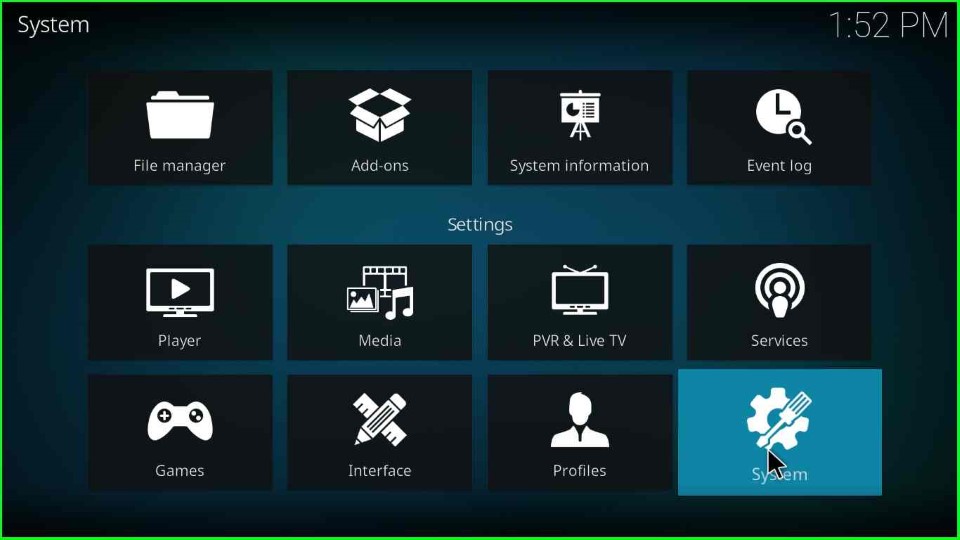
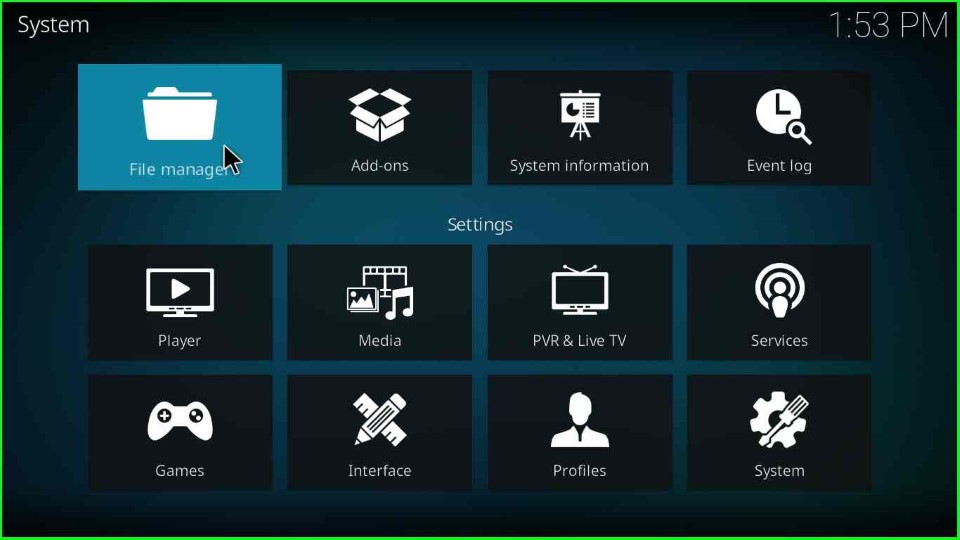
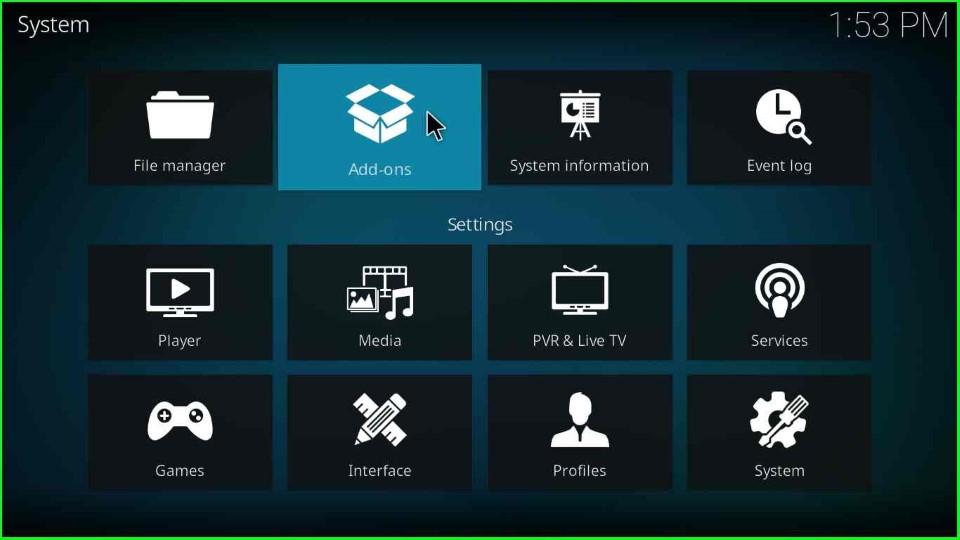
Open Kodi and go to Settings.
Select System, and then click on Add-ons.
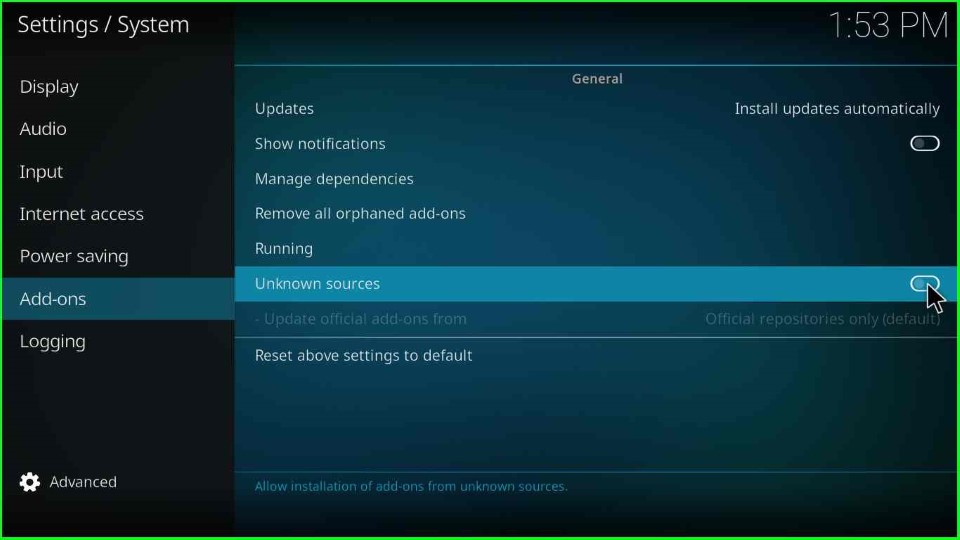
Tap the Addons option and Toggle the Unknown Sources option to enable it.
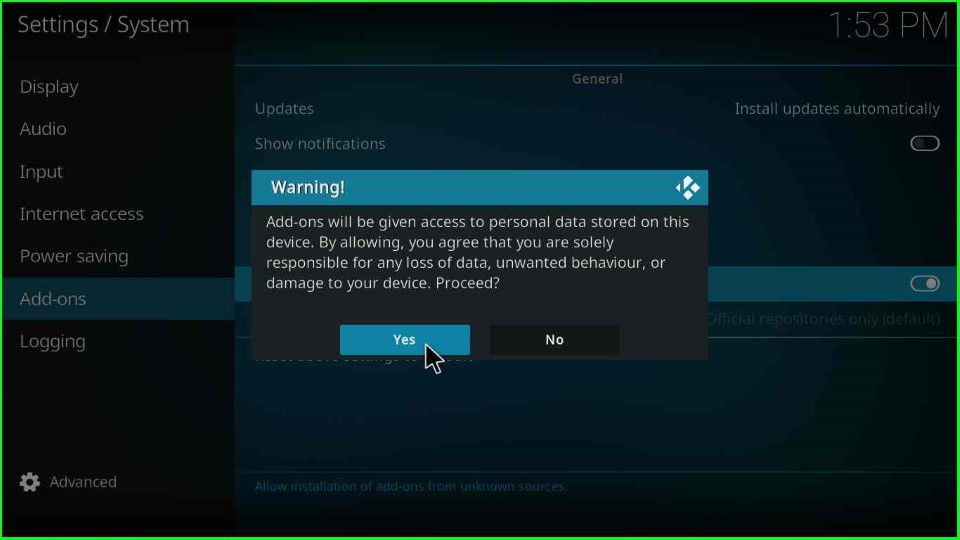
Click Yes to agree with the warning box.
Add Media Source and Repository URL
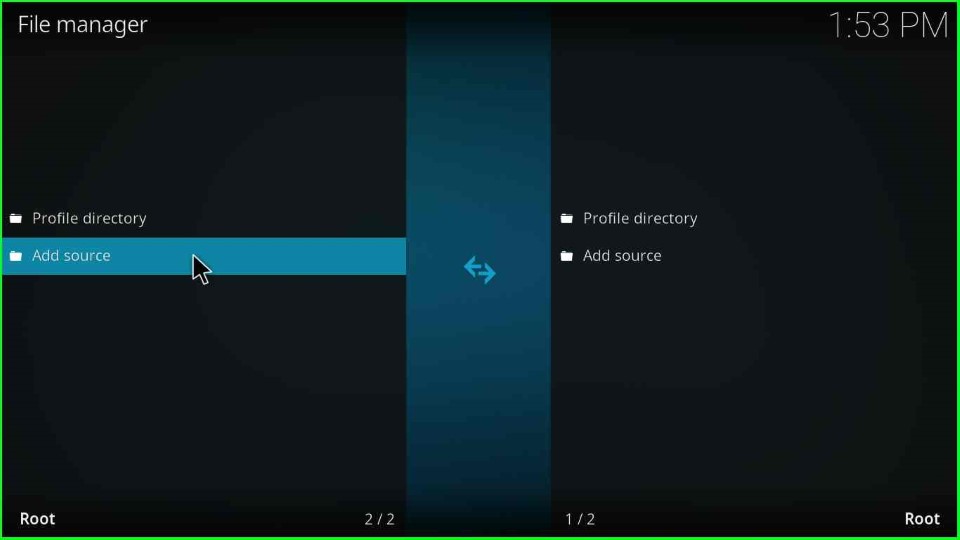
Go back to the Kodi Settings screen and choose File Manager.
After that, click on Add source.
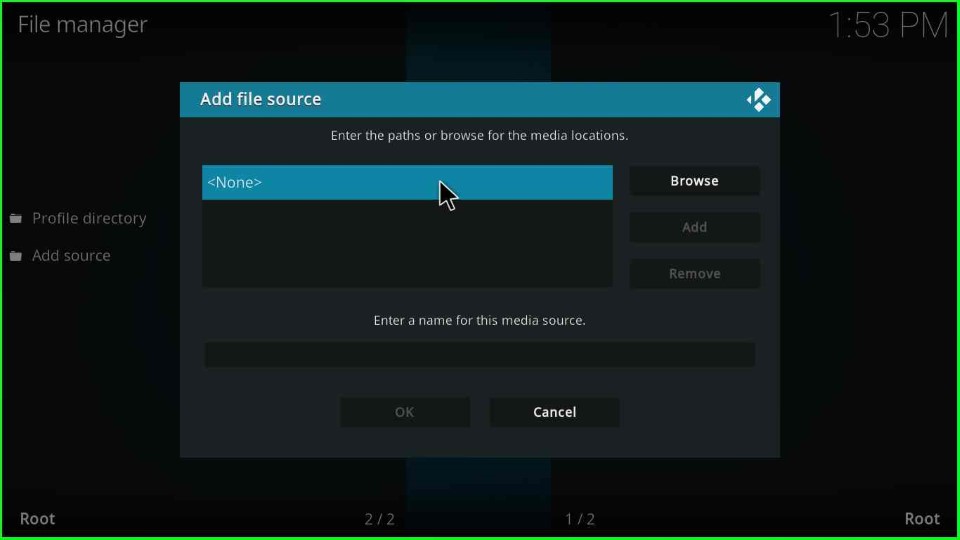
Next, tap on the <None> option.
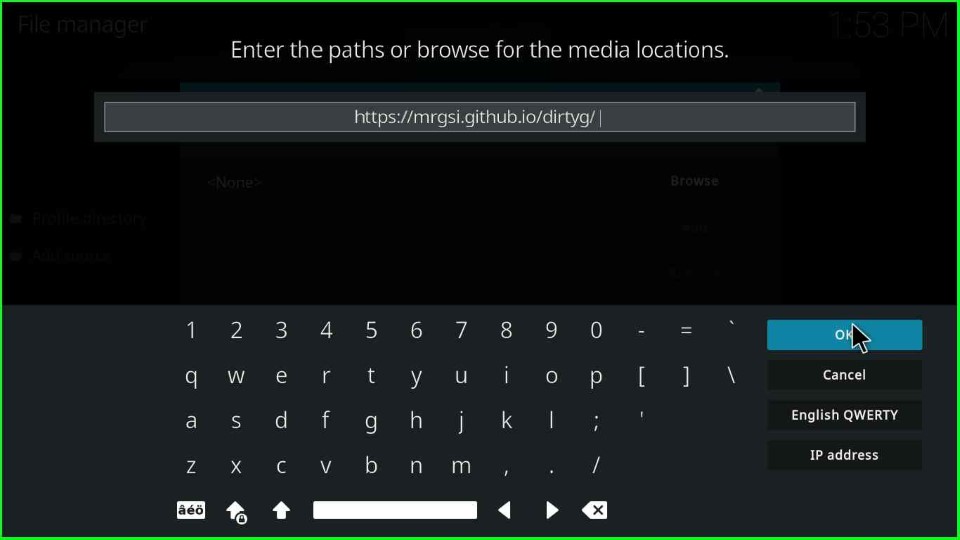
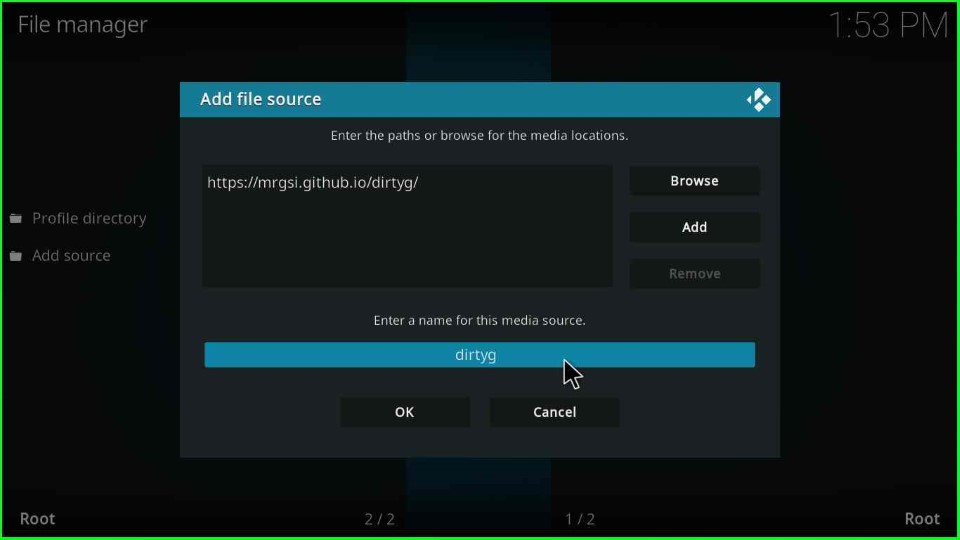
Here, enter the following URL: https://mrgsi.github.io/dirtyg/, and hit the OK key.
Change the default media source name (dirtyg).
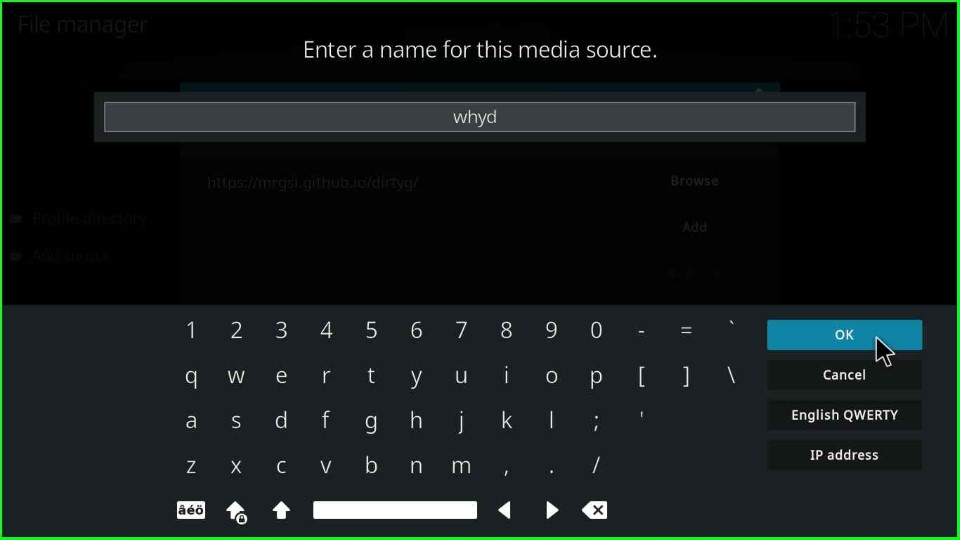
Give the media source the name whyd and click OK.
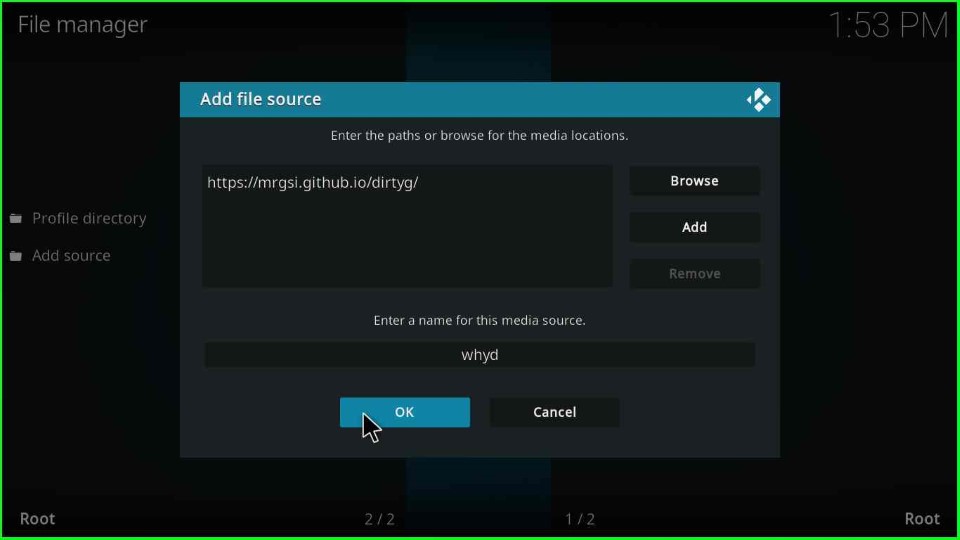
In this step, check the entered URL and media source again, and tap the OK button.
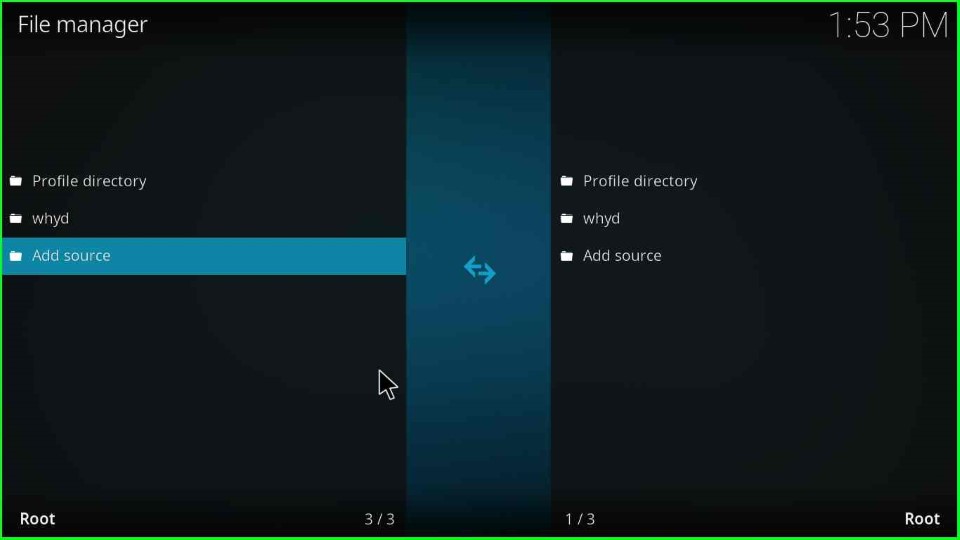
On the File Manager page, the media source folder whyd is created successfully.
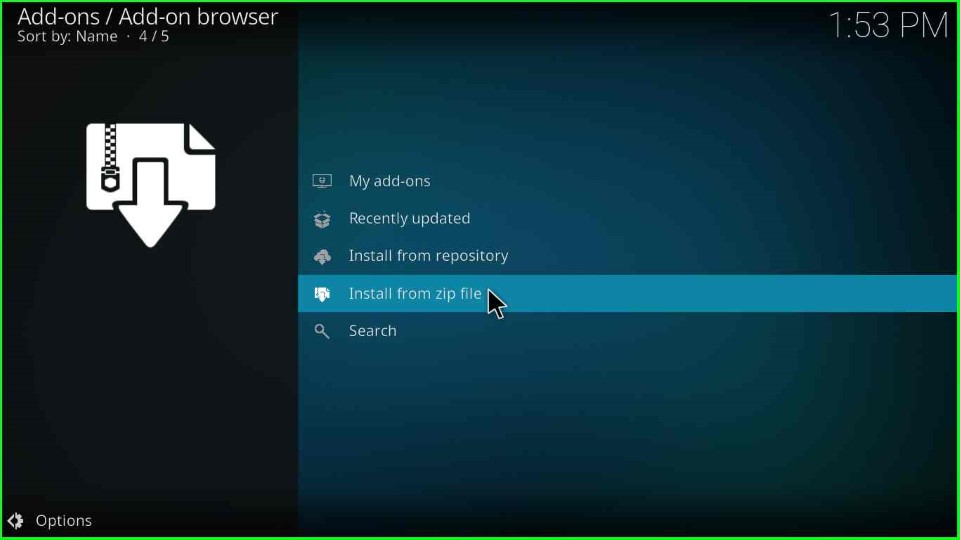
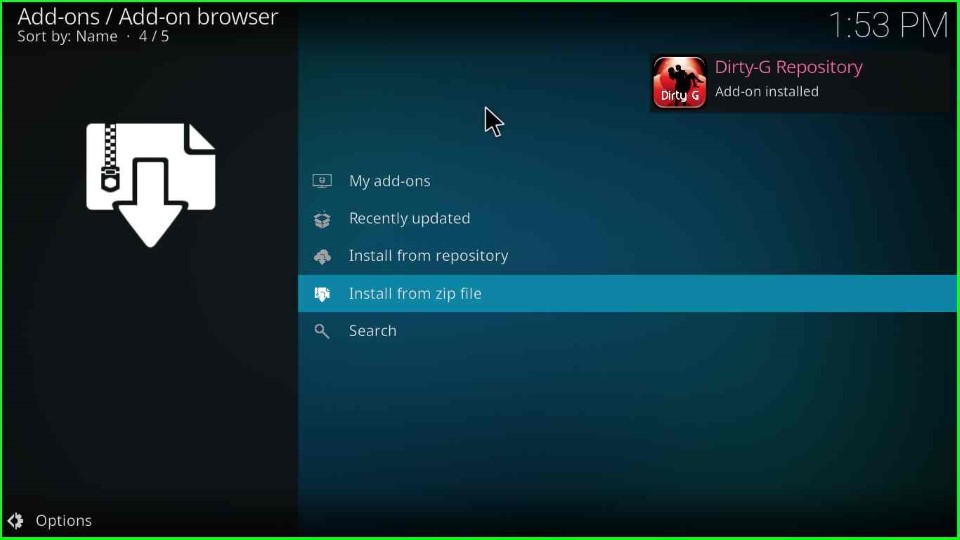
Install from Zip File
Go back to the Kodi screen and select Add-ons.
Here, select Install from zip file.
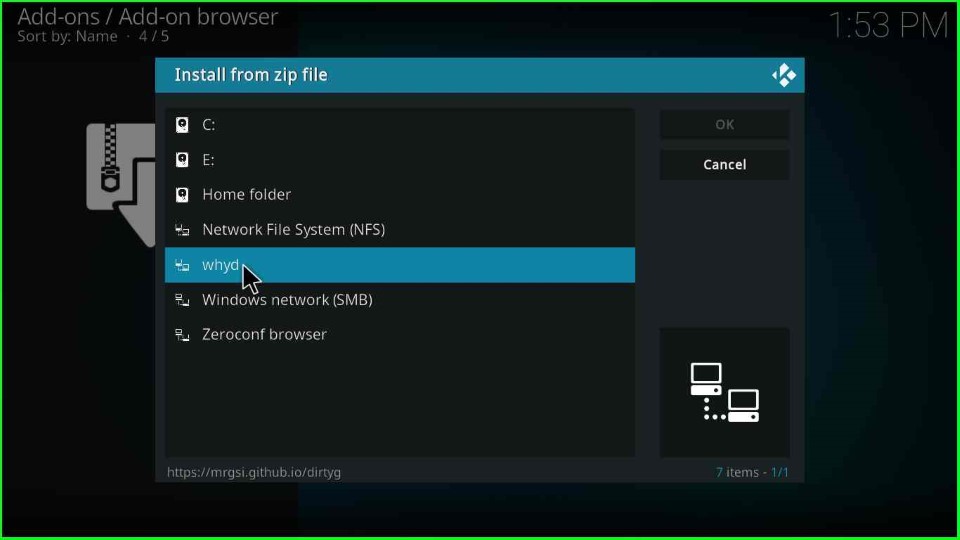
Choose the recently added source (whyd).
After that, select the repository ZIP file, repository.dirtyg-x.x.x.zip.
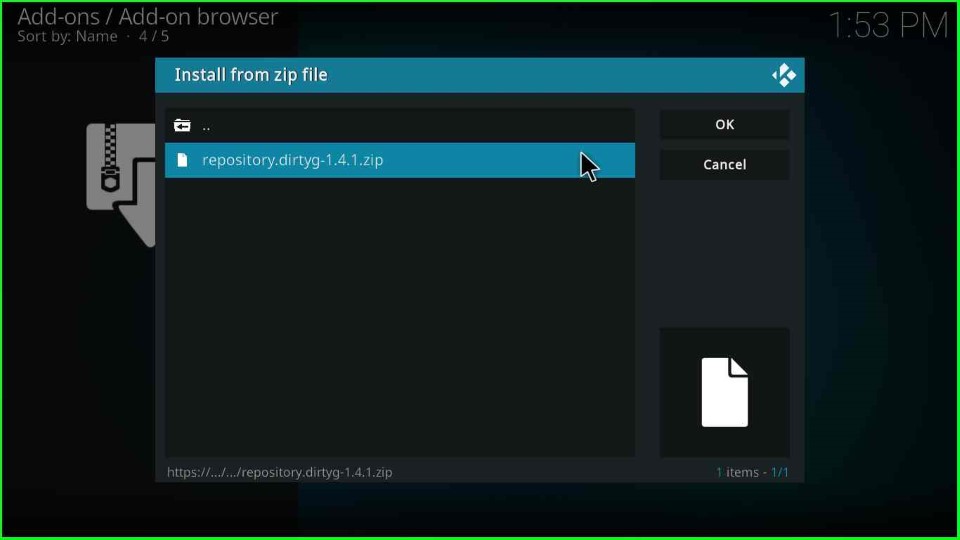
Wait until the notification of the Dirty-G Repository addon installed appears on the screen.
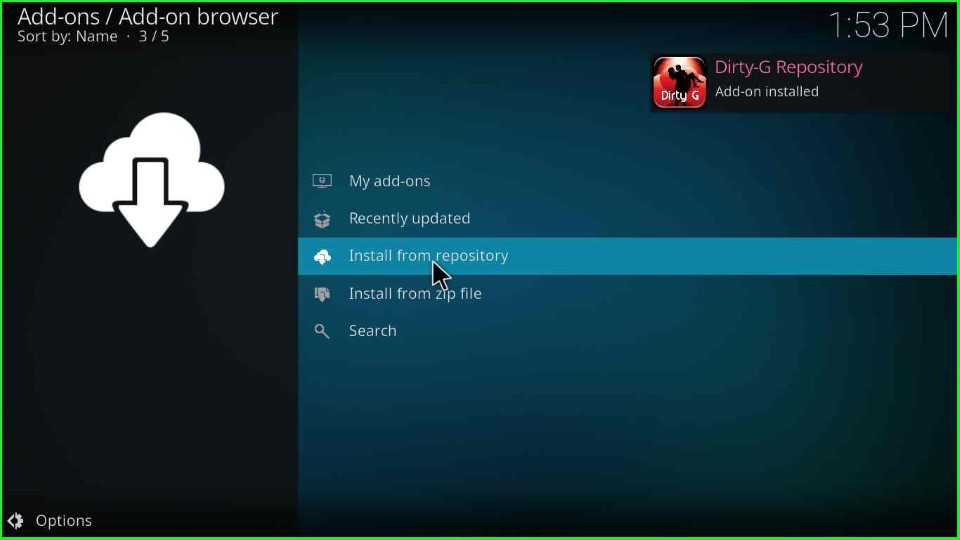
Install from Repository
After the repository is installed, select Install from repository.
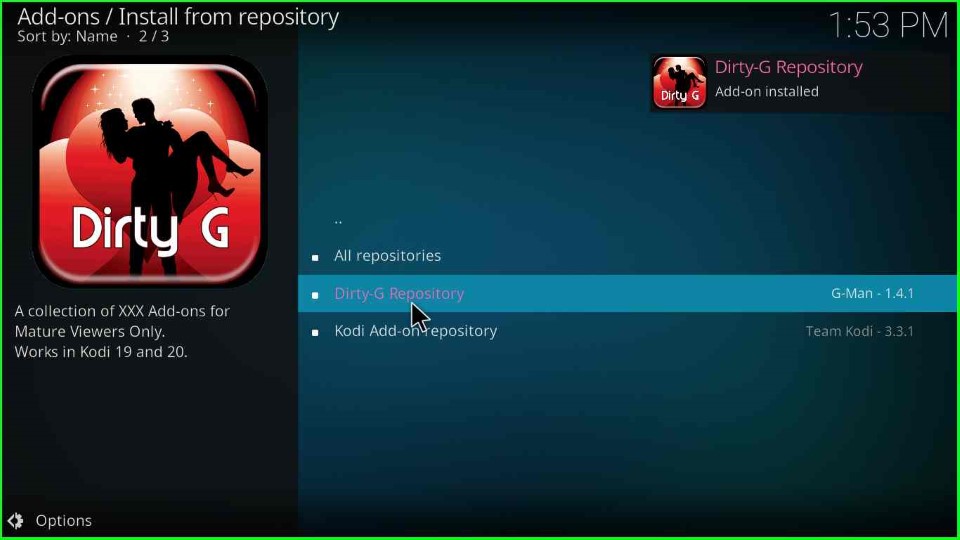
Next, click on the Dirty-G repository.
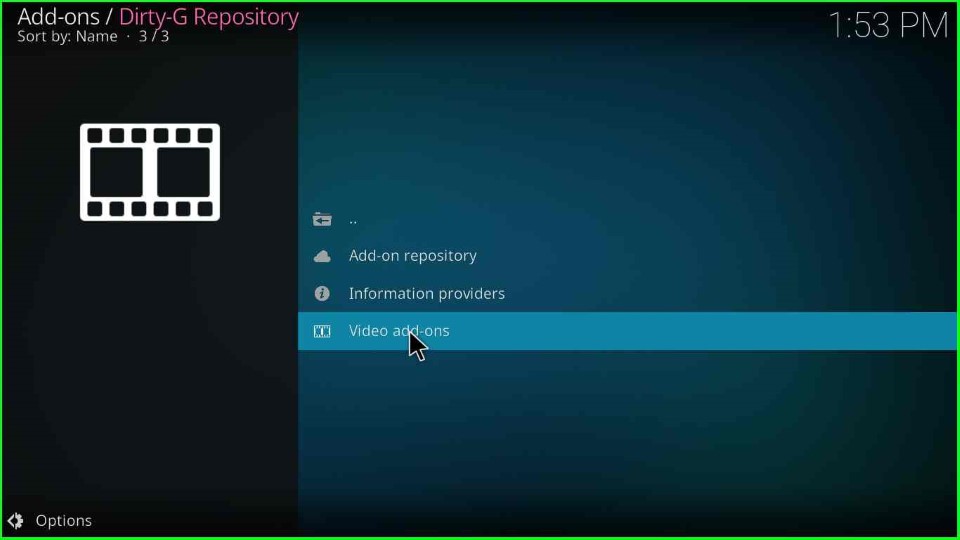
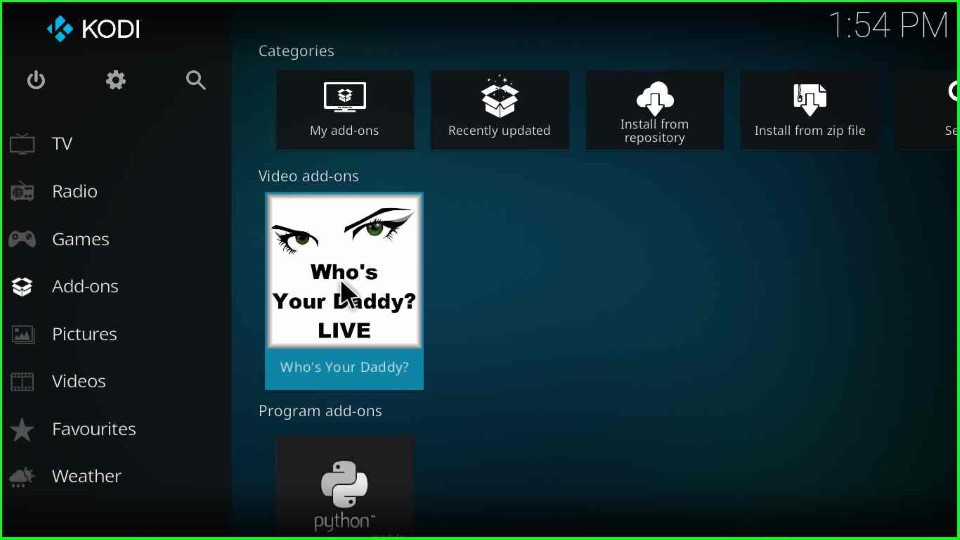
Navigate to the Video add-ons option.
From the list of add-ons, choose the Who’s Your Daddy? addon.
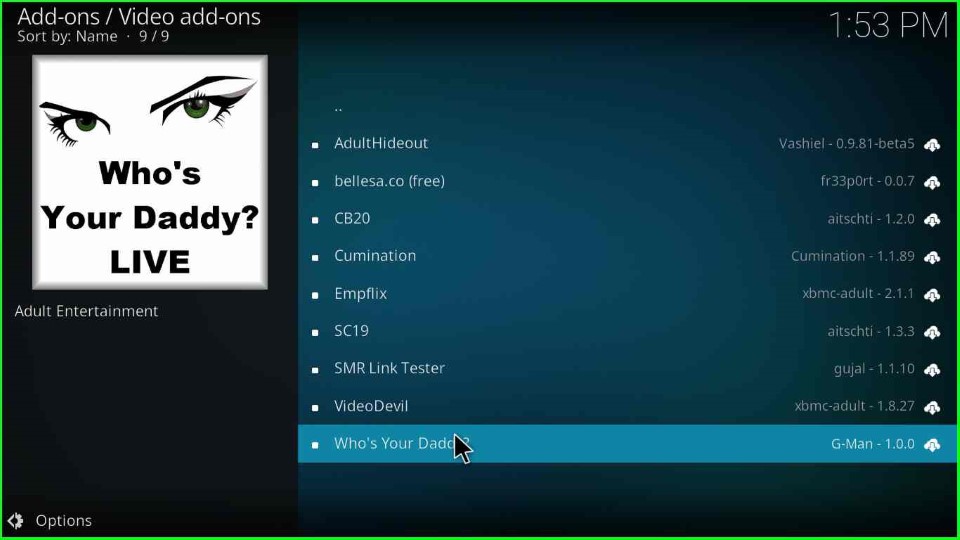
Thereafter, choose the Install button from the addon dashboard.
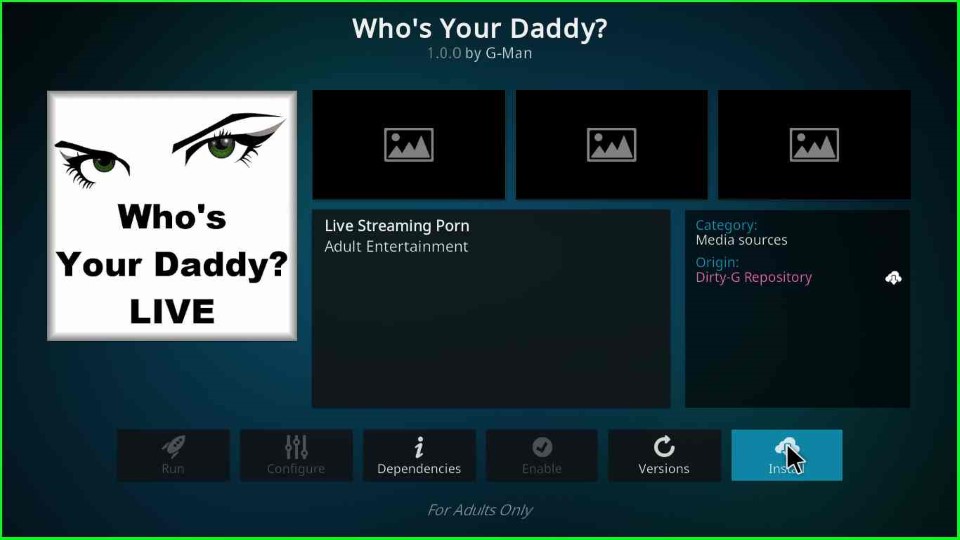
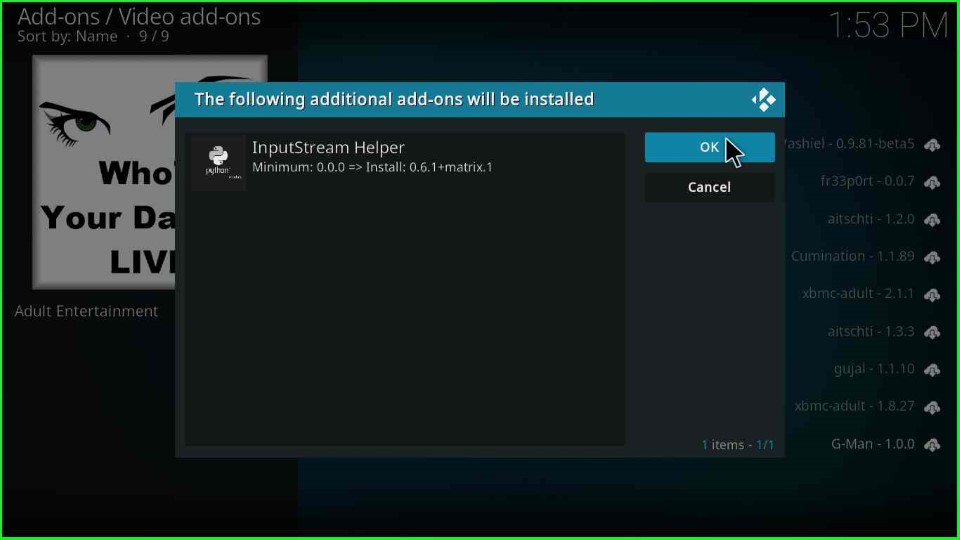
As you click on it, a prompt will appear. Click OK to agree with it.
Wait for the installation message Who’s Your Daddy? Add-on installed message on the screen.
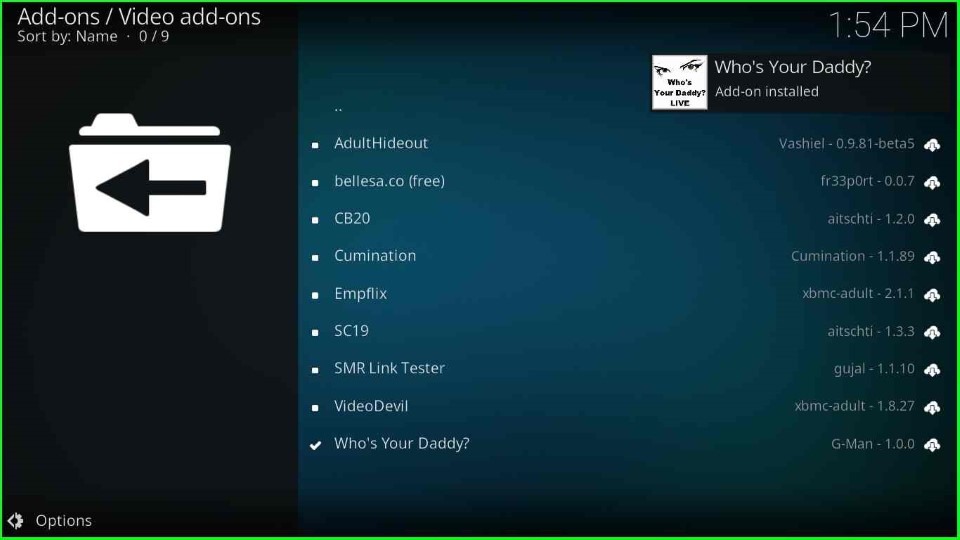
Go back to the Kodi screen and open the addon for streaming the adult addon on Kodi.
Conclusion
Finally, we have discussed all the necessary steps to install the Who’s Your Daddy Live addon on Windows. So, try the above installation procedure on your device viz. Firestick, Fire TV, Nvidia Shield, Roku, Windows, Linux, Raspberry Pi, or Android.
Useful Guides:
